Hyundai Tucson: Radiator grill
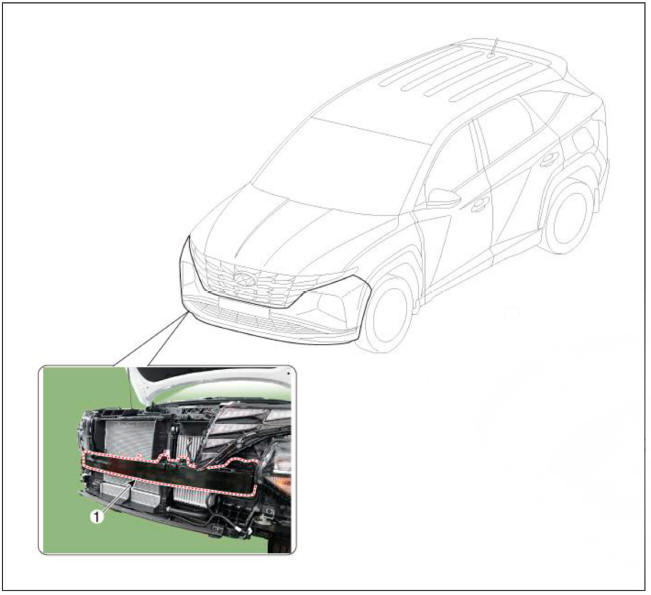
Component Location

- Radiator grill
Replacement
WARNING
- When removing with a flat-tip screwdriver or remover, wrap protective tape around the tools to prevent damage to components.
- Put on gloves to prevent hand injuries.
WARNING
Take care not to bend or scratch the bumper cover and panels.
- Remove the front bumper assembly.
(Refer to Front Bumper - "Front Bumper Assembly")
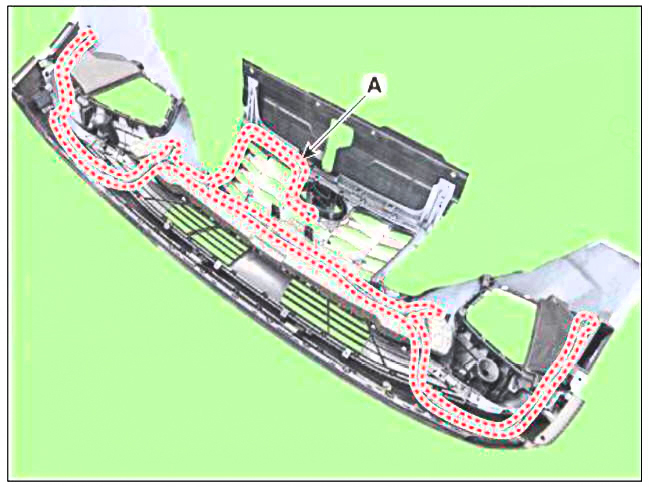
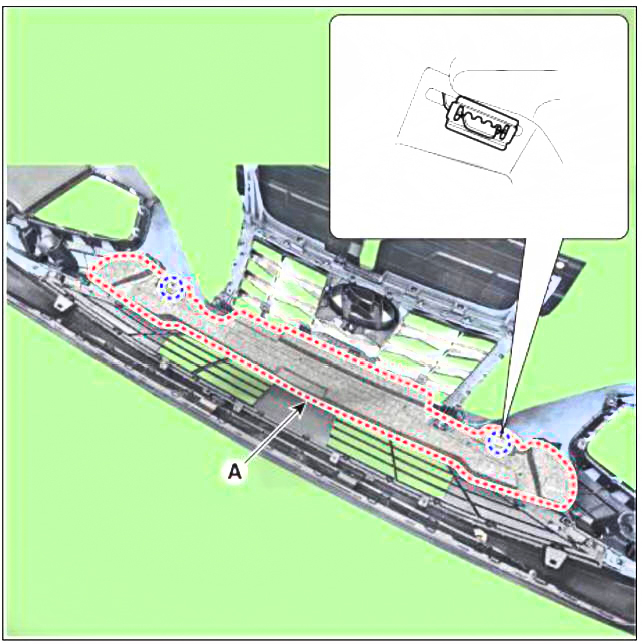
- Detach the wiring (A) mounted on the front bumper assembly and radiator grill.
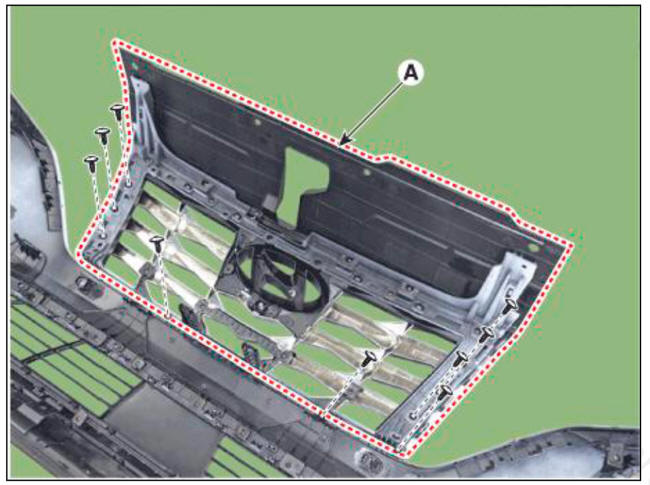
- Remove the front bumper energy absorber (A).
- Loosen the mounting screws, remove the radiator grill cover assembly (A).
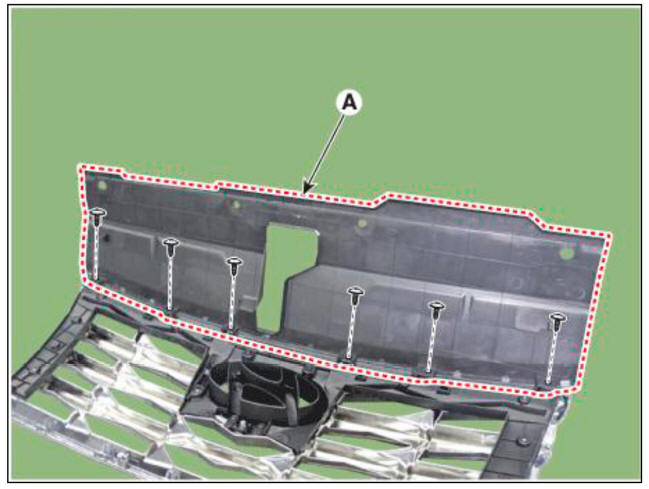
- Loosen the monting screws, remove the radiator grill upper cover (A).

- To install, reverse removal procedure.
WARNING
- Make sure the connector is connected properly.
- Replace any damage clips.
Front bumper beam assembly
Component Location
- Front bumper beam assembly
Replacement
WARNING
- When removing with a flat-tip screwdriver or remover, wrap protective tape around the tools to prevent damage to components.
- Put on gloves to prevent hand injuries.
- Remove the front bumper assembly.
(Refer to Front Bumper - "Front Bumper Assembly")
- Loosen the mounting nuts and bolts, remove the front bumper beam (A).

- To install, reverse removal procedure.
READ NEXT:
 Rear Bumper
Components
Rear bumper assembly
Rear bumper under cover C'TR
Rear bumper side under cover RH
Rear bumper side bracket RH
Rear bumper side bracket LH
Rear bumper assembly
Component Location
Rear bumper assembly
Replacement
WARNING
When removing with a flat-tip screwdriver or remover, wrap
protective tape around the tools to prevent
damage to components.
Put on gloves to prevent hand injuries.
Rear bumper beam assembly
Component
Location
Rear bumper beam assembly
Replacement
WARNING
When removing with a flat-tip screwdriver or remover, wrap
protective tape around the tools to
prevent damage to components.
Put on gloves to prevent hand injuri
SEE MORE:
Free Running Inspection
Place the starter motor in a vise equipped with soft jaws and connect a
fully-charged 12-volt battery to
starter motor as follows.
Connect a test ammeter (150-ampere scale) and carbon pile rheostats
shown is the illustration.
Connect a
Engine Cover
Removal
Turn the ignition switch OFF and disconnect the battery (-) terminal.
Remove the engine cover.
(Refer to Engine Mechanical System - "Engine Cover")
Disconnect the ignition coil connectors (A).
WARNING
When remov
Information
- Home
- Hyundai Tucson - Fourth generation (NX4) - (2020-2023) - Owner's Manual
- Hyundai Tucson - Fourth generation (NX4) - (2020-2023) - Workshop Manual
