Hyundai Tucson: Parking Brake System
Hyundai Tucson - Fourth generation (NX4) - (2020-2023) - Workshop Manual / Brake System / Parking Brake System
Components
Lever Type
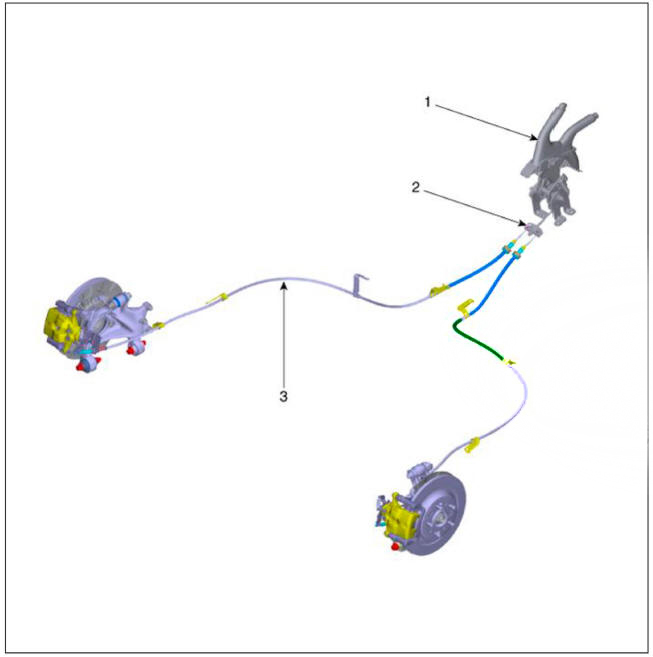
- Parking brake pedal assembly
- Equalizer assembly
- Parking brake cable
Pedal Type
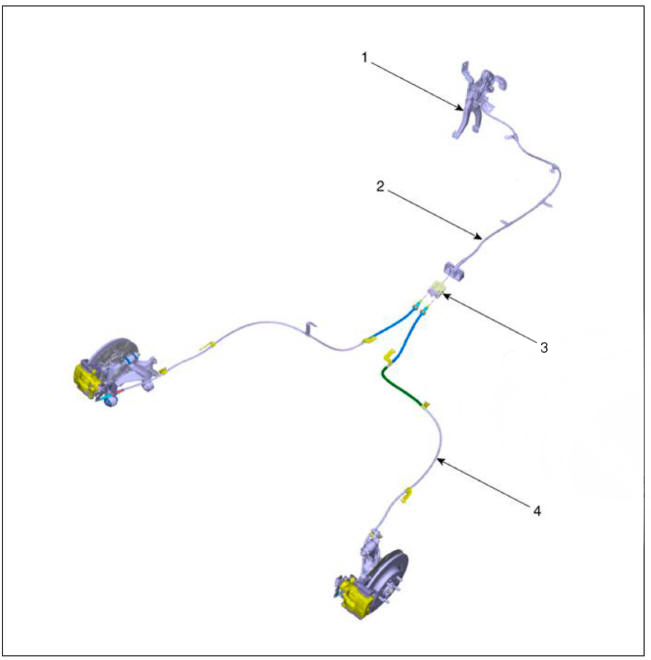
- Parking brake pedal assembly
- Front parking brake cable
- Equalizer assembly
- Rear parking brake cable
Removal
- Disconnect the (-) batteiy terminal.
- Release the parking brake.
- Remove the crash pad lower panel.
(Refer to Body - "Crash Pad Lower Panel")
- Remove the Integrated Central Control Unit (ICU).
( Refer to Body Electrical System - "Relay Box (Passenger Compartment)")
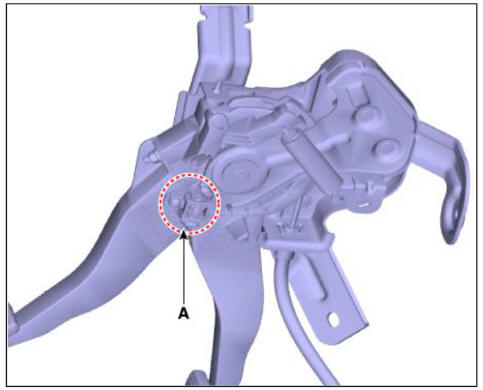
- Disconnect the parking brake switch connector (A).
- Separate the parking brake cable (A) by removing the nut and retaining clip (B).
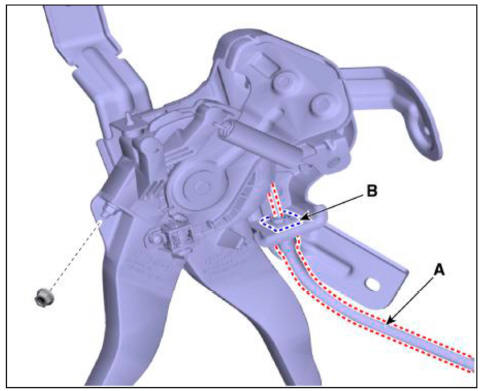
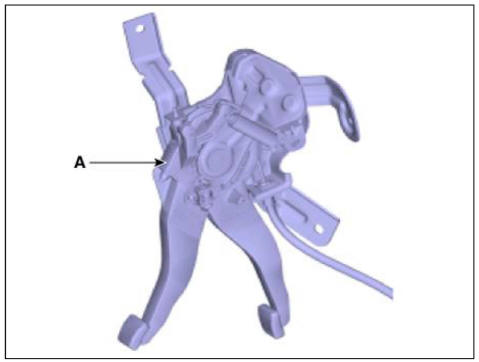
- Remove the bolts and nut remove the parking brake pedal assembly (A).
Tightening torque : 19.6 - 29.4 N m (2.0 - 3.0 kgf m, 14.5 - 21.7 lb ft)
Installation
- Install in the reverse order of removal.
- After the installation, check the operation status of the parking brake and brake switch.
- Parking Brake Pedal Stroke
- Parking Brake Adjustment
- Lever Type
- Pedal Type
- Main Function
- Electronic Parking Brake (EPB)
READ NEXT:
 Parking Brake Pedal Stroke
Adjustment
WARNING
After disassembling/assembling the caliper body or replacing the
caliper, parking brake cable or brake
disc, re-adjust the parking brake.
To fit the cable, follow one of these procedures.
Apply a parking brake fully
Parking Brake Adjustment
WARNING
After disassembling/assembling the caliper body or replacing the
caliper, parking brake cable or brake
disc, re-adjust the parking brake.
Remove the floor console assembly.
(Refer to Body - "Floor Console Assembly")
For
Lever Type
Removal
Disconnect the negative (-) battery cable.
Release the parking brake.
Remove the floor console assembly.
(Refer to Body - "Floor Console Assembly")
Remove the cable retainer and remove the parking brake cable (A).
WAR
SEE MORE:
Evaporative Emission Control System - Removal
Removal
WARNING
Be careful not to damage the parts located under the vehicle (floor
under cover, canister, fuel tank)
when raising the vehicle using the lift.
(Refer to General Information - "Lift and Support Points")
Turn
Drive Belt System- Removal and Installation
Components
Crankshaft Damper Pulley
Drive Belt Tensioner
Drive Belt
Removal and
Installation
Fix the drive belt tensioner.
(1) Insert the drive belt tensioner by installing fixing pin (A) after
turning the drive belt tensione
Information
- Home
- Hyundai Tucson - Fourth generation (NX4) - (2020-2023) - Owner's Manual
- Hyundai Tucson - Fourth generation (NX4) - (2020-2023) - Workshop Manual
