Hyundai Tucson: Lighting System - Removal
Hyundai Tucson - Fourth generation (NX4) - (2020-2023) - Workshop Manual / Body Electrical System / Lighting System / Lighting System - Removal
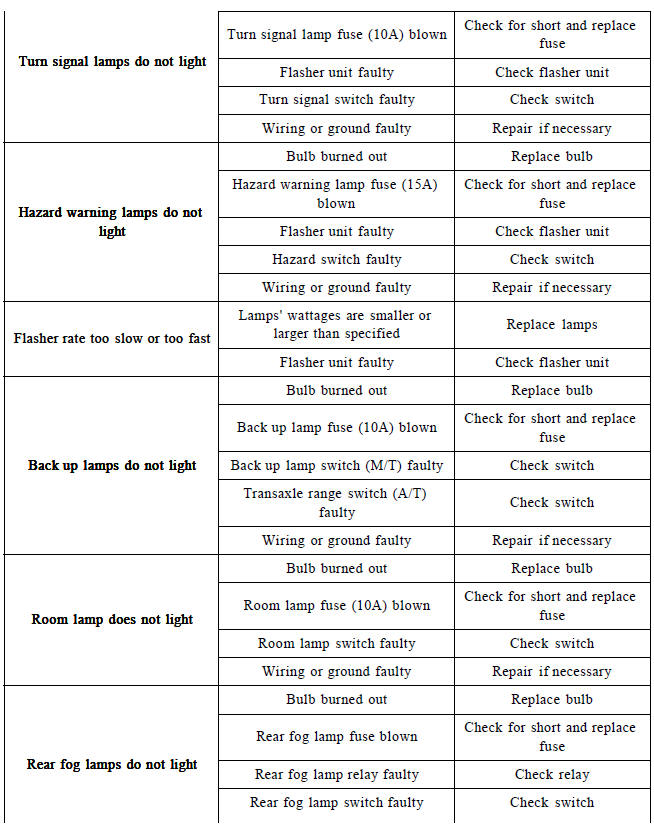
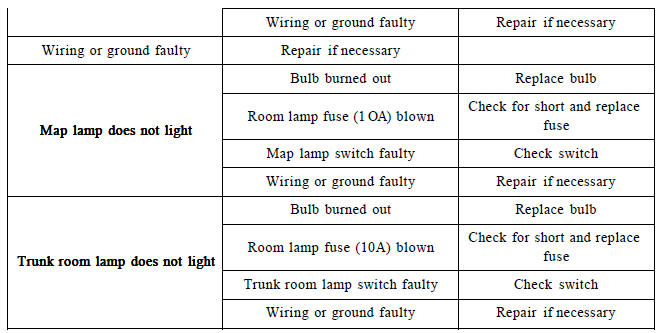
Troubleshooting

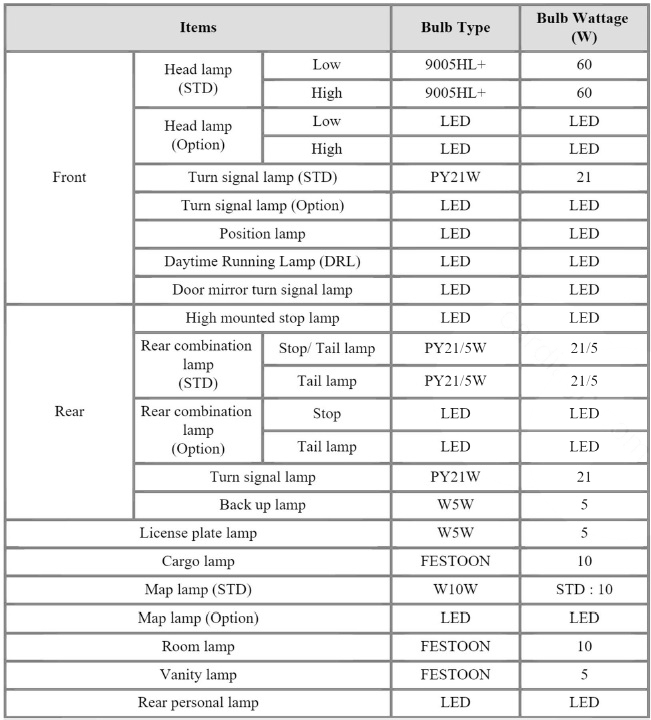
Specifications
Removal
- Disconnect the negative (-) battery terminal.
- Remove the front bumper assembly.
(Refer to Body - "Front Bumper Assembly")
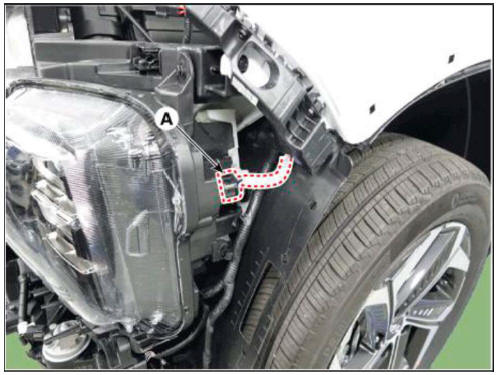
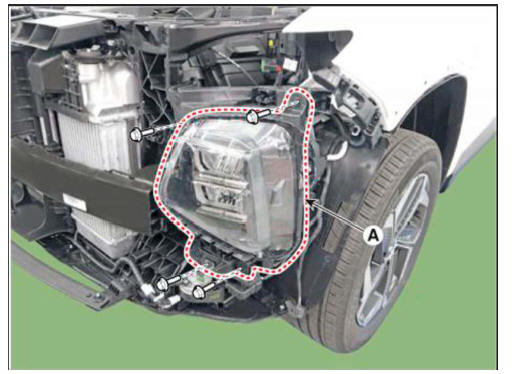
- Disconnect the head lamp connector (A).
- Loosen the mounting bolts and then remove the head lamp assembly (A).
Replacement
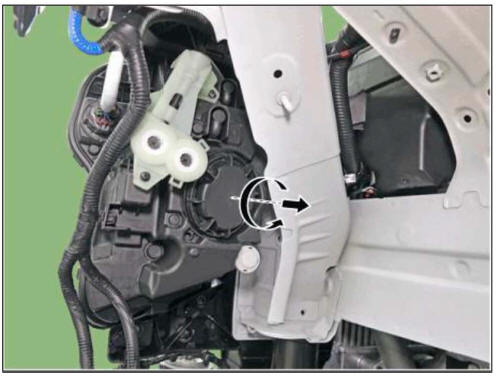
- Remove the front wheel guard.
(Refer to Body - "Front Wheel Guard")
- Unfasten the screws and then replace the moisture-absorbing agent.
WARNING
- Fold the moisture absorber as in the illustration below.
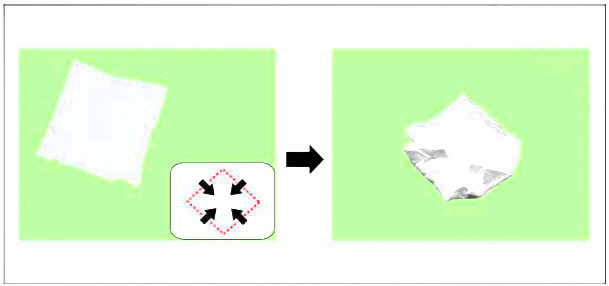
- When installation, install it in the same direction before removing.
Installation
- Install the head lamp bulbs.
- Install the head lamp bulb covers.
- Install the head lamp assembly after connecting the lamp connector.
READ NEXT:
 Head Lamp Aiming
Instructions
Alternately turn the adjusting gear to adjust the head lamp aiming.
If beam-setting equipment is not available, proceed as follows:
Draw vertical lines (Vertical lines passing through respective head lamp
centers) and a horizo
Outside Rear View Mirror - Removal
Removal
When removing with a flat-tip screwdriver or remover, wrap
protective tape around the tools to prevent
damage to components.
Put on gloves to prevent hand injuries.
Disconnect the negative (-) battery terminal.
Remove the f
Outside Rear View Mirror - Installation
Outside Rear View Mirror
Installation
Install the outside rear view mirror and connect the connector.
Tightening torque :
6.9 - 10.8 N.m (0.7 - 1.1 kgf.m, 5.0 - 8.0 lb-ft)
Connect the negative (-) batteiy terminal.
Front/Rear Turn Sig
SEE MORE:
Rear console cover
Component Location
Rear console cover
Replacement
WARNING
When removing with a flat-tip screwdriver or remover, wrap
protective tape around the tools to
prevent damage to components.
Put on gloves to prevent hand injuries.
W
Condensor - Replacement
Remove the condensor.
(Refer to Air conditioning System - "Condensor")
Using a Lwrench, remove the cap (A) on the bottom of the receiver-drier.
Remove the receiver-drier (A) from condenser using a long nose plier.
Check
Information
- Home
- Hyundai Tucson - Fourth generation (NX4) - (2020-2023) - Owner's Manual
- Hyundai Tucson - Fourth generation (NX4) - (2020-2023) - Workshop Manual
