Hyundai Tucson: Camshaft - Description
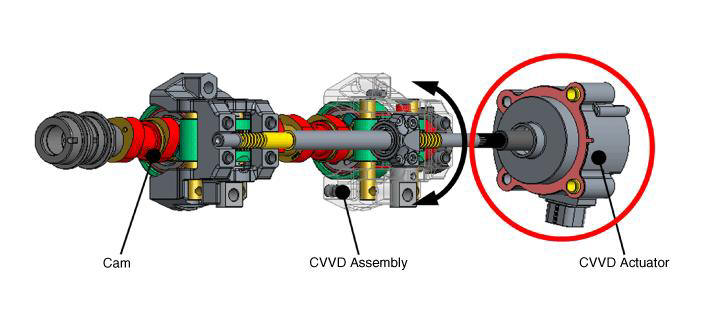
CVVD (Continuous Variable Valve Duration) System is a device to control the optimum open and close timing according to the driving mode by changing the valve opening section.
It is composed of cam shaft, CVVD assembly, and CVVD acatuator.
The valve opening time operates in proportion to the rpm of control shaft.
Operation Principle
CVVD System Operating Mode
Optimum Valve Timing by Engine Load
Removal
- Disconnect the battery negative terminal.
- Remove the cylinder head cover.
(Refer to Cylinder Head Assembly - "Cylinder Head Cover")
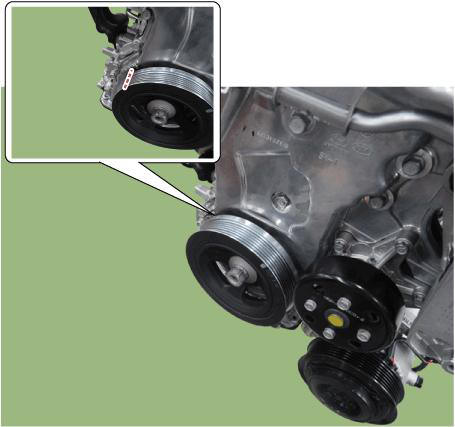
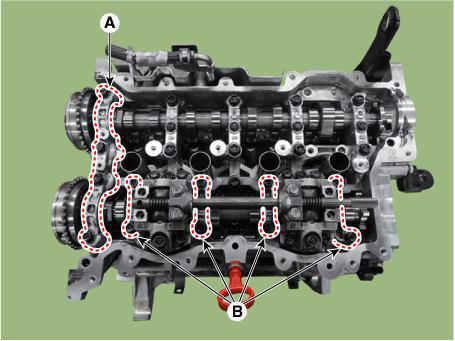
- Turn the crankshaft damper pulley so that No. 1 piston is at top dead center.
(1) Turn the crankshaft damper pulley and align its groove with the timing mark on the timing chain cover
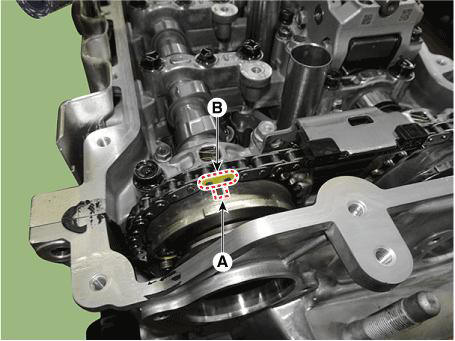
(2) Check the timing chain, be sure that the timing mark (A) of each sprocket is matched with the timing mark (B) (color link) of the timing chain.
If not, turn the crankshaft damper pulley by one revolution (360º).
Intake CVVT

Exhaust CVVT
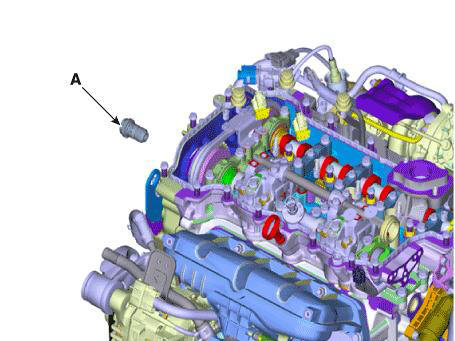
- Remove the Intake variable force solenoid (VFS) valve (A).
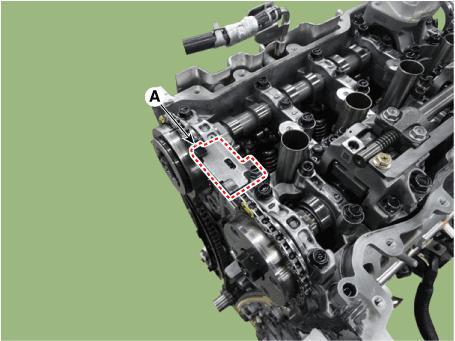
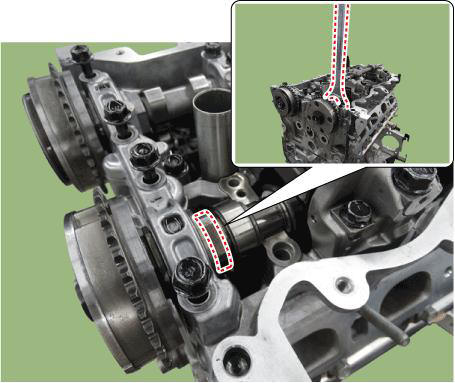
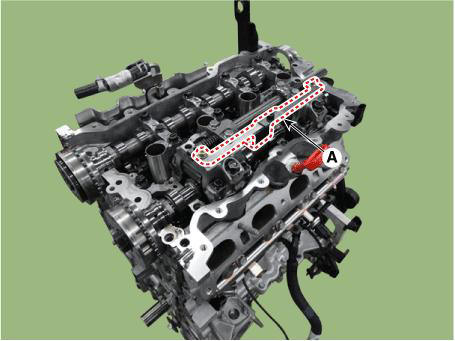
- Remove the cam to cam guide (A).
- Reomve the front bearing cap (A) and intake camshaft bearing caps (B).
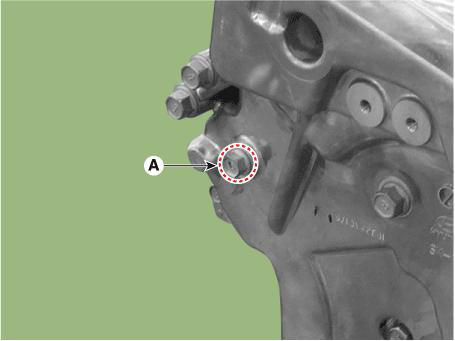
- Remove the service hole bolt (A).
- Remove the engine mounting support bracket.
(Refer to Engine and Transaxle Assembly - "Engine Mounting")
- Lift the engine using the jack to obtain space.
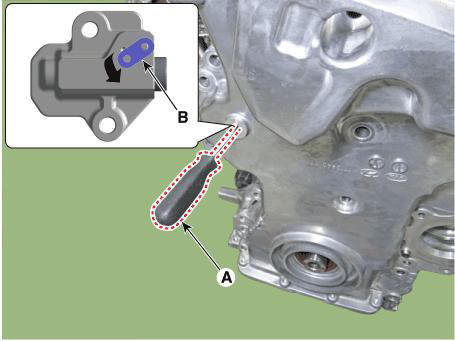
- Release the lock by putting down rachet plate (B) of timing chain tensioner with using back of tiny awl (A).
- Remove the intake oil control valve (OCV) & center bolt (A).
WARNING
- To prevent impurities from entering intake oil control valve (OCV) & center bolt, wear rubber gloves.
- Intake oil control valve (OCV) and center bolt, hold the
hexagonal portion on the camshaft with a wrench
to prevent the camshaft from rotating.
- Remove the CVVD assembly.
WARNING
- After removing the CVVD unit, make sure that the parts such as lifter, cam, etc are not separated.
- Ensure that the CVVD components are not damaged.
When Using the CVVD fixture
(1) Install the CVVD fixture (A) over the CVVD assembly.
(2) Remove the CVVD assembly.

READ NEXT:
 When not using the CVVD fixture
(3) Remove the CVVD assembly.
Remove the Intake CVVT (A).
Installation
Install the Intake CVVT (A).
Install the CVVD assembly (A).
WARNING
After installing the CVVD, check whether the swing arm is
separated
When Using the CVVD fixture
When installing the CVVD assembly mounting bolts (M6), tighten sequence
shown.
Tightening torque :
1ST
4.9 - 6.9 N.m (0.5 - 0.7 kgf.m, 3.6 - 5.1 lb-ft)
2nd
9.8 - 11.8 N.m (1.0 - 1.2 kgf.m, 7.2 - 8.7 lb-ft)
Remove the CVVD fixture
Intake/Exhaust CVVT Timing Mark
Intake CVVT Timing Mark
Exhaust CVVT Timing Mark
Install the cam to cam guide (A).
Tightening torque :
9.8 - 11.8 N.m (1.0 - 1.2 kgf.m, 7.2 - 8.7 lb-ft)
Install the intake variable force solenoid (VFS) valve (A).
Tightenin
SEE MORE:
Crankshaft Position Sensor (CKPS)
Description
Crankshaft Position Sensor (CKPS) detects the crankshaft position and is one
of the most important
sensors of the engine control system. If there is no CKPS signal input, fuel is
not supplied.That is,
vehicle can't run without
Driver Attention Warning (DAW)
Basic function
Driver Attention Warning will help
determine the driver's attention level by
analyzing driving pattern, driving time,
etc. while vehicle is being driven. Driver
Attention Warning will recommend a
break when the driver's atten
Information
- Home
- Hyundai Tucson - Fourth generation (NX4) - (2020-2023) - Owner's Manual
- Hyundai Tucson - Fourth generation (NX4) - (2020-2023) - Workshop Manual
