Hyundai Tucson: Water Inlet Fitting
Hyundai Tucson - Fourth generation (NX4) - (2020-2023) - Workshop Manual / Engine Mechanical System / Cooling System / Water Inlet Fitting
- Remove the engine room under cover.
(Refer to Engine and Transaxle Assembly - "Engine Room Under Cover")
- Drain the coolant.
(Refer to Cooling System - "Coolant")
- Disconnect the radiator lower hose (A).
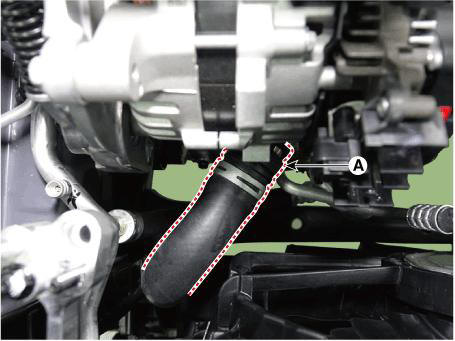
- Disconnect the oil cooler hose (A).

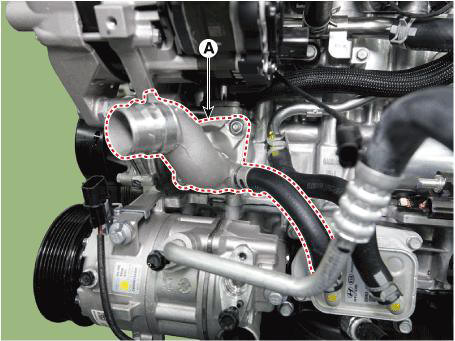
- Remove the water inlet fitting (A).
Tightening torque : 18.6 - 23.5 N.m (1.9 - 2.4 kgf.m, 13.7 - 17.4 lb-ft)
- Install in the reverse order of removal.
WARNING
Always use a new O-ring.
When assembling the hose, Use a product with EPDM rubber stability.
If a hose lubricant is applied, fill the coolant after 30 minutes of assembly.
Place the hose at the specified location of the stopper and assemble them together. The front side of stoppers should be in close contact with the hose. And then, place the clamp at the correct location.
- Fill with engine coolant.
(Refer to Cooling System - "Coolant")
WARNING
The coolant must be injected according to the integrated thermal management module (ITM) coolant filling method.
- Start engine and check for leaks.
Components
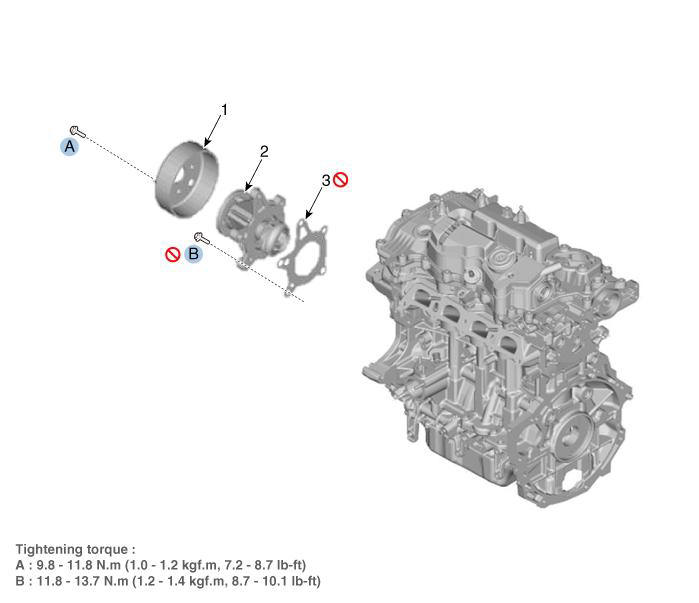
- Water pump pulley
- Water pump
- Water pump gasket
READ NEXT:
 Troubleshooting
Trouble Symptom
Coolant
leakage
From the
bleed hole of
the water
pump
From gaskets
or bolts
From outer
surface of
water pump
Probable Cause
Visually
check
Check leaks
after about
ten-minute
warming up.
If co
Active Air Flap(AAF)
Remove the front bumper.
(Refer to Body (Interior and Exterior) - "Front Bumper Cover")
Disconnect the active air flap connector (A).
RH
LH
Remove the active air flap (A) after loosening the mounting screws.
RH
Active Air Flap (AAF) Actuator
Remove the front bumper.
(Refer to Body (Interior and Exterior) - "Front Bumper Cover")
Disconnect the active air flap connector (A).
RH
LH
Remove the active air flap actuator (A) after loosening the mounting
screw
SEE MORE:
DCT (Dual Clutch Transmission) System (SBC) - Removal
Removal
Turn ignition switch OFF and disconnect the negative (-) battery cable.
Remove the air cleaner assembly and air duct.
(Refer to Engine Mechanical System - "Air cleaner")
Remove the ECM.
(Refer to Engine Control / Fue
Inhibitor switch/ Manual control lever- Removal
Turn ignition switch OFF and disconnect the batteiy negative (-)
terminal.
Make sure vehicle does not roll before setting shift lever to "N"
position.
Remove the air cleaner assembly and air duct.
(Refer to Engine Mechanical
Information
- Home
- Hyundai Tucson - Fourth generation (NX4) - (2020-2023) - Owner's Manual
- Hyundai Tucson - Fourth generation (NX4) - (2020-2023) - Workshop Manual
