Hyundai Tucson: Supervision cluster
Hyundai Tucson - Fourth generation (NX4) - (2020-2023) - Workshop Manual / Body (Interior and Exterior) / Crash Pad / Supervision cluster
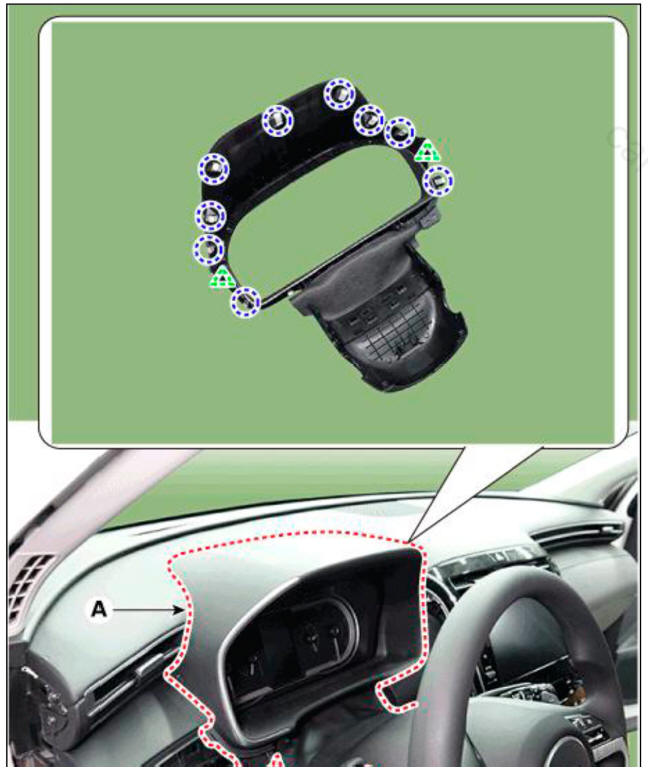
Component Location
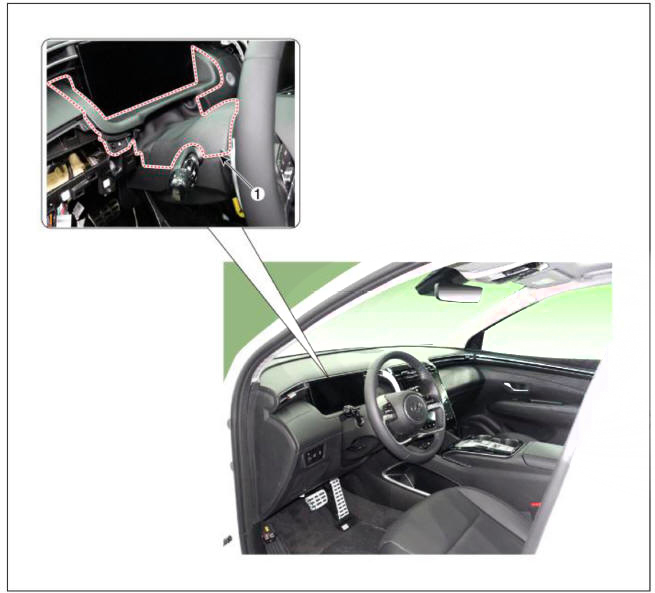
- Cluster fascia panel
General cluster
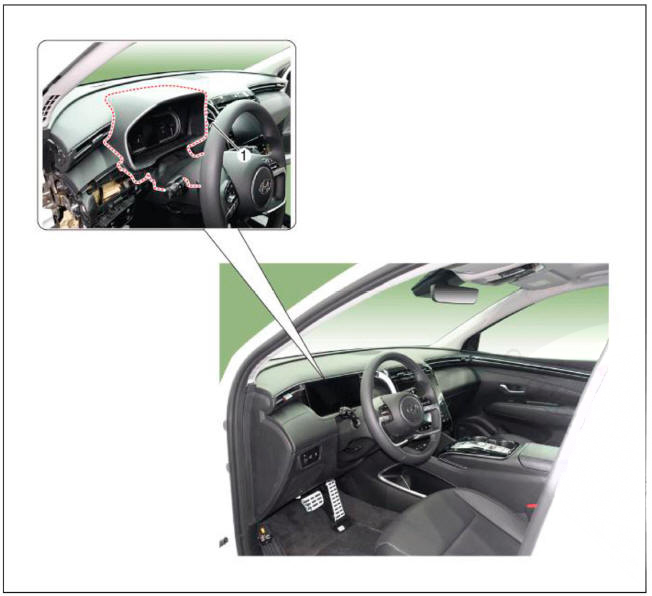
- Cluster fascia panel
Replacement
WARNING
- When removing with a flat-tip screwdriver or remover, wrap protective tape around the tools to prevent damage to components.
- Put on gloves to prevent hand injuries.
WARNING
Take care not to bend or scratch the trim and panels.
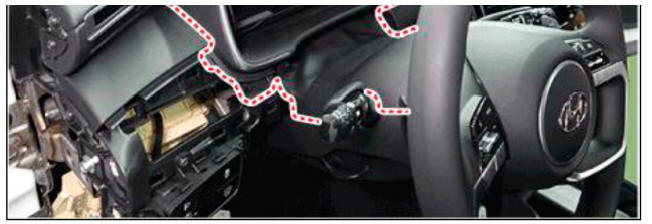
- Remove the crash pad garnish LH.
(Refer to Crash Pad - "Crash Pad Garnish")
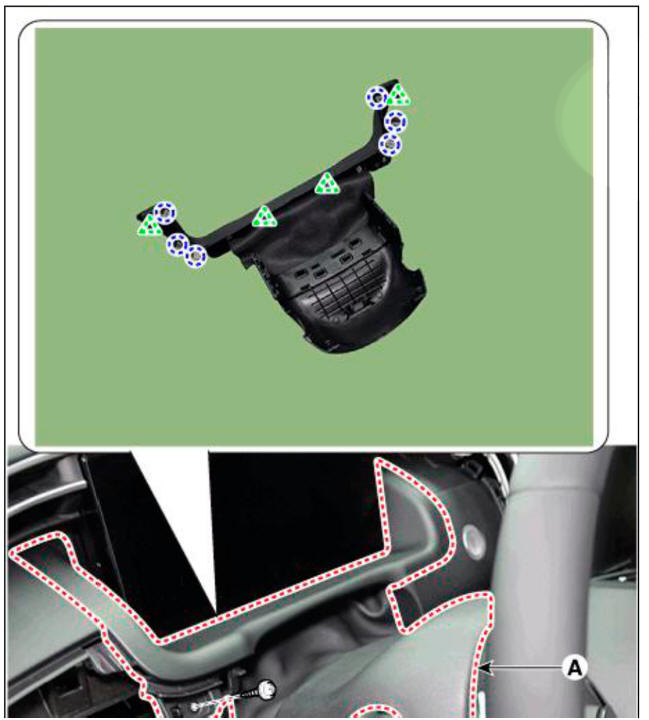
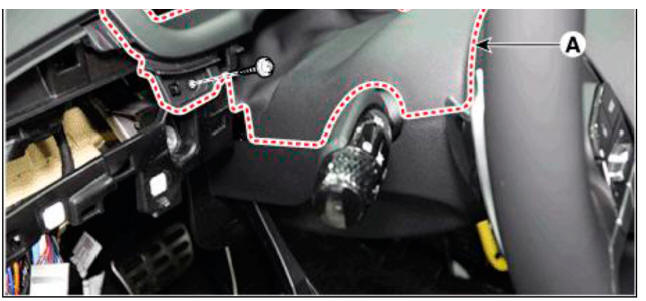
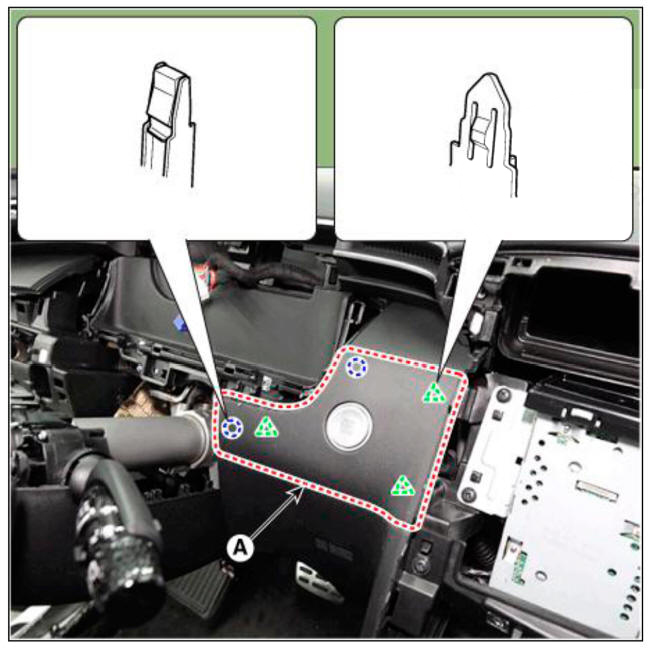
- Loosen the mounting screw, remove the cluster fascia panel (A).
Supervision cluster
General cluster
- To install, reverse the removal procedure.
WARNING
Replace any damaged clips (or pin-type retainers).
Component Location
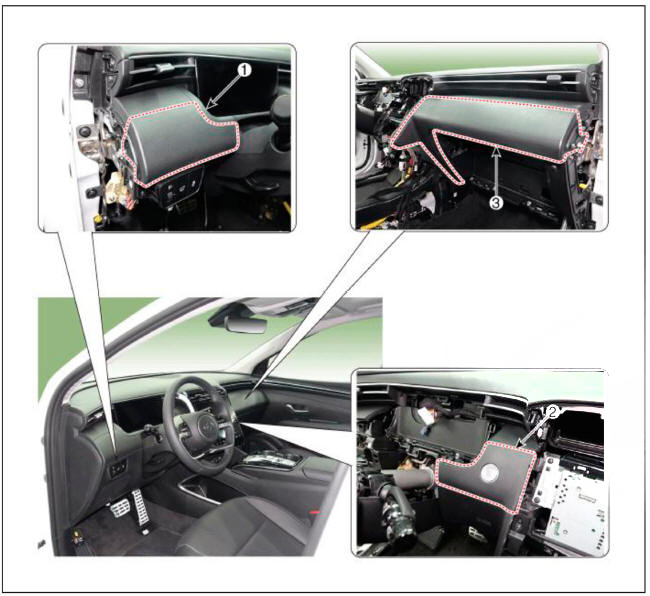
- Crash pad garnish LH
- Crash pad garnish C'TR
- Crash pad garnish RH
Replacement
WARNING
- When removing with a flat-tip screwdriver or remover, wrap protective tape around the tools to prevent damage to components.
- Put on gloves to prevent hand injuries.
WARNING
Take care not to bend or scratch the trim and panels.
LH
- Remove the crash pad lower panel.
(Refer to Crash Pad - "Crash Pad Lower Panel")
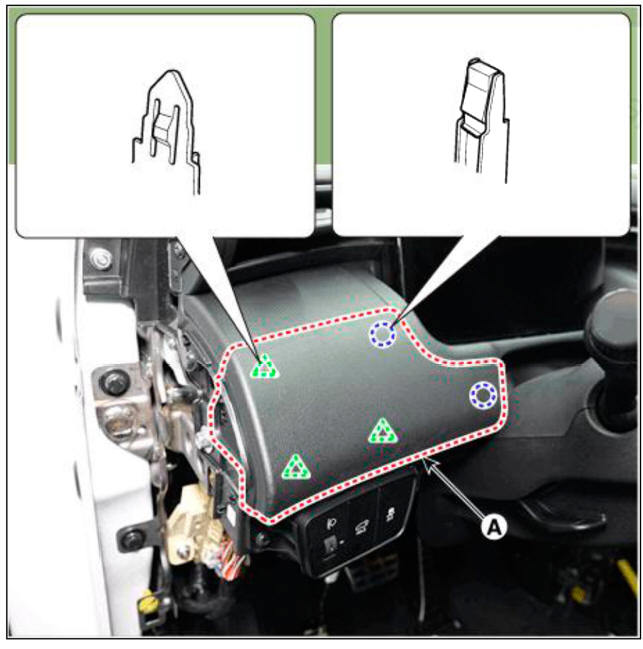
- Loosen the mounting screw, remove the crash pad gamishLH (A).
- To install, reverse the removal procedure.
WARNING
Replace any damaged clips (or pin-type retainers).
CTR
- Remove the cluster fascia panel.
(Refer to Crash Pad - "Cluster Fascia Panel")
- Remove the front monitor.
(Refer to Body Electrical System - "Front Monitor")
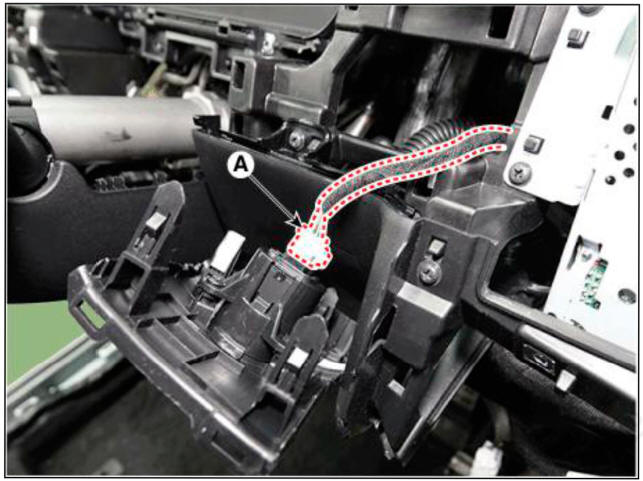
- Remove the crash pad garnish CTR (A).
- Disconnect the start button connector (A).
- To install, reverse the removal procedure.
WARNING
- Replace any damaged clips (or pin-type retainers).
- Make sure the connectors are plugged in properly, and the antenna lead is connected properly.
RH
- Disconnect the negative (-) battery terminal.
- Remove the crash pad side coverRH.
(Refer to Crash Pad - "Crash Pad Side Cover")
- Loosen the mounting screw, remove the crash pad garnishRH (A).

- To install, reverse the removal procedure.
WARNING
Replace any damaged clips (or pin-type retainers).
READ NEXT:
 Crash pad lower panel
Component
Location
Crash pad lower panel
Replacement
WARNING
When removing with a flat-tip screwdriver or remover, wrap
protective tape around the tools to
prevent damage to components.
Put on gloves to prevent hand injuries.
Glove box
Component Location
Glove box
Replacement
WARNING
When removing with a flat-tip screwdriver or remover, wrap
protective tape around the tools to
prevent damage to components.
Put on gloves to prevent hand injuries.
WARNING
Tak
Crash pad air vent
Component Location
Crash pad air vent LH
Crash pad air vent RH
Replacement
LH
WARNING
When removing with a flat-tip screwdriver or remover, wrap
protective tape around the tools to
prevent damage to components.
Put on gloves t
SEE MORE:
Input shaft speed sensor
Components
Input shaft speed sensor 1 (Odd)
Input shaft speed sensor 2 (Even)
Specification
Circuit Diagram
Removal
Turn ignition switch OFF and disconnect the negative (-) batteiy cable.
Remove the air cleaner assembly a
Heater - Inspection
Operating Logic Test (Manual only)
Inspect the PTC operation with the confirmation logic below :
Entering
(1) Set the mode to FLOOR.
(2) Set the temperature to MAX HOT.
(3) Turn off the blower switch.
(4) Press the intake (recirculat
Information
- Home
- Hyundai Tucson - Fourth generation (NX4) - (2020-2023) - Owner's Manual
- Hyundai Tucson - Fourth generation (NX4) - (2020-2023) - Workshop Manual
