Hyundai Tucson: Crash pad air vent
Component Location
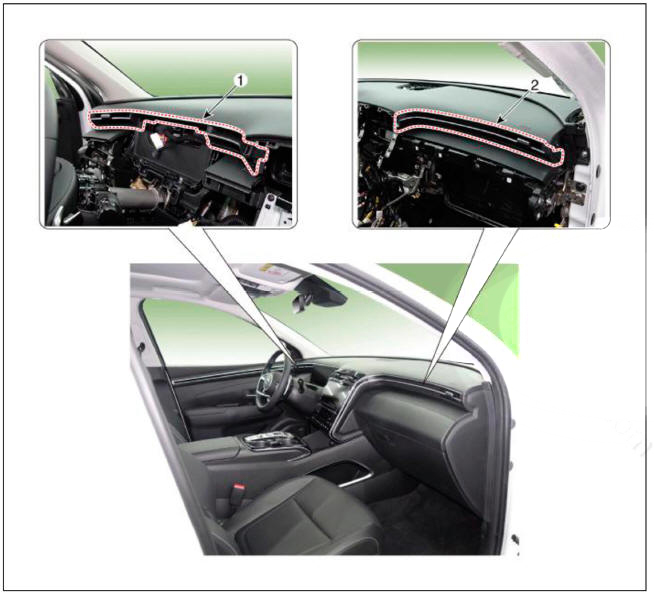
- Crash pad air vent LH
- Crash pad air vent RH
Replacement
LH
WARNING
- When removing with a flat-tip screwdriver or remover, wrap protective tape around the tools to prevent damage to components.
- Put on gloves to prevent hand injuries.
WARNING
Take care not to bend or scratch the trim and panels.
- Disconnect the negative (-) battery terminal.
- Remove the instrument cluster.
(Refer to Body Electrical System - "Instrument Cluster")
- Remove the front monitor.
(Refer to Body Electrical System - "Front Monitor")
- Loosen the mounting screw, remove the crash pad air ventLH (A).
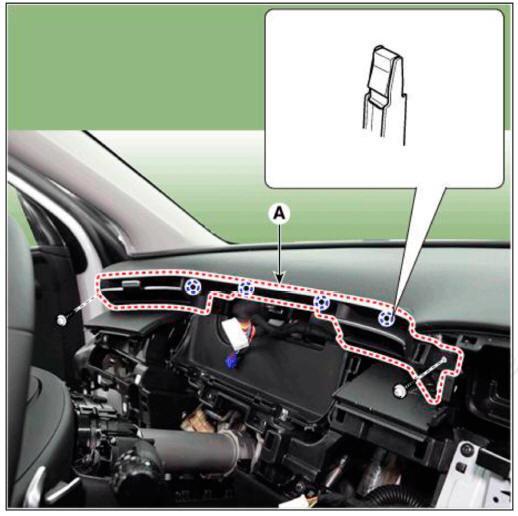
- Install in the reverse order of removal.
WARNING
Replace any damaged clips (or pin - type retainers).
RH
WARNING
- When removing with a flat - tip screwdriver or remover, wrap protective tape around the tools to prevent damage to components.
- Put on gloves to prevent hand injuries.
WARNING
Take care not to bend or scratch the trim and panels.
- Disconnect the negative (-) battery terminal.
- Remove the crash pad side coverRH.
(Refer to Crash Pad - "Crash Pad Side Cover")
- Remove the front monitor.
(Refer to Body Electrical System - "Front Monitor")
- Loosen the mounting screw, remove the crash pad air ventRH (A).
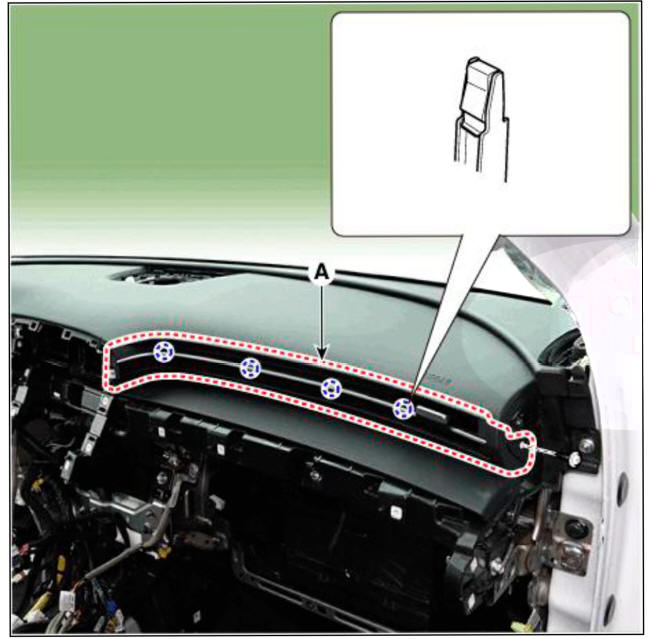
- Install in the reverse order of removal.
WARNING
Replace any damaged clips (or pin - type retainers).
READ NEXT:
 Crash pad side cover
Component Location
LH
Crash pad side cover LH
RH
Crash pad side cover RH
Replacement
WARNING
When removing with a flat-tip screwdriver or remover, wrap
protective tape around the tools to
prevent damage to components.
Crash pad center panel
Component Location
Crash pad center panel
Replacement
WARNING
When piying with a flat-tip screwdriver, wrap it with
protective tape, and apply protective tape
around the related parts, to prevent damage.
Put on gloves to protec
Main crash pad assembly
Component Location
Main crash pad assembly
Replacement
WARNING
When removing with a flat-tip screwdriver or remover, wrap
protective tape around the tools to prevent damage to
components.
Put on gloves to prevent hand injuries.
SEE MORE:
Rear Wiper Washer - Removal
Disconnect the negative (-) battery terminal.
Loosen the mounting nut and remove the rear wiper arm & blade (A).
WARNING
Take care not to damage the rear glass when removing the rear wiper
arms & blades.
Remove the tail gat
Rear Brake Pad
After installing the rear caliper, perform "Brake Pad Replacement Mode"
using the self-diagnosis. EPB Apply
Select C2 (Release) on the screen below.
After disassembling/assembling the caliper body or replacing
Information
- Home
- Hyundai Tucson - Fourth generation (NX4) - (2020-2023) - Owner's Manual
- Hyundai Tucson - Fourth generation (NX4) - (2020-2023) - Workshop Manual
