Hyundai Tucson: Main crash pad assembly
Hyundai Tucson - Fourth generation (NX4) - (2020-2023) - Workshop Manual / Body (Interior and Exterior) / Crash Pad / Main crash pad assembly
Component Location
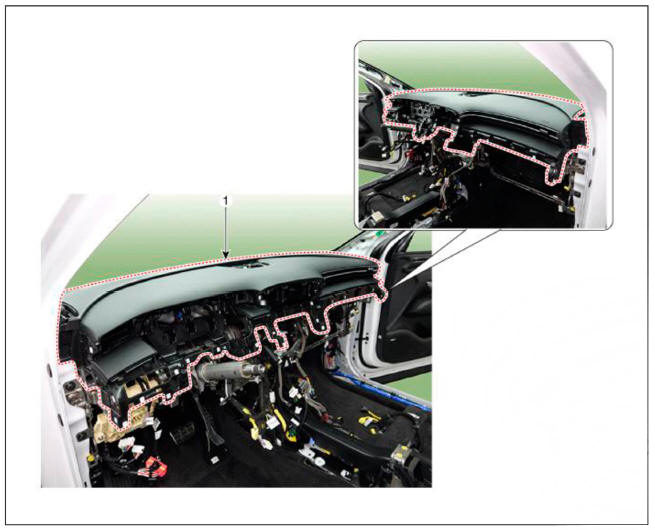
- Main crash pad assembly
Replacement
WARNING
- When removing with a flat-tip screwdriver or remover, wrap protective tape around the tools to prevent damage to components.
- Put on gloves to prevent hand injuries.
WARNING
Take care not to bend or scratch the rim and panels.
- Disconnect the negative (-) battery terminal.
- Remove the floor console assembly.
(Refer to Floor Console - "Floor Console Assembly")
- Remove the front pillar trim.
(Refer to Interior Trim - "Front Pillar Trim")
- Remove the crash pad lower panel.
(Refer to Crash Pad - "Crash Pad Lower Panel")
- Remove the steering column shroud lower panel.
(Refer to Crash Pad - "Steering Column Shroud Panel")
- Remove the crash pad under cover.
(Refer to Crash Pad - "Crash Pad Under Cover")
- Remove the crash pad center panel.
(Refer to Crash Pad - "Crash Pad Center Panel")
- Remove the instrument cluster.
- (Refer to Body Electrical System - "Instrument Cluster")
- Remove the front monitor.
(Refer to Body Electrical System - "Front Monitor")
- Remove the steering wheel.
(Refer to Steering System - "Steering Wheel")
- Remove the multifunction switch assembly.
(Refer to Body Electrical System - "Multifunction Switch")
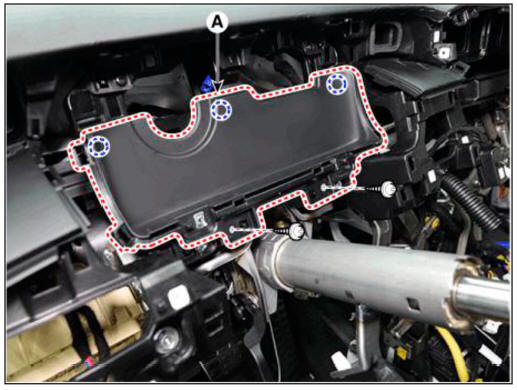
- Loosen the mounting screws, remove the instrument cluster bracket (A).
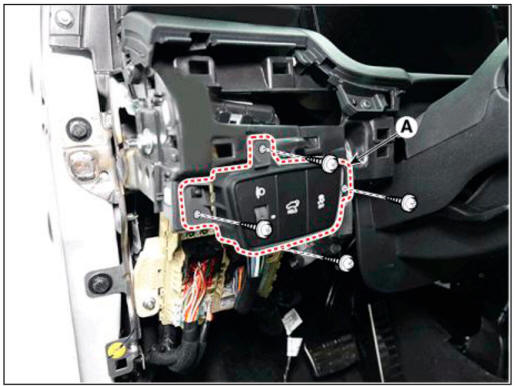
- Loosen the mounting screws, remove the crash pad switch assembly (A).
- Disconnect the connector (A).

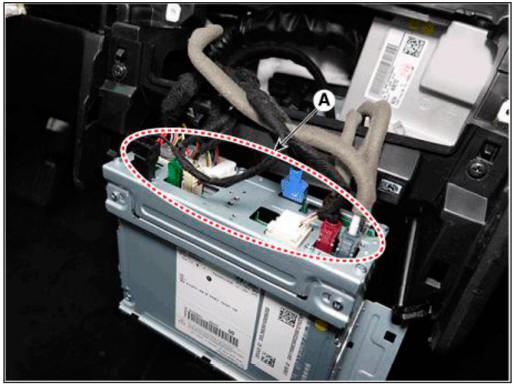
- Loosen the mounting screws, remove the AVN head unit assembly (A).
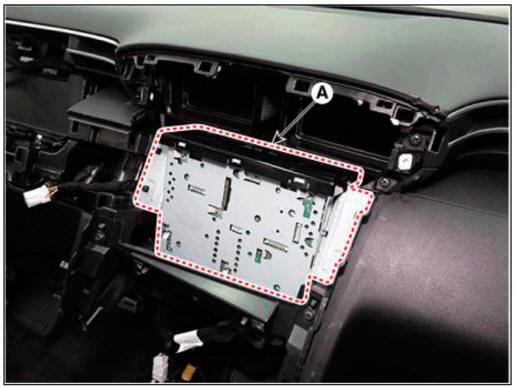
- Disconnect the AVN head unit connectors (A).
- Remove the crash pad upper garnish (A).
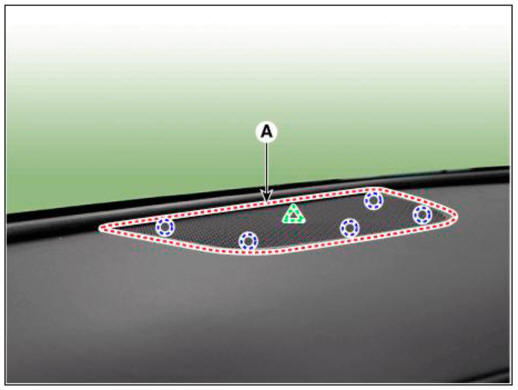
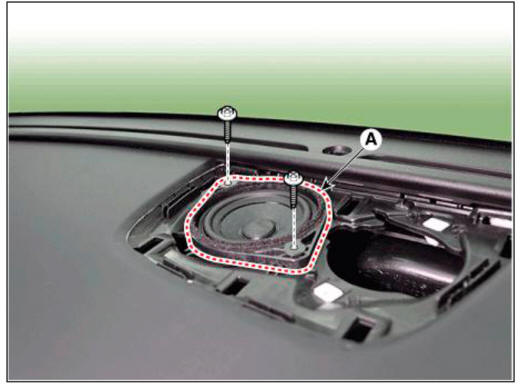
- Loosen the mounting screws, remove the center speaker (A).
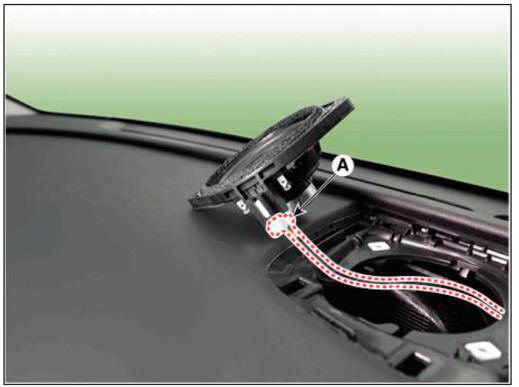
- Disconnect the center speaker connector (A).
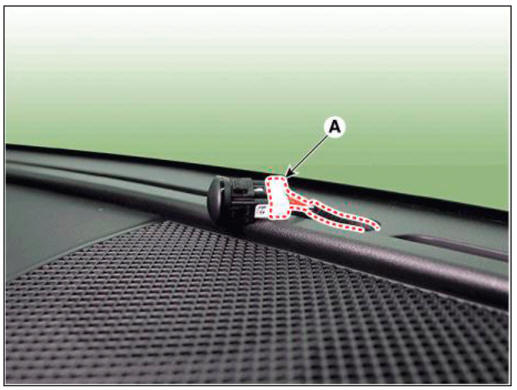
- After removing the crash pad upper garnish, insert hand and push up the photo sensor (A) from the inside to remove it.
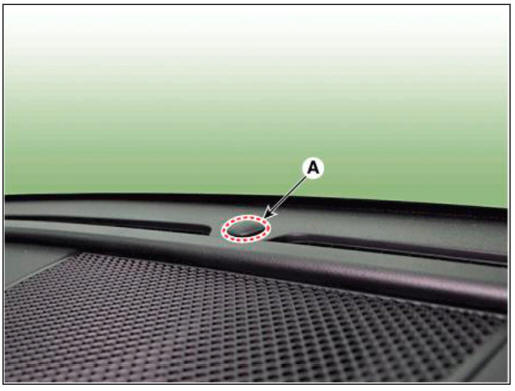
- Disconnect the photo sensor connector (A).
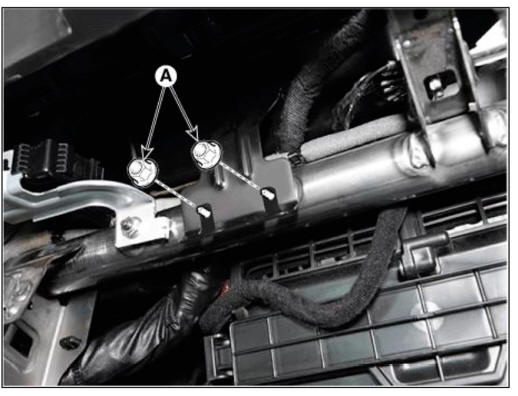
- Loosn the passenger's airbag(PAB) mounting nuts (A).
Tightening torque : 16.7 - 25.5 N.m (1.7 - 2.6kgf.m, 12.3 - 18.8 lb-ft)
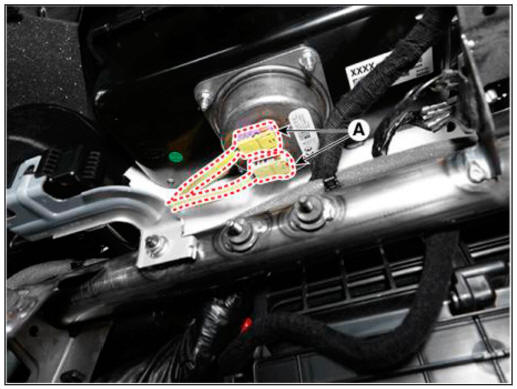
- Loosen the mounting bolts and nuts and remove the main crash pad assembly (A).
Tightening torque : 16.7 - 25.5 N.m (1.7 - 2.6kgf.m, 12.3 - 18.8 lb-ft)

- Press the lock pin, separate the passenger's airbag(PAB) connectors (A).
- To install, reverse removal procedure.
WARNING
- Make sure the crash pad fits onto the guide pins correctly.
- Before tightening the bolts, make sure the crash pad wire harnesses are not pinched.
- Make sure the connectors are plugged in properly, and the antenna lead is connected properly.
- Make sure that each of the assembly components operates properly.
- Replace any damaged clips (or pin-typ retainers).
READ NEXT:
 Cowl cross bar assembly
Component Location
Cowl cross bar assembly
Replacement
WARNING
When removing with a flat-tip screwdriver or remover, wrap
protective tape around the tools to prevent damage to
components.
Put on gloves to prevent hand injuries.
Roof Trim - General type
Components
General type
Sunvisor LH
Sunvisor RH
Roof trim
Panorama sunroof type
Sunvisor LH
Sunvisor RH
Roof trim
Component Location
Sunvisor
Retainer
Replacement
Sunvisor
Remove the sunvisor pivot cov
SEE MORE:
Reverse Parking Collision- Avoidance Assist Operation
Operating conditions
If 'Rear Active Assist' or 'Rear Warning
Only' is set from the Settings menu,
Reverse Parking Collision-Avoidance
Assist will be in the ready status when
the following conditions are satisfied:
The liftgate is closed
T
ESC Control unit (HECU) - Adjustment
Adjustment
Perform diagnostic procedure by using diagnostic device as shown below :
Connect self-diagnosis connector (16pins) located under the driver side
crash pad to self-diagnosis device, and then torn the
self-diagnosis device after ke
Information
- Home
- Hyundai Tucson - Fourth generation (NX4) - (2020-2023) - Owner's Manual
- Hyundai Tucson - Fourth generation (NX4) - (2020-2023) - Workshop Manual
