Hyundai Tucson: Glove box
Component Location
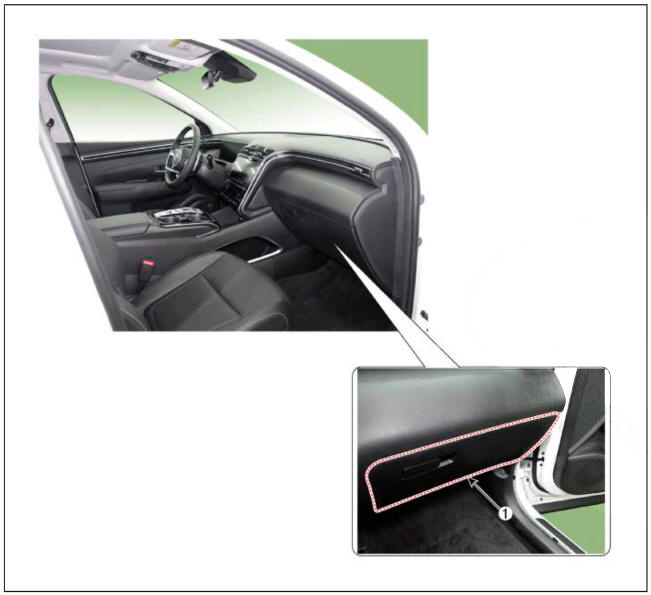
- Glove box
Replacement
WARNING
- When removing with a flat-tip screwdriver or remover, wrap protective tape around the tools to prevent damage to components.
- Put on gloves to prevent hand injuries.
WARNING
Take care not to bend or scratch the trim and panels.
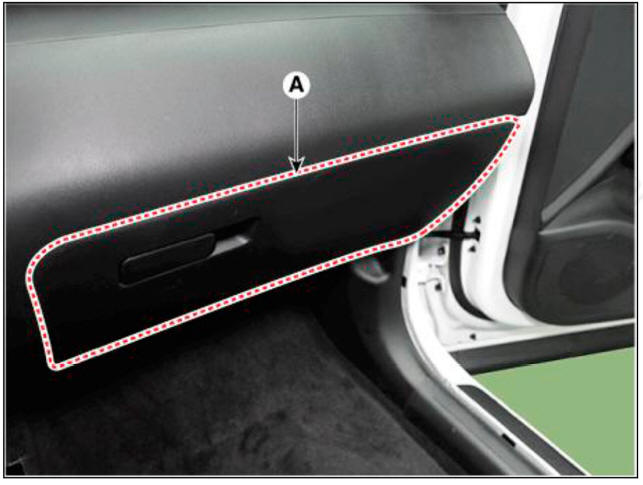
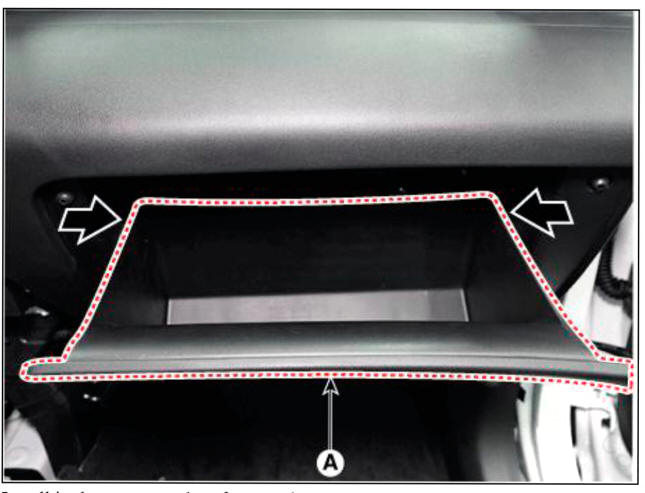
- Open the glove box (A).
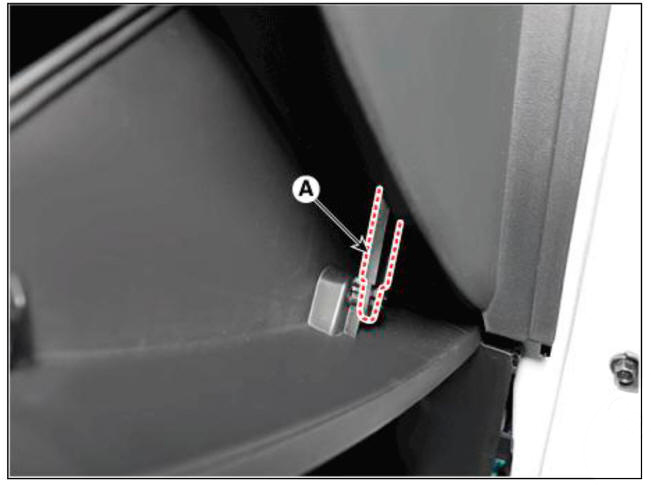
- Remove the air damper (A) from the glove box.
- Press the side of the glove box and remove the glove box (A).
- Install in the reverse order of removal.
WARNING
Replace any damaged clips (or pin - type retainers).
Component Location
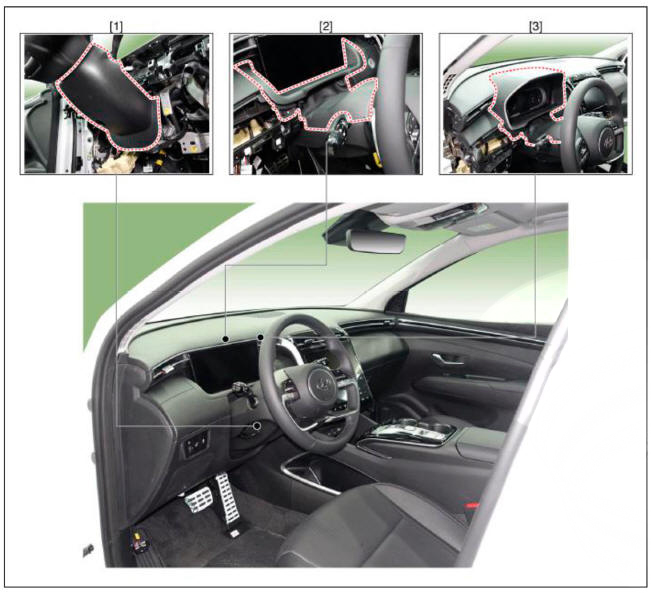
- Steering column shorud lower panel
- Steering column shorud upper panel General cluster
- Steering column shorud upper panel Supervision cluster
Replacement
Steering column shroud upper panel
WARNING
- When removing with a flat-tip screwdriver or remover, wrap protective tape around the tools to prevent damage to components.
- Put on gloves to prevent hand injuries.
WARNING
Take care not to bend or scratch the trim and panels.
- Remove the crash pad garnishLH.
(Refer to Crash Pad - "Crash Pad Garnish")
- Loosen the mounting screw, remove the steering column shroud upper panel (A).
Supervision cluster
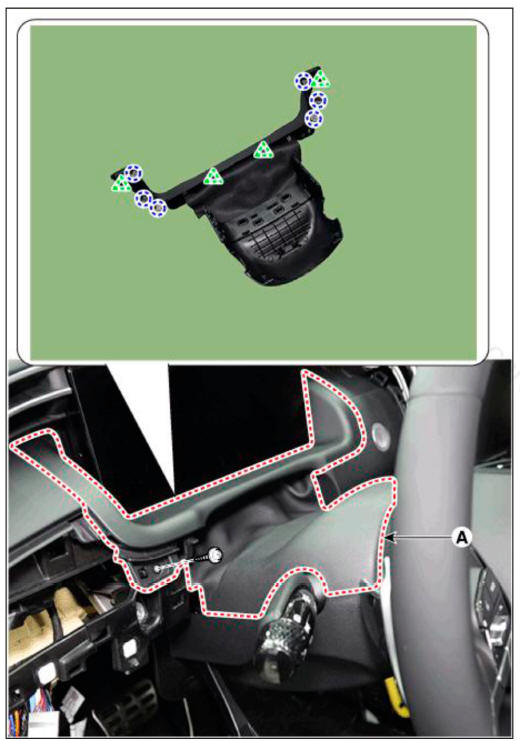
General cluster
- To install, reverse removal procedure.
WARNING
Replace any damaged clips (or pin-type retainers).
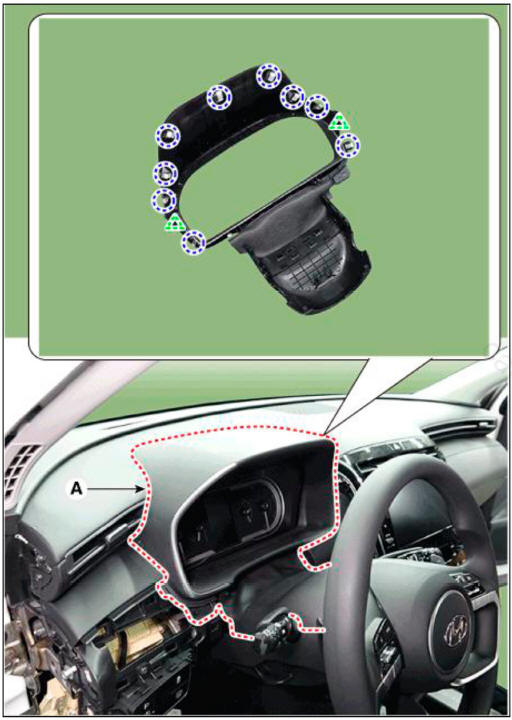
Steering column shroud lower panel
WARNING
- When removing with a flat-tip screwdriver or remover, wrap protective tape around the tools to prevent damage to components.
- Put on gloves to prevent hand injuries.
WARNING
Take care not to bend or scratch the trim and panels.
- Remove the steering column shroud upper panel.
- Remove the crash pad lower panel.
(Refer to Crash Pad - "Crash Pad Lower Panel")
- Loosen the mounting screws by turning the steering wheel to the left and right, and remove the steering column shroud lower panel (A).

- To install, reverse removal procedure.
WARNING
Replace any damaged clips (or pin-type retainers).
READ NEXT:
 Crash pad air vent
Component Location
Crash pad air vent LH
Crash pad air vent RH
Replacement
LH
WARNING
When removing with a flat-tip screwdriver or remover, wrap
protective tape around the tools to
prevent damage to components.
Put on gloves t
Crash pad side cover
Component Location
LH
Crash pad side cover LH
RH
Crash pad side cover RH
Replacement
WARNING
When removing with a flat-tip screwdriver or remover, wrap
protective tape around the tools to
prevent damage to components.
Crash pad center panel
Component Location
Crash pad center panel
Replacement
WARNING
When piying with a flat-tip screwdriver, wrap it with
protective tape, and apply protective tape
around the related parts, to prevent damage.
Put on gloves to protec
SEE MORE:
Injector - Description
The GDI injector is similar to a standard injector, but sprays fuel at a much
higher pressure directly
into the combustion chamber and has a swirl disc to get the fuel swirling as it
exits the nozzle. This
aids in atomization of the fuel.
Th
Condensor
Components Location
Condensor
Inspection
Check the condenser fins for clogging and damage. If clogged, clean them
with water, and blow them with compressed air. If
bent, gently bend them using a screwdriver or pliers.
Check the co
Information
- Home
- Hyundai Tucson - Fourth generation (NX4) - (2020-2023) - Owner's Manual
- Hyundai Tucson - Fourth generation (NX4) - (2020-2023) - Workshop Manual
