Hyundai Tucson: Remote Control Switch
Hyundai Tucson - Fourth generation (NX4) - (2020-2023) - Workshop Manual / Body Electrical System / Audio / Remote Control Switch
Components
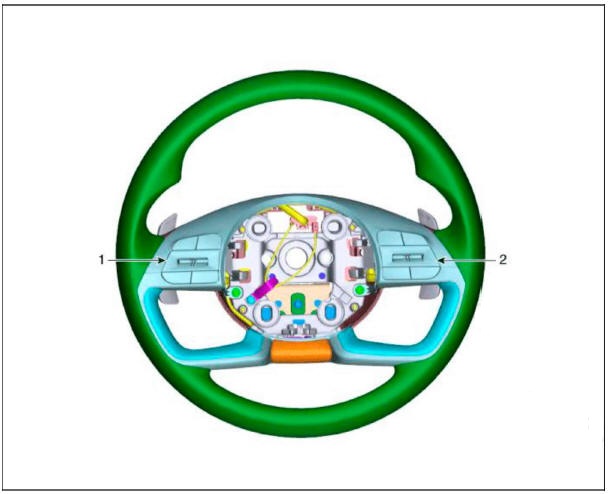
- Left Remote Control Switch (Audio)
- Right Remote Control Switch (Cruise)
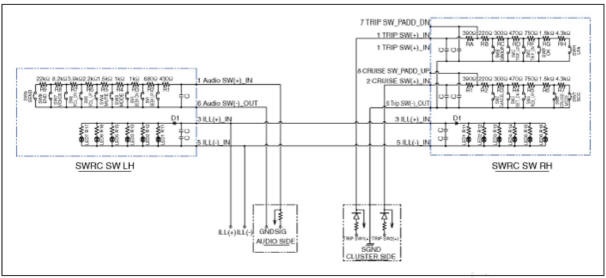
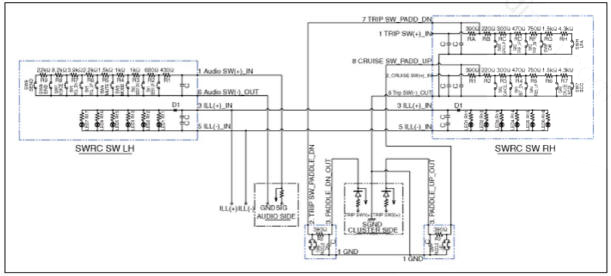
Schematic Diagrams
Audio + B/Tooth+Voice+TRIP+SCC+MSLA+LFA
Audio + B/Tooth+Voice+TRIP+SCC+MSLA+LFA+Paddle Shift
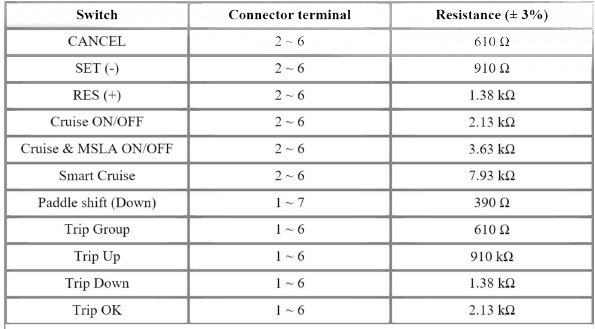
Inspection
- Check for resistance between terminals in each switch position (LH).
Audio/Voice
- Check for resistance between terminals in right switch position.
Trip/Cruise

Removal
- Disconnect the negative (-) battery terminal.
- Remove the steering wheel.
(Refer to Steering System - "Steering Wheel")
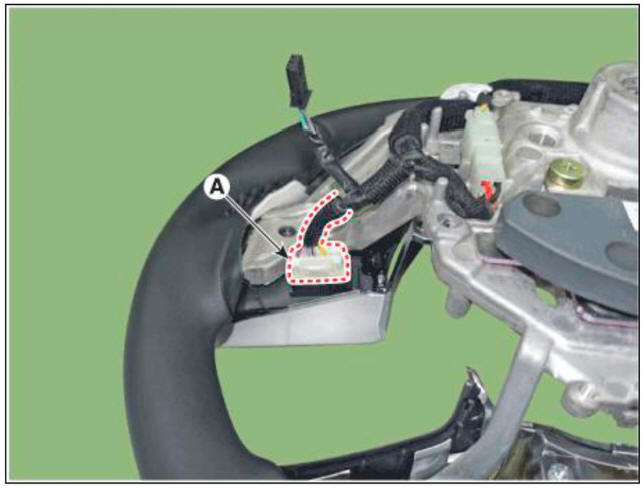
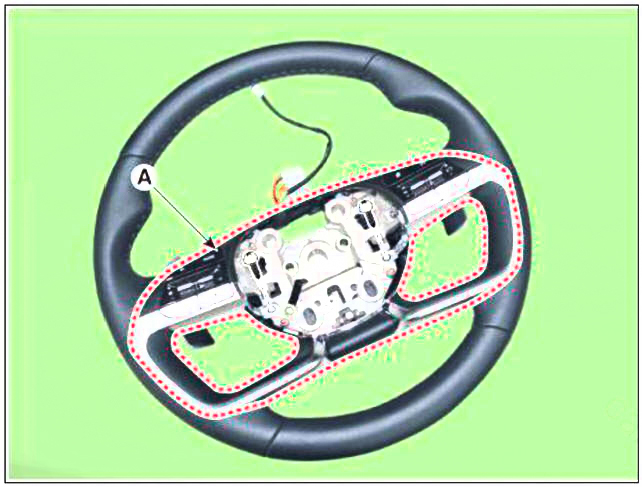
- Remove the paddle shift lever (A).
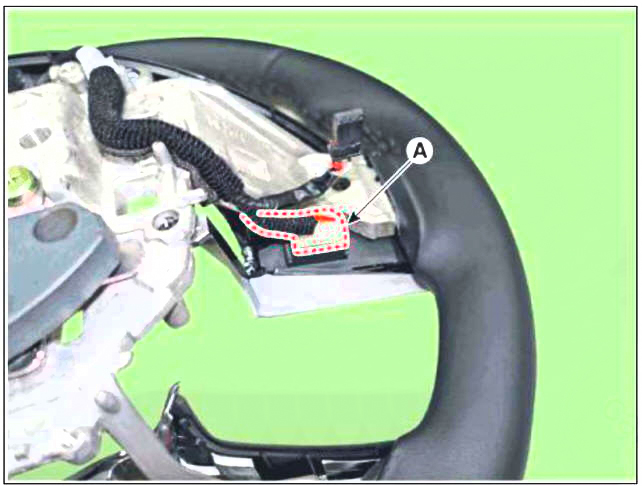
- Disconnect the paddle shift lever connector (A).
- Remove the steering wheel lower cover (A).
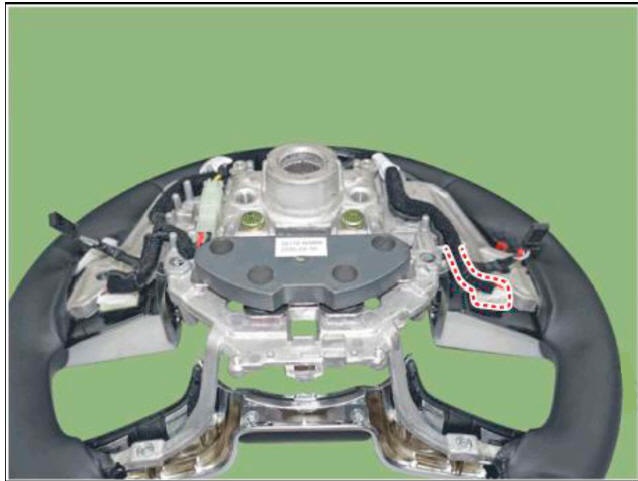
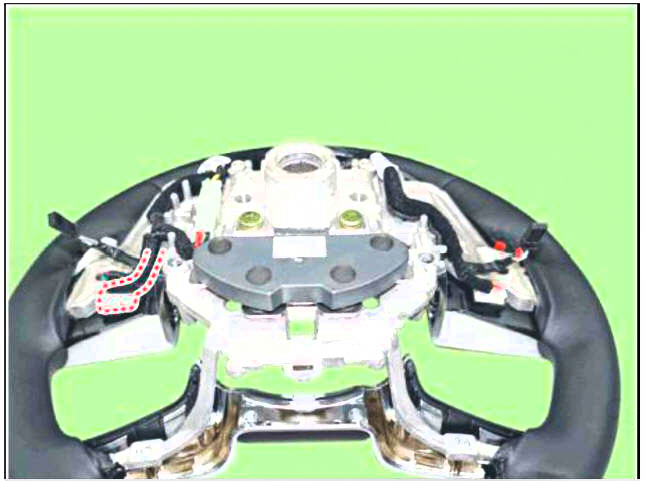
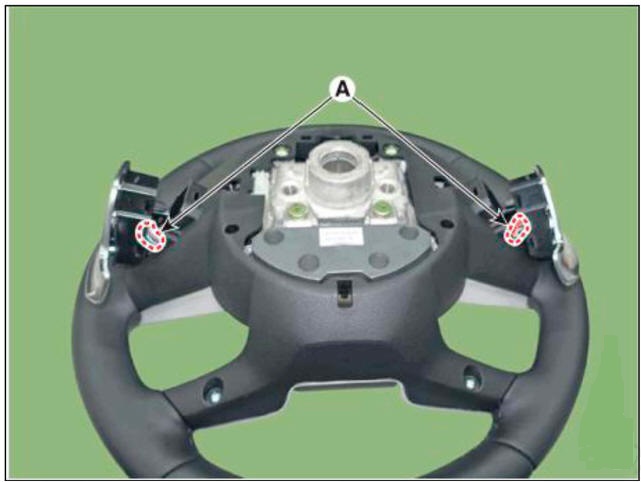
- Loosen mounting screws and then disconnect the steering wheel switch connector (A).
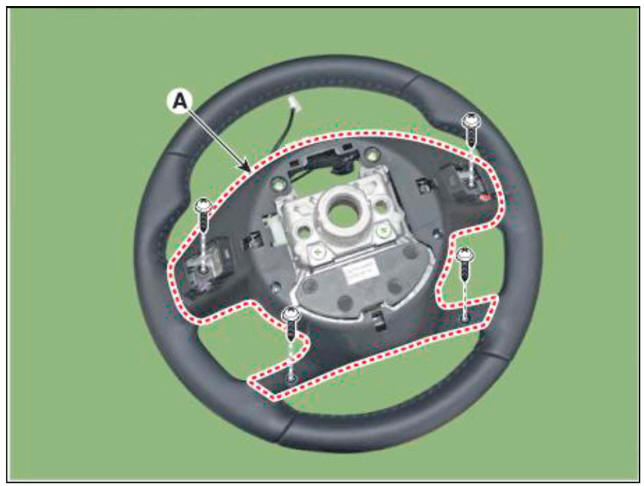
- Remove the steering wheel control siwtch (A) after loosening mounting screws.
Installation
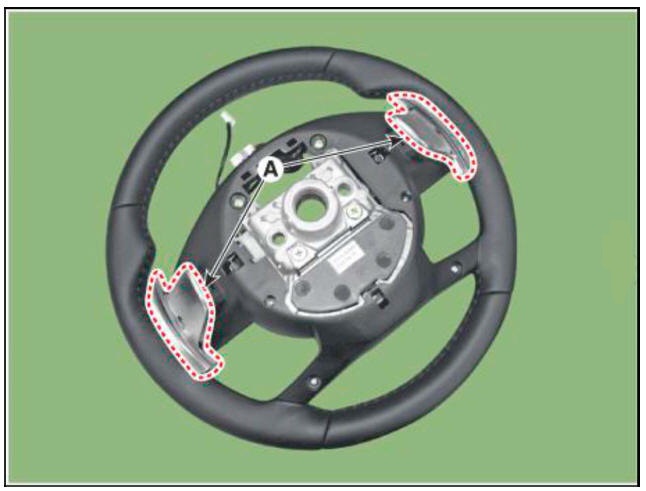
- Install the remote control switch on the steering wheel.
- Install the steering wheel.
- Reconnect the remote control switch connector and airbag connectors.
- Make sure that the switch connector is plugged in properly.
- Check the audio system or radio and USB for normal operation.
- Install the driver airbag module.
- Check the audio system for normal operation.
- Make sure that the switch connector is plugged in properly.
Description
The USB jack on the console upper cover is for customers who like to listen to external portable players like the USB. MP3 through the vehicle's sound system when it is linked to this jack. The customer has this added option.
Removal
- When removing with a flat-tip screwdriver or remover, wrap protective tape around the tools to prevent damage to components.
- Put on gloves to prevent hand injuries.
- Disconnect the negative (-) battery terminal.
- Using a flat-head screwdriver, remove the floor console tray assembly (A).
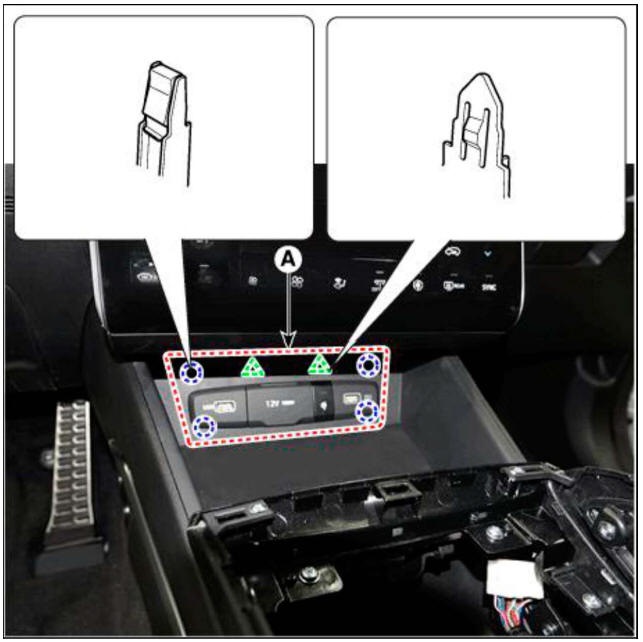
- Remove the USB (A) by pushing hooks in the direction of the arrow as lillustration below

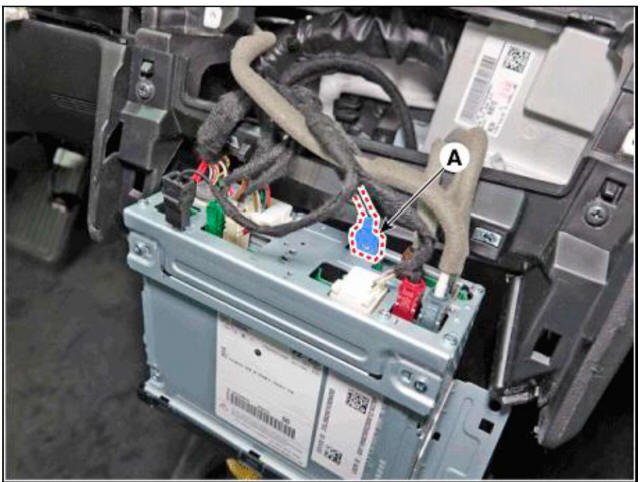
- Remove the audio unit.
(Refer to Body - "Audio Unit")
- Remove the USB after disconnect the USB connector (A).
Installation
- Install the USB.
- Install the floor console tray assembly.
- Connect the negative (-) battery connector.
- Make sure that the switch connector is plugged in properly.
- Check the audio system or Radio and USB for normal operation.
READ NEXT:
 Monitor cover
Remove the front monitor lower cover after disconnecting the mood lamp
connector
Remove front monitor side cover (A) and (B).
Remove the front monitor assembly (A).
Remove the front monitor assembly (A) aft
Multifunction Switch - Components
Steering column
Lighting swtich
Wiper switch
Clock spring
Steering wheel
Driver airbag (DAB)
Specifications
Removal
Disconnect the negative (-) battery terminal.
Remove the clock spring.
(Refer to Restraint - "
SEE MORE:
Cylinder Block - Removal and Installation
Remove the cylinder head.
(Refer to Cylinder Head Assembly - "Cylinder Head")
Remove the RH water jacket insert and LH water jacket insert (A).
WARNING
When removing the water jacket insert, Be careful not to damage the
Accelerator Position Sensor (APS)
Description
Accelerator Position Sensor (APS) is installed on the accelerator pedal
module and detects the rotation
angle of the accelerator pedal. The APS is one of the most important sensors in
engine control system,
so it consists of the tw
Information
- Home
- Hyundai Tucson - Fourth generation (NX4) - (2020-2023) - Owner's Manual
- Hyundai Tucson - Fourth generation (NX4) - (2020-2023) - Workshop Manual
