Hyundai Tucson: Rear Brake Disc
Rear Brake Disc Thickness Check
Inspection
- Check the brake disc for damage and cracks.
- Remove all rust and contamination from the surface, and measure the disc thickness at 24 points, at least, of same distance (5mm) from the brake disc outer circle.
Rear brake disc thickness
- Standard (Solid disc): 10 mm (0.39 in)
- Service Limit: 8.0 mm (0.32 in)
Difference in thickness of each measuring part: Less than 0.005 mm (0.0002 in) (Circumferential direction), 0.01 mm (0.0004 in) (Radial)
- If wear exceeds the limit, replace the discs and pad assembly left and right of the vehicle.
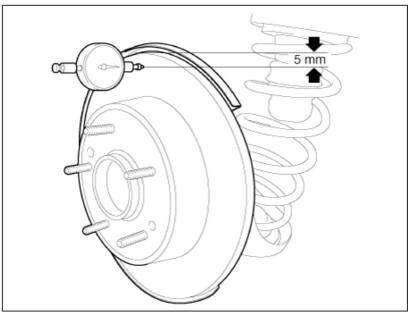
Rear Brake Disc Runout Check
- Place a dial gauge about 5mm (0.20 in.) from the outer circumference of the brake disc, and measure the runout of the disc.
Brake disc runout Limit: 0.05 mm (0.0020 in.) or less (new one)
- If the runout of the brake disc exceeds the limit specification, replace the disc, and then measure the runout again.
- If the runout cannot be corrected by changing the position of the brake disc, replace the brake disc.
Installation
- Install in the reverse order of removal.
- When istalling. press and rotate the piston into the caliper body until it is fully retracted.
- After installation, bleed the brake system.
(Refer to Brake System - "Brake Bleeding Procedures")
- After installing the rear caliper, perform "Brake Pad Replacement Mode" using the self-diagnosis. EPB Apply
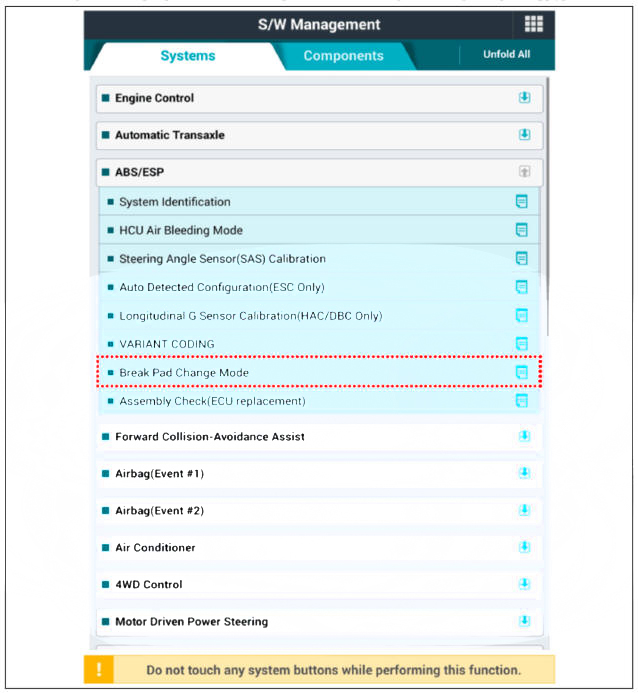
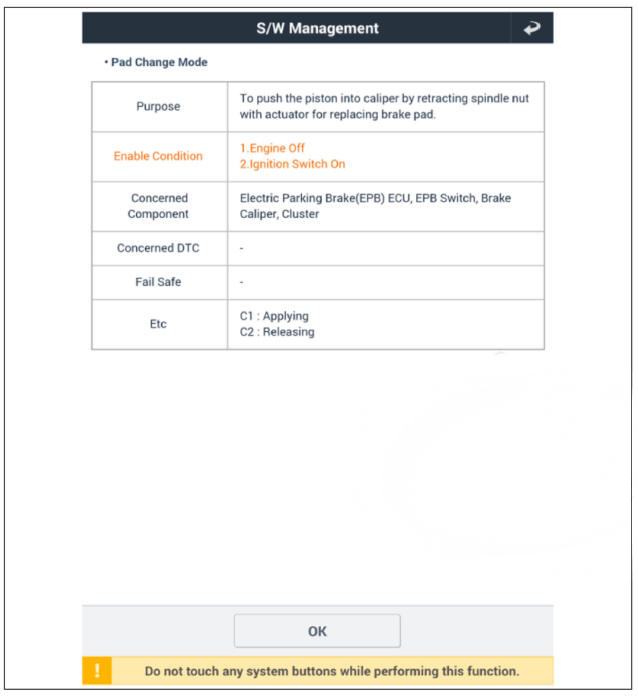
- Select CI (Apply) on the screen below.
- After replacing the rear caliper, make sure that the caliper is installed correctly by performing "Check assembling (ECU replaced)" from the option

- After disassembling/assembling the caliper body or replacing the brake caliper, parking brake cable or brake disc, re-adjust the parking brake. EPB None Apply
- Apply the parking brake several times and check for normal operation.
- Check if the parking brake is operating normally.
Replacement
WARNING
Be careful not to damage the parts located under the vehicle (floor under cover, fuel filter, fuel tank and canister) when raising the vehicle using the lift.
(Refer to General Information - "Lift and Support Points")
READ NEXT:
 Front Brake Pad
Loosen the wheel nuts slightly.
Raise the vehicle, and make sure it is securely supported.
Remove the front wheel and tire (A) from front hub
WARNING
Be careful not to damage the hub bolts when removing the front wheel
and tire (A).
Rear Brake Pad
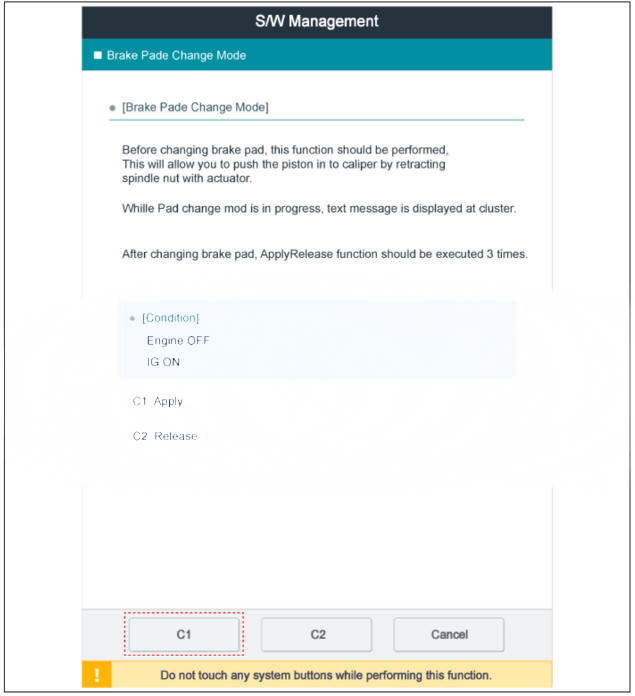
After installing the rear caliper, perform "Brake Pad Replacement Mode"
using the self-diagnosis. EPB Apply
Select C2 (Release) on the screen below.
After disassembling/assembling the caliper body or replacing
Brake Pedal
Components
Brake member assembly
Stop lamp switch
Brake pedal arm assembly
Brake pedal pad
Schematic Diagram
System circuit diagram
Terminal Function
Adjustment
Turn ignition switch OFF and disconnect the negat
SEE MORE:
Downhill Brake Control (DBC)
Downhill Brake Control assists the driver
to descend down a steep hill without
having to depress the brake pedal.
The system automatically applies the
brakes to maintain vehicle speed below
a certain speed and allows the driver
to concent
Forward Collision-Avoidance Assist (FCA) (Sensor fusion)
Basic function
Forward Collision-Avoidance Assist is
designed to help detect and monitor the
vehicle ahead or help detect a pedestrian
or cyclist in the roadway and warn the
driver that a collision is imminent with
a warning message and an
Information
- Home
- Hyundai Tucson - Fourth generation (NX4) - (2020-2023) - Owner's Manual
- Hyundai Tucson - Fourth generation (NX4) - (2020-2023) - Workshop Manual
