Hyundai Tucson: General Information
Troubleshooting
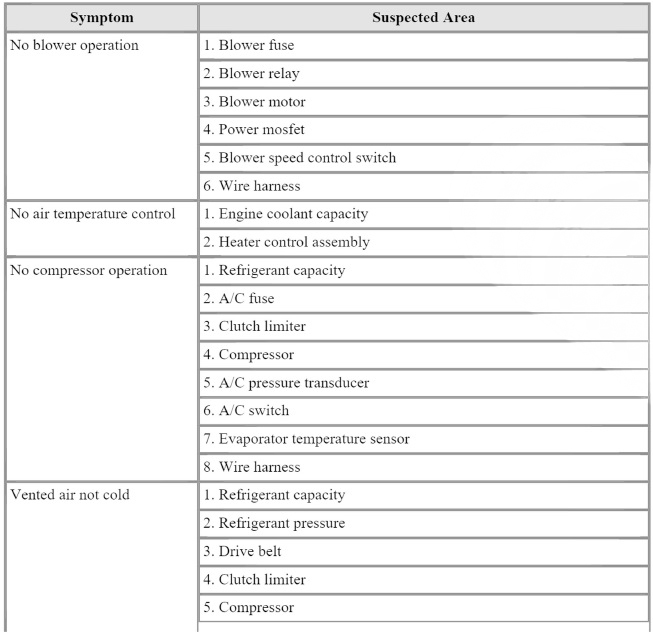
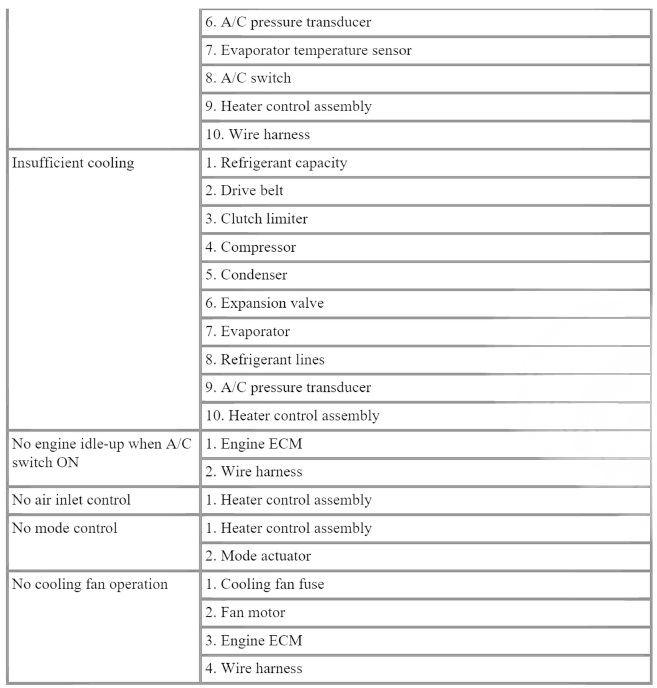
Problem Symptoms Table
Before replacing or repairing air conditioning components, first determine if the malfunction is due to the refrigerant charge, air flow or compressor.
Use the table below to help you find the cause of the problem. The numbers indicate the priority of the likely cause of the problem. Check each part in order. If necessary, replace these parts.
After correcting the malfunction, check the complete system to ensure that performance is satisfactory.
Standard
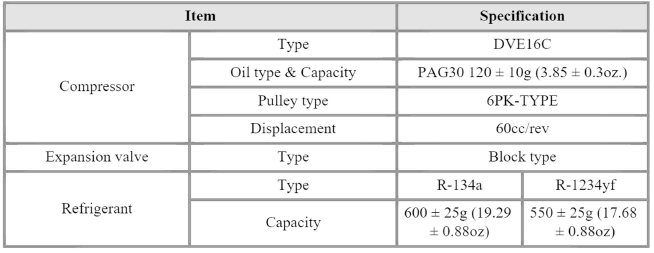
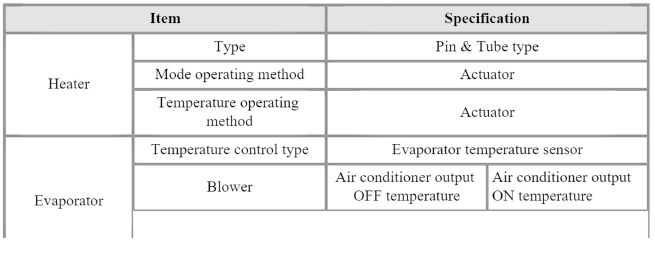
Specification
Air Conditioner
Blower Unit
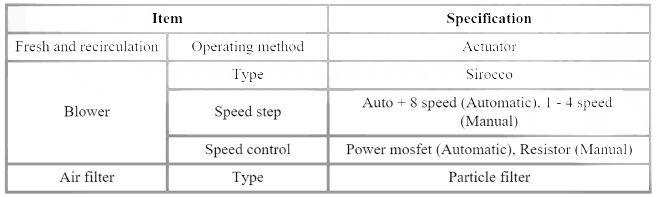
Heater and Evaporator Unit

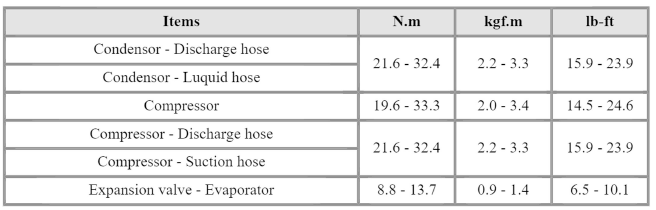
Tightening Torques
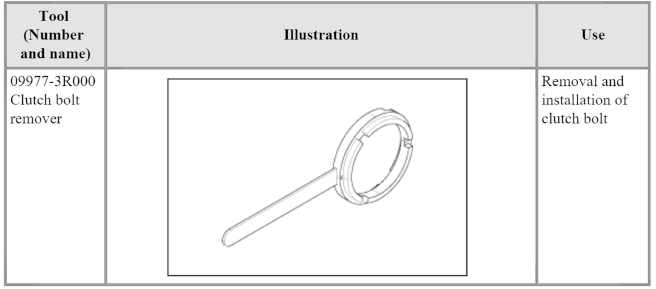
Special Tools
READ NEXT:
 Air Conditioning System - Instructions (R- 134a)
When Handling Refrigerant
R-134a liquid refrigerant is highly volatile. A drop on the skin of your
hand could result in localized
frostbite. When handling the refrigerant, be sure to wear gloves.
It is standard practice to wear goggles or
Air Conditioning System - Instructions (R- 1234yf)
WARNING
The R-1234yf liquid refrigerant is a flammable gas. The gas
reduces oxygen available for
breathing and causes asphyxiation in high concentrations. The victim will
not realize that he/she
is suffocating.
Inhalation may cause ce
SEE MORE:
Rear Axle Assembly- Removal- 2WD
Components
Rear brake disc
Rear hub assembly
Dust cover
Rear carrier assembly
Removal
2WD
WARNING
When lifting a vehicle using a lift, be careful not to damage the
lower parts of the vehicle (floor under cover,
fuel filter, fue
System operation
Ventilation
Set the mode to the
position.
Set the air intake control to the
outside (fresh) air position.
Set the temperature control to the
desired position.
Set the fan speed control to the
desired speed.
Heating
Information
- Home
- Hyundai Tucson - Fourth generation (NX4) - (2020-2023) - Owner's Manual
- Hyundai Tucson - Fourth generation (NX4) - (2020-2023) - Workshop Manual
