Hyundai Tucson: Rear Axle Assembly- Removal- 2WD
Components
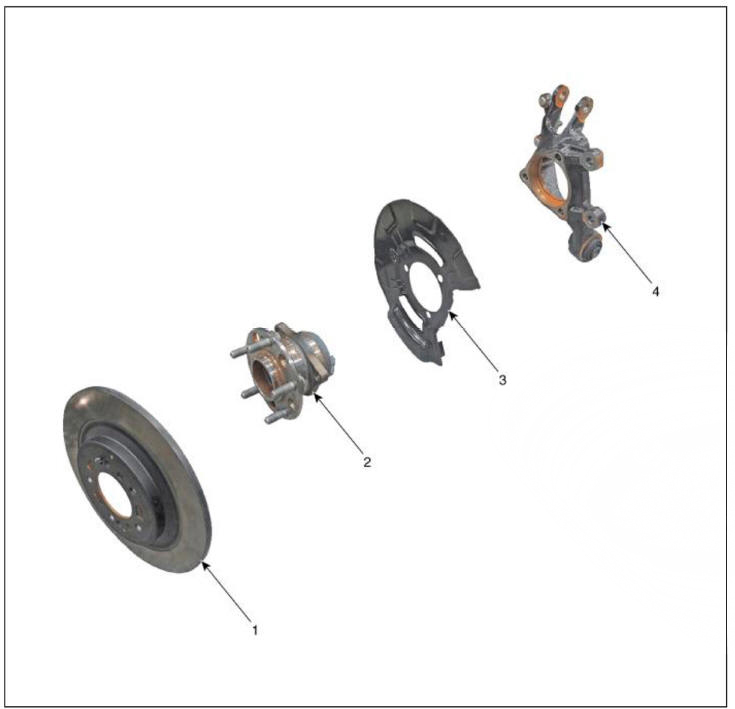
- Rear brake disc
- Rear hub assembly
- Dust cover
- Rear carrier assembly
Removal
2WD
WARNING
When lifting a vehicle using a lift, be careful not to damage the lower parts of the vehicle (floor under cover, fuel filter, fuel tank, canister).
(Refer to General Information - "Lift Point")
- Loosen the rear wheel nuts slightly.
Raise the vehicle, and make sure it is securely supported.
- Remove the rear wheel and tire.
(Refer to Suspension System - "Wheel")
- Remove the rear brake caliper
(Refer to Brake System - "Rear Disc Brake")
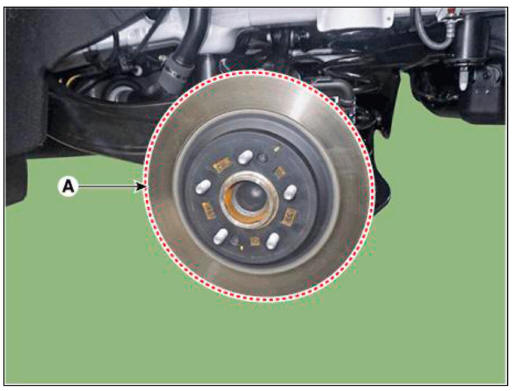
- Remove the rear brake disc (A) after loosening the screw.
Tightening torque : 4.9 - 5.9 N.m (0.5 - 0.6 kgf.m, 3.6 - 4.3 lb-ft)
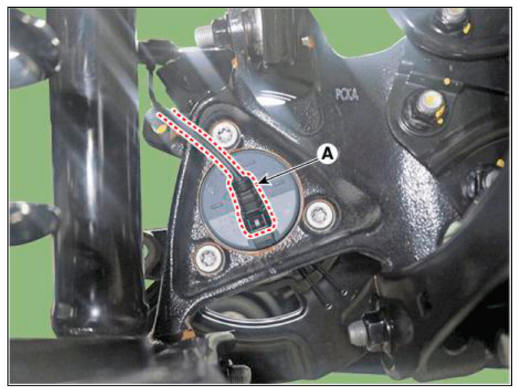
- Disconnect the rear wheel speed sensor connector (A).
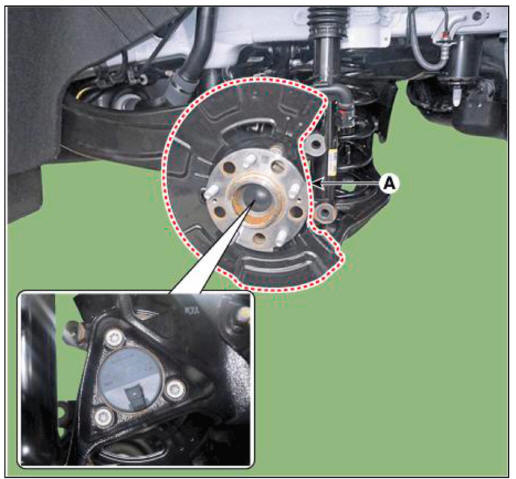
- Remove the rear hub bearing & dust cover (A) after loosening the mounting bolts.
Tightening torque: 98.0 - 117.6 N.ni (10.0 - 12.0 kgf.m, 72.3 - 86.7 lb-ft)
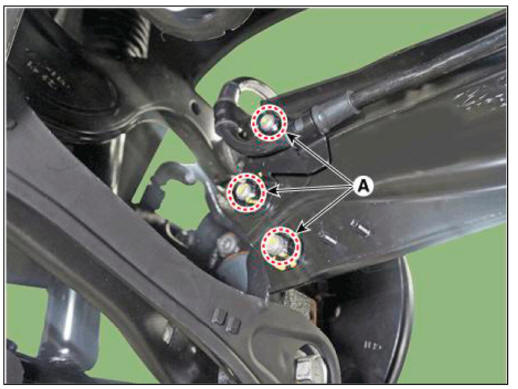
- Remove the rear upper arm from the rear carrier after loosening the mounting bolt and nut (A).
Tightening torque : 137.2- 156.9 N.m (14.0- 16.0 kgf.m, 101.2 - 115.7 lb-ft)

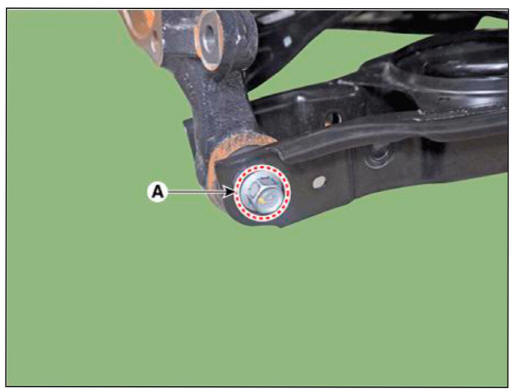
- Remove the trailing arm after loosening the mounting nuts (A).
Tightening torque: 98.0 - 117.6 N.ni (10.0 - 12.0 kgf.m, 72.3 - 86.7 lb-ft)
- Remove the rear assist arm after loosening the mounting bolt and nut (A).
Tightening torque : 156.9- 176.5 N.m( 16.0- 18.0 kgf.m, 115.7-130.2 lb-ft)

- Remove the rear lower arm after loosening the mounting bolt and nut (A).
Tightening torque : 137.2 - 156.9 N.m (14.0- 16.0 kgf.m, 101.2- 115.7 lb-ft)
- Remove the rear knuckle (A).

READ NEXT:
 Rear Axle Assembly - Removal - 4WD
WARNING
When lifting a vehicle using a lift, be careful not to damage the
lower parts of the vehicle (floor under cover,
fuel filter, fuel tank, canister).
(Refer to General Information - "Lift Point")
Loosen the rear wheel nuts
Rear Driveshaft Assembly- Removal
Components
Rear drive shaft
Removal
WARNING
When lifting a vehicle using a lift, be careful not to damage the
lower parts of the vehicle (floor under cover,
fuel filter, fuel tank, canister).
(Refer to General Information - "L
SEE MORE:
Before driving
Before entering the vehicle
Be sure all windows, outside mirror(s),
and outside lights are clean and
unobstructed.
Remove frost, snow, or ice.
Visually check the tires for uneven
wear and damage.
Check under the vehicle for any sign
Warning Lamp
Activation
Warning Lamp Behavior after Ignition On
As soon as the operating voltage is applied to the SRSCM ignition input, the
SRSCM activates the
warning lamp for a LED lamp check.
The lamp shall turn on for 6 seconds during the initialization phase an
Information
- Home
- Hyundai Tucson - Fourth generation (NX4) - (2020-2023) - Owner's Manual
- Hyundai Tucson - Fourth generation (NX4) - (2020-2023) - Workshop Manual
