Hyundai Tucson: Oil Hydraulic Motor (Actuator) Inspection Procedure
Removal
- Remove the coupling assembly.
(Refer to 4 Wheel Drive (4WD) System - "Direct Electro Hydraulic Actuator Coupling")
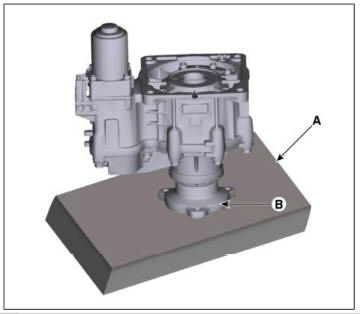
- Keep going perpendicular state after remove the coupling assembly.
WARNING
- Keep going perpendicular state during remove (install) the
hydraulic motor (acmators).
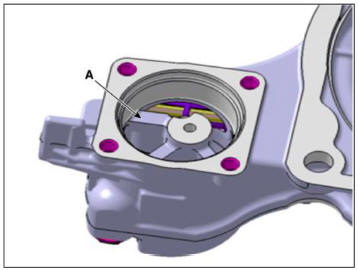
- Use a tool (A) that allows the auxiliary operator to hold or seat the coupling in a vertical position.
- So that the input shaft side (B) is not damaged.
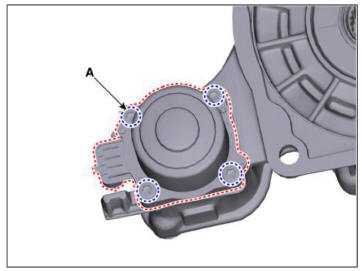
- Remove the hydraulic motor (A) after loosening bolts with hex wrench.
WARNING
- Remove the hydraulic motor (actuators) after dropping residual
oil as much as possible inside the coupling, (abut 5-10
sec)
Installation
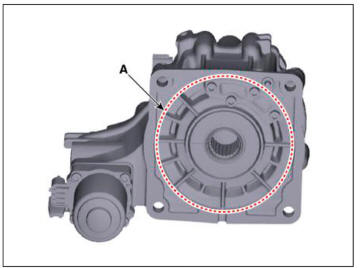
- Before installation, wipe the surface with a clean cloth.
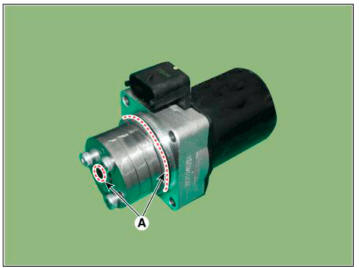
- Check the O-rings (A) ot the new hydraulic motor (actuators).
WARNING
You have to prevent any dust from entering inside hydraulic motors (acmators) and housing.
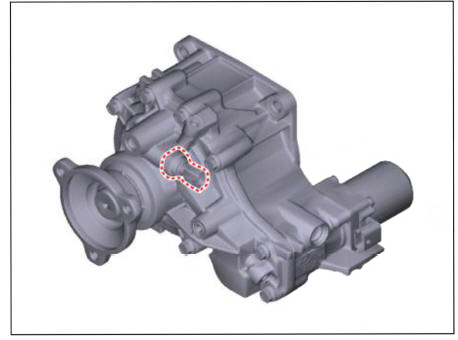
- Tighten the bolts after install the hydraulic motor.
WARNING
- When installing, motor connector (A) has to toward in the direction of outside of the coupling.
Tightening torque:
9.8 - 11.7 N m (1.0 - 1.2kgf m, 7.2-8.6 lb ft)
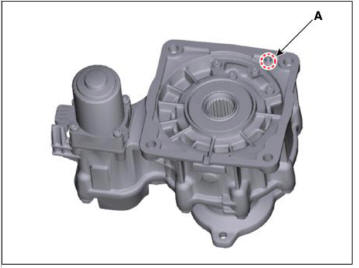
WARNING
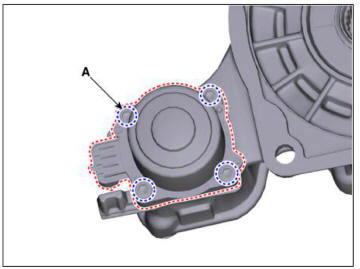
- When installing, oil can be reflux by the pressure in air
breather hole (A).
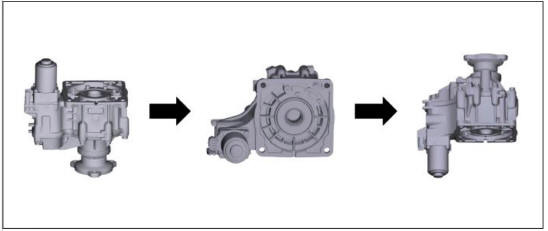
- Change direction in the direction of the arrow and lay on the floor as shown in the illustration.
*The reflux oil will flow to the bottom.
You have to prevent additional backflow in according to order as
shown in the illustration.
- Wipe the flowed oil to around the surface with a clean cloth.
- Install the coupling assembly.
(Refer to 4 Wheel Drive (4WD) System - "Direct Electro Hydraulic Actuator Coupling")
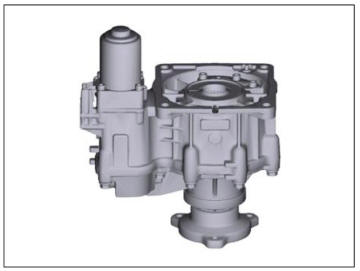
Description
The 4WD ECU makes a Motor Pump(Actuator) turn round for generating an oil pressure. And then it presses a multiple disk clutch and transfers the generated torque into rear wheels. Its torque value varies according to a pressure status.
Component location
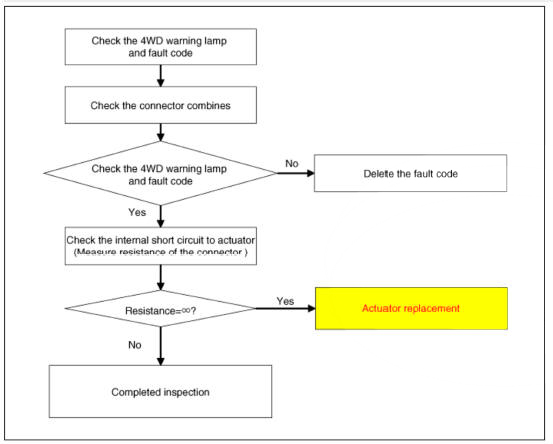
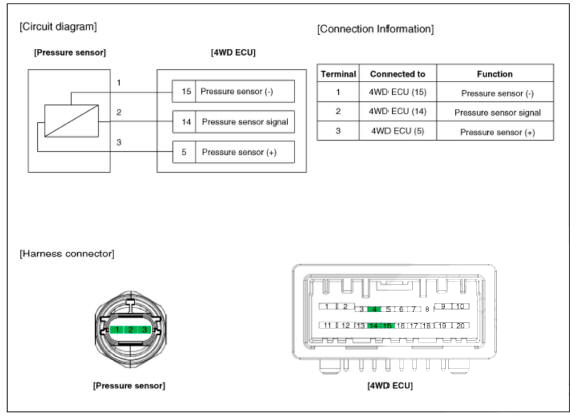
Circuit Diagram
Inspection
READ NEXT:
 Measuring the resistance of the pressure sensor
Turn ignition switch OFF.
Disconnect the pressure sensor connector.
Measure resistance between sensor terminal and terminal.
Check the measured resistance. (Refer to table)
Table 1
Removal
Remove the coupling assembly.
(Refer to
Measuring the resistance of the pressure sensor- Adjustment
Adjustment
Description
The friction material inside the coupling will degrade over time. Therefore,
corresponding compensation values must be referenced
and entered after replacing the controller or the coupling.
Compensation Requirement and Pr
General Information
Trouble
shooting
Area of
leakage
occuring/ Area/ Type
(1)
Connecting
part/under
part of
transfer case
(2)
Connecting
part of
transmission/ / A
(1) Connecting
part/under
part of
transfer case
(2)
Connecting
part of
transmission
(
SEE MORE:
Rear seat back cover - RH
Remove the rear seat back assembly RH,
(Refer to Rear Seat - "Rear Seat Assembly")
Loosen the mounting screw, remove the rear seat slide knob (A).
Loosen the mounting screws, press the lock pin (B) and remove the rear
se
Engine Oil
Check the engine oil quality.
Check the oil deterioration, entry of water, discoloring of thinning.
If the quality is visibly poor, replace the oil.
Check the engine oil level.
After warning up the engine and then 10 minutes after the
Information
- Home
- Hyundai Tucson - Fourth generation (NX4) - (2020-2023) - Owner's Manual
- Hyundai Tucson - Fourth generation (NX4) - (2020-2023) - Workshop Manual
