Hyundai Tucson: General Information
Hyundai Tucson - Fourth generation (NX4) - (2020-2023) - Workshop Manual / Wheel Drive (4WD) System / General Information
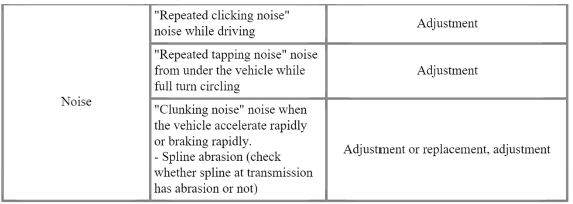
Trouble shooting
Area of leakage occuring/ Area/ Type
(1) Connecting part/under part of transfer case
(2)
Connecting
part of
transmission/ 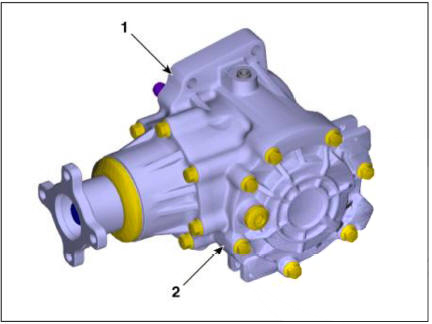 / A
/ A
(1) Connecting
part/under
part of
transfer case
(2)
Connecting
part of
transmission
(3) Assembly
part of drive
shaft/ 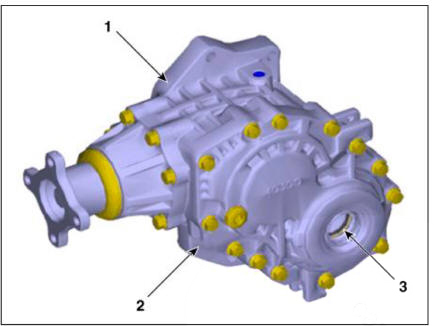 / B
/ B
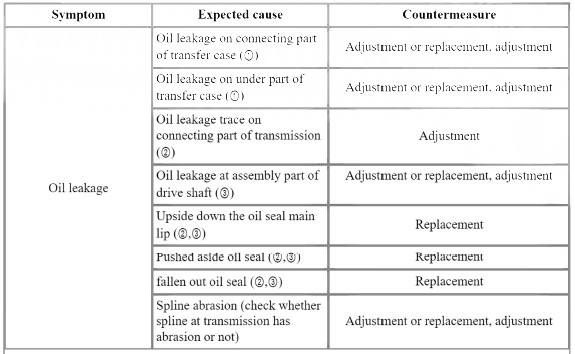
WARNING
* Range of "adjustment"
- Clean out the oil or trace of grease leakage
- Check whether engine or transmission has oil leakage and oil flow down or not.
- Check the parts that is related to trouble area.
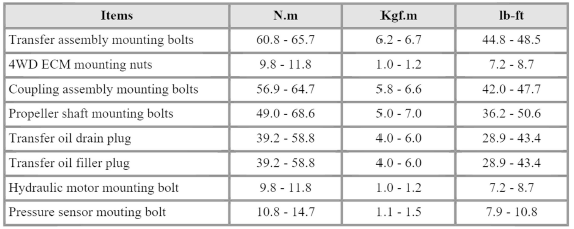
Specifications
Tightening Torques
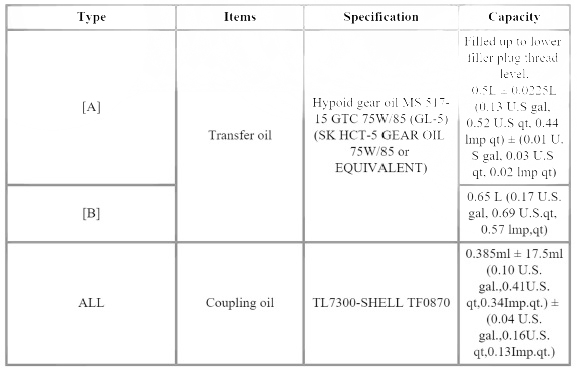
Lubricants
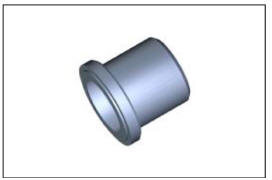
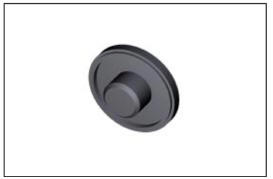
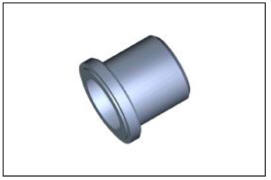
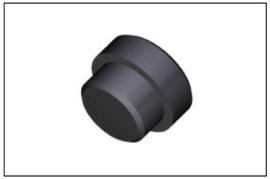
Special Service Tools
Type/ Tools (Number and name)/ Illustration/ Use
A
- Oil seal
installer
09473-/
 /
/
- HandleUsed for
installing the
transfer case
oil seal
(Driveshaft
side)
(Used with
the handle)
09231-
H1100/
 / Used
for
installing the
transfer case
oil seal
(Used with
the oil seal
installer)
/ Used
for
installing the
transfer case
oil seal
(Used with
the oil seal
installer)
B
- Oil seal #1
installer
0K473-
P2100/
installing the
transfer case
oil seal
(Driveshaft
side)
(Used with
the handle)/
 / Used for
installing the
transfer case
oil seal #1
(Driveshaft
side)
(Used with
the handle)
/ Used for
installing the
transfer case
oil seal #1
(Driveshaft
side)
(Used with
the handle) - Oil seal #2
installer
0K473-
P2200/
 /
Used for
/
Used for - Oil seal #3
installer
0K473-
P2300/
 /
Used for
installing the
transfer case
oil seal #3
(Driveshaft
side)
(Used with
the handle)
/
Used for
installing the
transfer case
oil seal #3
(Driveshaft
side)
(Used with
the handle) - Oil seal
installer
0K473-
P2400/
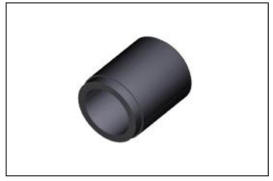 /
Used for
installing the
transfer case
(Transaxle
side)
(Used with
the handle)
/
Used for
installing the
transfer case
(Transaxle
side)
(Used with
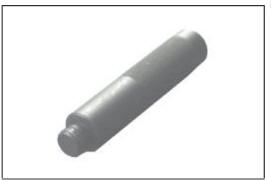
the handle) - Handle
09231-
H1100/
 /
Used for
installing the
transfer case
oil seal
(Used with
the oil seal
installer)
/
Used for
installing the
transfer case
oil seal
(Used with
the oil seal
installer)
READ NEXT:
 Transfer Assembly- Inspection
Inspection
Remove the engine room under cover.
(Refer to Engine Mechanical System - "Engine Room Under Cover")
Loosen the oil filler plug (A).
A Type
B Type
Check the oil level.
WARNING
Oil level must be up to fil
Transfer Assembly- Removal
Removal
A Type
Remove the engine room under cover.
(Refer to Engine Mechanical System - "Engine Room Under Cover")
Remove the front driveshaft assembly. Right side
(Refer to Driveshaft and Axle - "Front Driveshaft")
SEE MORE:
Brake fluid
Checking the brake fluid level
Check the fluid level in the reservoir
periodically. The fluid level should be
between MAX and MIN marks on the side
of the reservoir.
Before removing the reservoir cap and
adding brake fluid, clean the area
Seat warmers
Seat warmers are provided to warm the
seats during cold weather.
During mild weather or under conditions
where the operation of the seat warmer
is not needed, keep the seat warmers
OFF.
WARNING
The seat warmers can cause a SERIOUS
BURN, eve
Information
- Home
- Hyundai Tucson - Fourth generation (NX4) - (2020-2023) - Owner's Manual
- Hyundai Tucson - Fourth generation (NX4) - (2020-2023) - Workshop Manual
