Hyundai Tucson: Fender
Component Location
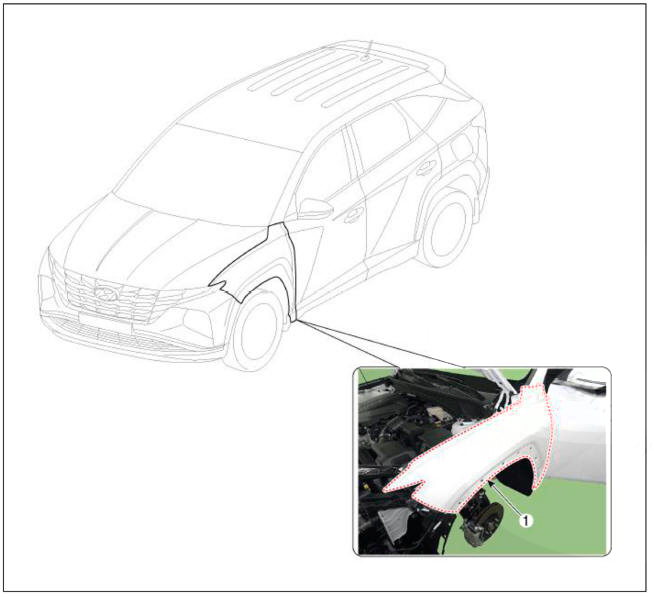
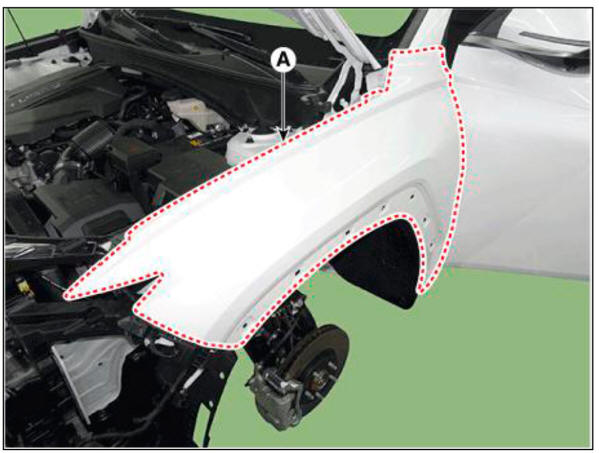
- Fender assembly
Replacement
WARNING
- When removing the fender, wrap protective tape around a screwdriver or remover not to damage components
- Put on gloves to prevent hand injuries
- Remove the front bumper.
(Refer to Front Bumper - "Front Bumper Assembly")
- Remove the head lamp.
(Refer to Body Electrical System - "Head Lamp")
- Remove the front wheel guard.
(Refer to Body Side Molding - "Front Wheel Guard")
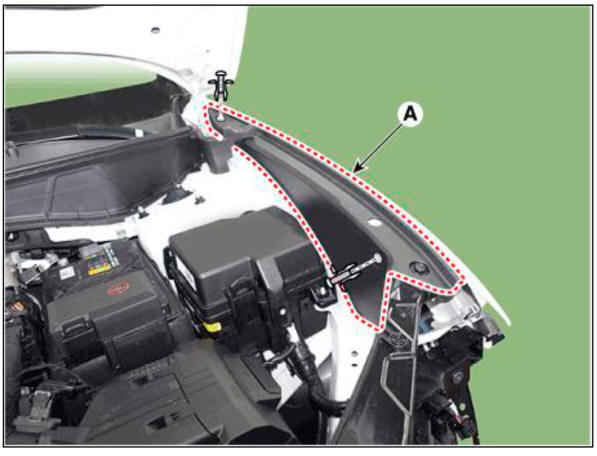
- Loosen the mounting clips, remove the fender apron cover (A).
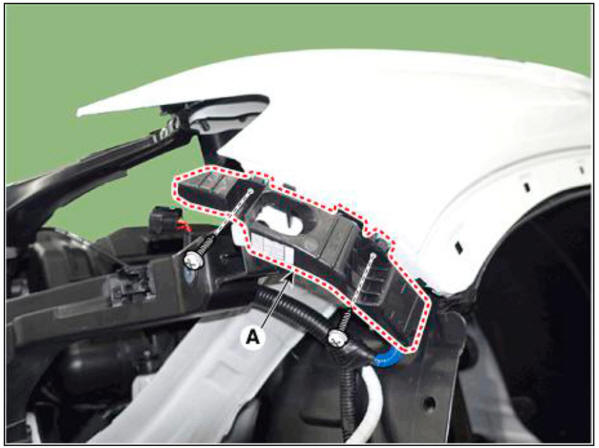
- Loosen the mounting screws and then remove the front bumper side mounting bracket (A).
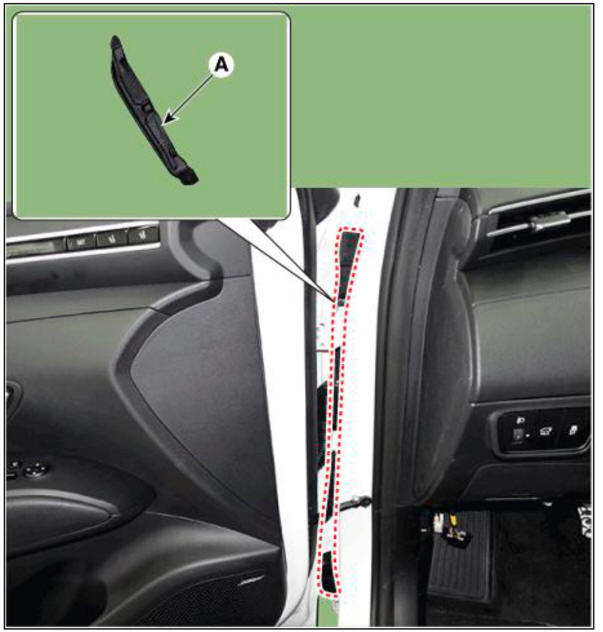
- Remove the fender insulator (A).
- Loosen the mounting bolts remove the fender assembly (A).
Tightening torque : 7.7 - 11.6 N.m (0.8 - 1.2 kgf.m, 5.8 - 8.7 lb-ft)
- To install, reverse removal procedure.
WARNING
Replace any damaged clips (orpin-type retainers).
READ NEXT:
 Hood
Hood
Adjustment
After loosening the hinge (A) mounting bolt, adjust the hood (B) by
moving it up and down or from side to side and tighten
the bolt.
Adjust the hood height by moving the hood overslam bumpers (C) up and
down.
After loosenin
Tail Gate - Adjustment
Place the car on a flat surface and check whether the body and trunk lid
are well-aligned.
After loosening the tailgate hinge (A) mounting bolt, adjust the
tailgate by moving it up and down or from side to side.
Adjust the gap between th
SEE MORE:
Active Air Flap (AAF) Actuator
Remove the front bumper.
(Refer to Body (Interior and Exterior) - "Front Bumper Cover")
Disconnect the active air flap connector (A).
RH
LH
Remove the active air flap actuator (A) after loosening the mounting
screw
Exterior Bumper Antenna
Disconnect the negative (-) battery terminal.
Lift the vehicle.
Disconnect the antenna connector (A) from the rear bumper.
Remove the antenna (B) after loosening mounting nuts.
Buzzer
Disconnect the negative (-) battery terminal.
Information
- Home
- Hyundai Tucson - Fourth generation (NX4) - (2020-2023) - Owner's Manual
- Hyundai Tucson - Fourth generation (NX4) - (2020-2023) - Workshop Manual
