Hyundai Tucson: Hood
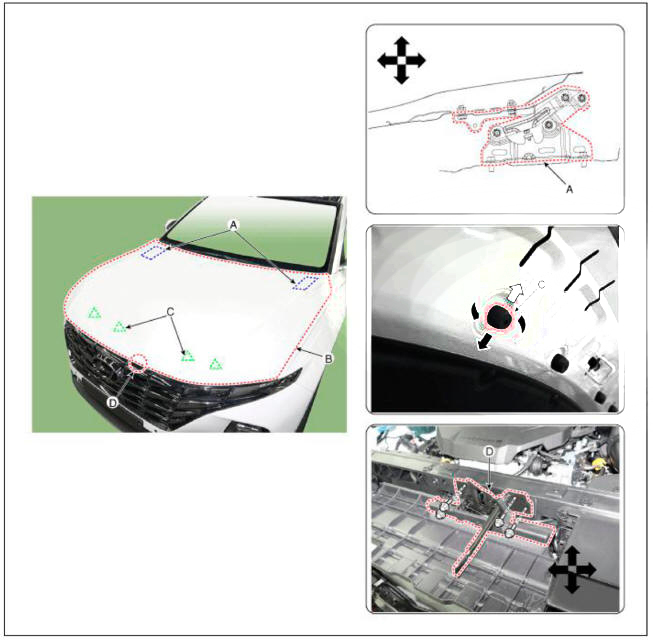
Adjustment
- After loosening the hinge (A) mounting bolt, adjust the hood (B) by moving it up and down or from side to side and tighten the bolt.
- Adjust the hood height by moving the hood overslam bumpers (C) up and down.
- After loosening the hood latch (D) mounting bolts, adjust the latch by moving it up and down or from side to side.
Component Location
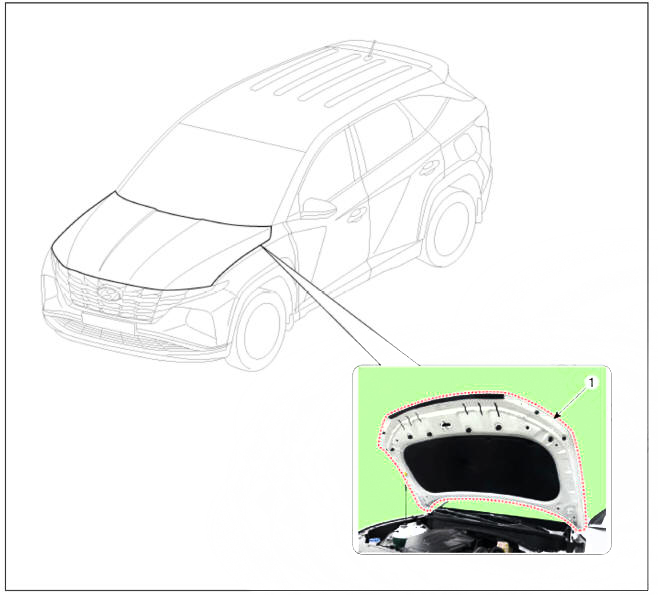
- Hood assembly
Replacement
WARNING
Wear gloves to protect hands from injury.
WARNING
Be care fill not to damage the hood and body.
WARNING
When removing and installing the tailgate, an assistant is needed.
- After loosening the hood hinge (B) mounting bolts, remove the hood assembly (A).
Tightening torque : 21.6 - 26.5 N.m (2.2 - 2.7 kgf.m, 15.9 - 19.5 lb-ft)
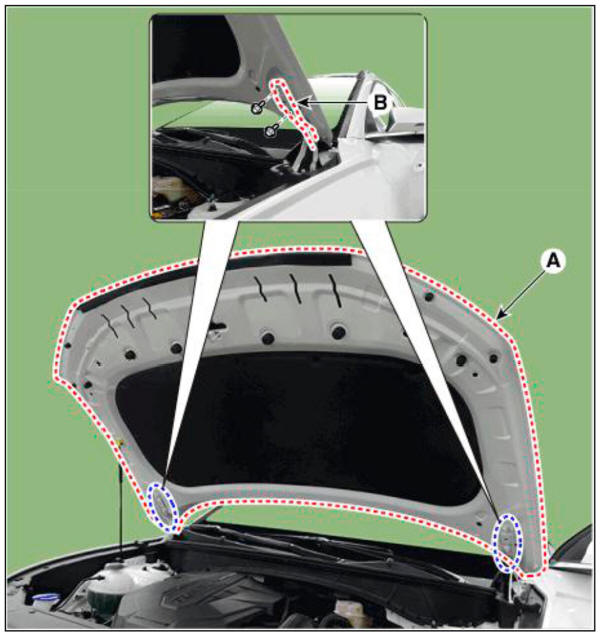
- To install, reverse removal procedure.
WARNING
- Make sure the hood locks / unlocks and opens / closes properly.
- Adjust the hood alignment.
(Refer yo Hood - Repair procedures")
Replacement
WARNING
Be careful not to scratch the hood panel.
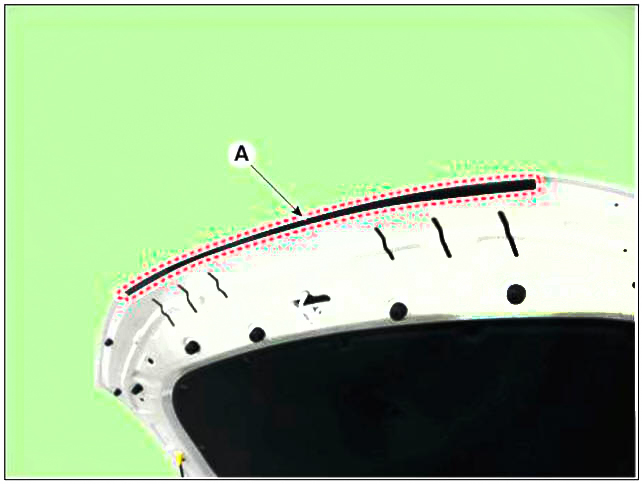
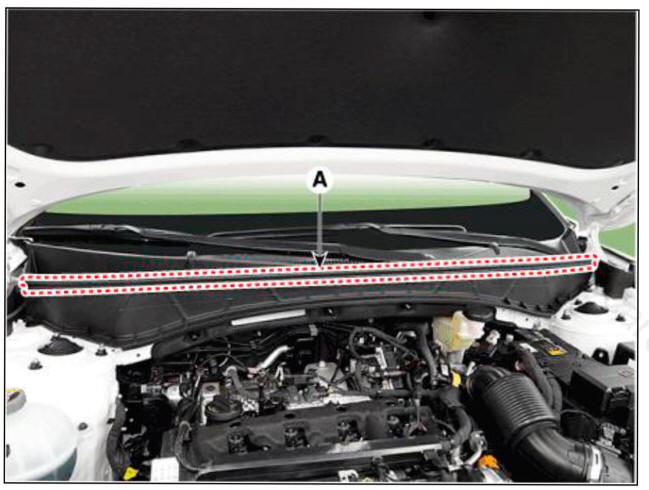
- Using a clip remover, remove the clips and then the hood insulator pad (A).

- To install, reverse removal procedure.
WARNING
Replace any damaged clips (or pin-type retainers).
Replacement
WARNING
Be careful not to damage the hood seal weahterstrip.
- Loosen the mounting clips, remove the hood seal weatherstrip (A).
- To install, reverse removal procedure.
WARNING
Replace any damaged clips (or pin-type retainers).
Replacement
WARNING
Be careful not to scratch the hood weatherstrip.
- Remove the hood weatherstrip (A).
- To install, reverse removal procedure.
WARNING
Replace any damaged clips (or pin-type retainers).
Component Location
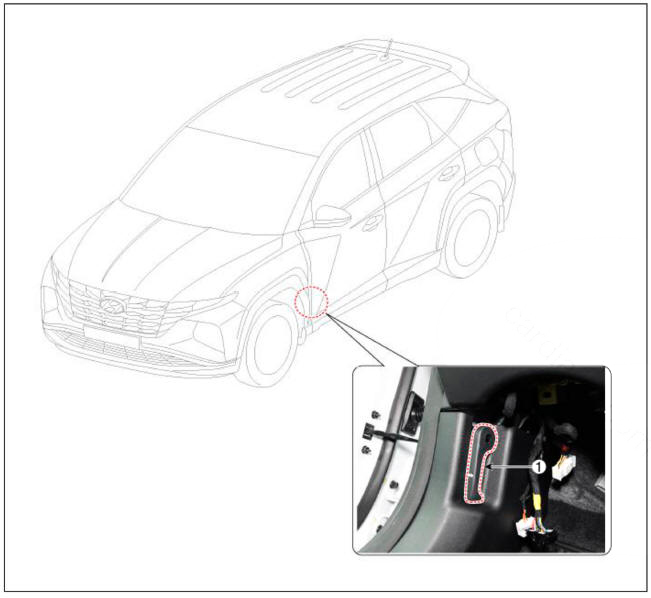
- Hood latch release handle
Replacement
Using a socket, remove the hood release handle (A).
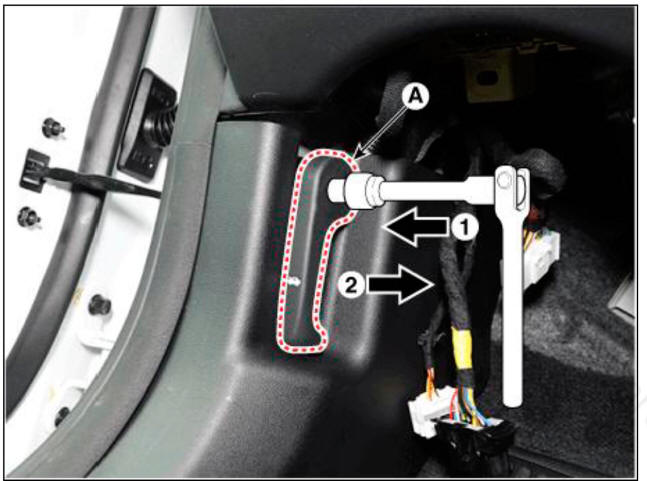
- To install, reverse removal procedure.
WARNING
- Make sure the hood latch cable is connected properly.
- Make sure the hood locks / unlocks and opens / closes properly.
Hood Latch Assembly
Component Location
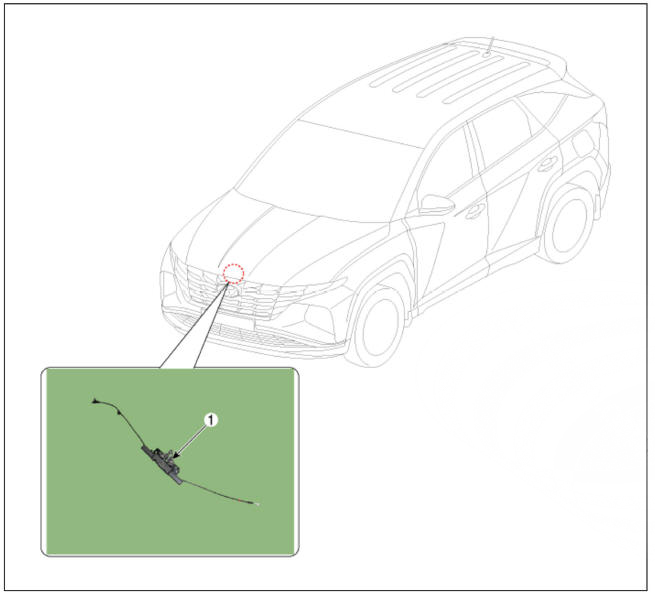
- Hood Latch Assembly
Replacement
WARNING
Put on gloves to prevent hand injuries
- Disconnect the negative (-) battery terminal.
- Remove the front bumper assembly.
(Refer to Front Bumper - "Front Bumper Assembly")
- Disconnect the hood latch cable (A).
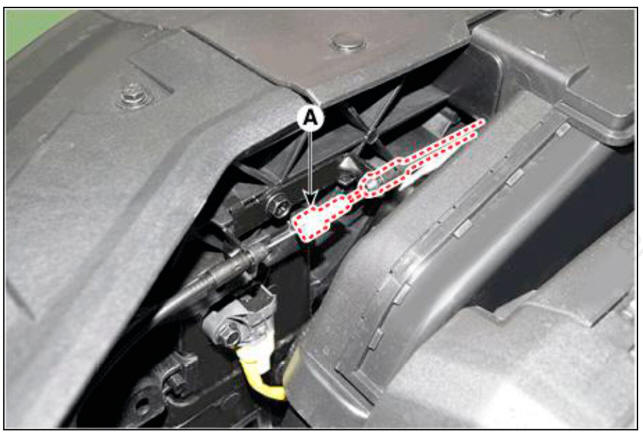
- Press the rock pin to separate the hood latch connector (A) and disconnect wiring clip.
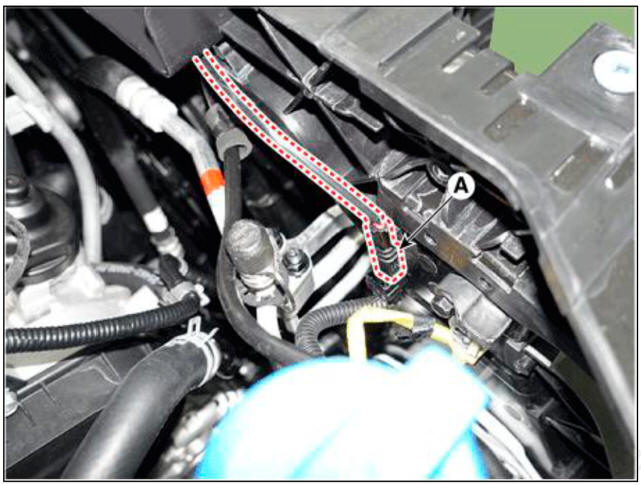
- Loosen the mounting bolts, remove the hood latch assembly (A).
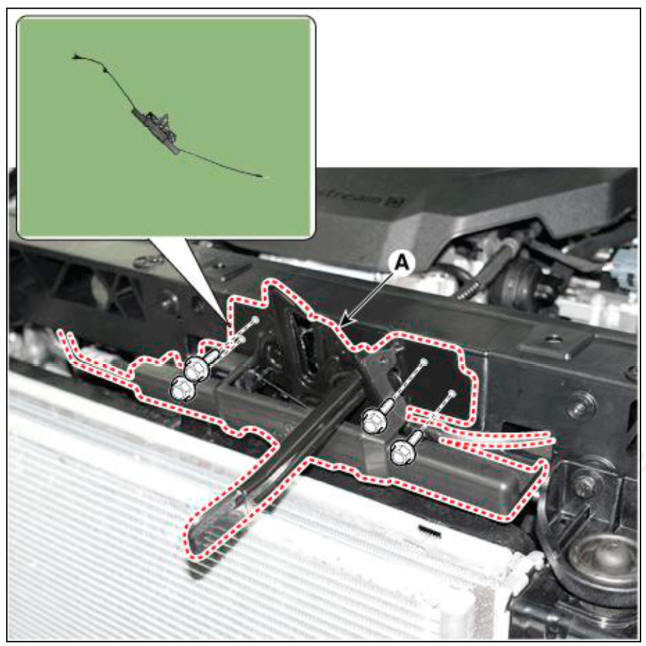
- To install, reverse removal procedure.
WARNING
- Make sure the hood latch release cable is connected properly.
- Make sure the hood locks / unlocks and opens / closes properly.
- Adjust the latch alignment.
(Refer yo Hood - Repair procedures")
READ NEXT:
 Tail Gate - Adjustment
Place the car on a flat surface and check whether the body and trunk lid
are well-aligned.
After loosening the tailgate hinge (A) mounting bolt, adjust the
tailgate by moving it up and down or from side to side.
Adjust the gap between th
Tail Gate - Replacement
Replacement
Tailgate upper trim
WARNING
When removing with a flat-tip screwdriver or remover, wrap
protective tape around the tools to
prevent damage to components.
Put on gloves to prevent hand injuries.
Using a screwdriver or rem
SEE MORE:
Components and Components Location
Components Location
Engine Control Module (ECM)
Mass Air Flow Sensor (MAFS)
Manifold Absolute Pressure Sensor (MAPS)
Intake Air Temperature Sensor (IATS)
Boost Pressure Sensor (BPS)
Engine Coolant Temperature Sensor (E
Cylinder Block - Components
Cylinder block
Water jacket insert (Exhaust)
Water jacket insert (Intake)
Lower crankcase
Oil jet
O-ring
Piston
ring
(No.1
ring
Piston
ring
(No.2
ring)
Piston
ring(Oil
ring)
Piston
Piston
snap ring
Information
- Home
- Hyundai Tucson - Fourth generation (NX4) - (2020-2023) - Owner's Manual
- Hyundai Tucson - Fourth generation (NX4) - (2020-2023) - Workshop Manual
