Hyundai Tucson: Tail Gate - Adjustment
Hyundai Tucson - Fourth generation (NX4) - (2020-2023) - Workshop Manual / Body (Interior and Exterior) / Tail Gate / Tail Gate - Adjustment
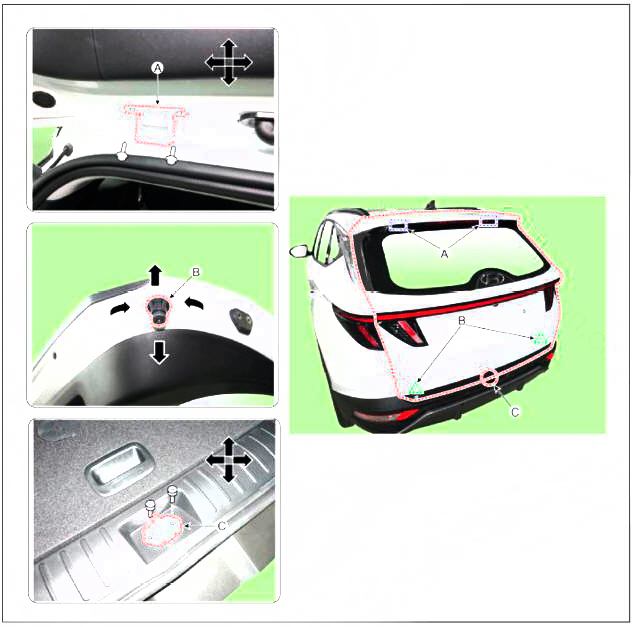
- Place the car on a flat surface and check whether the body and trunk lid are well-aligned.
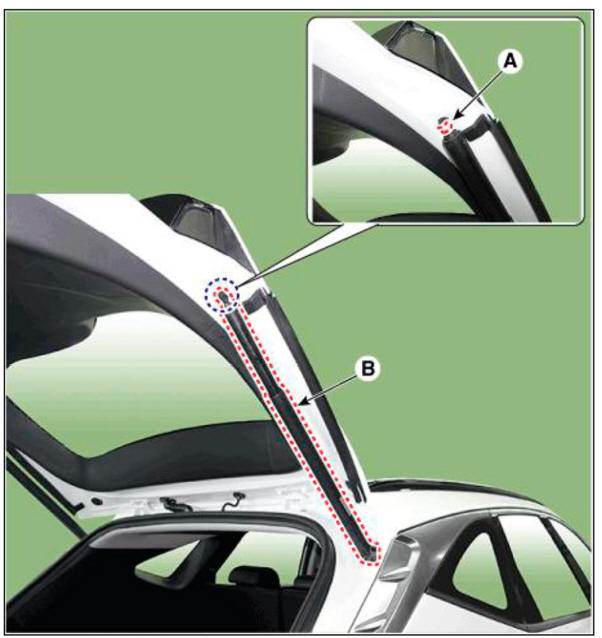
- After loosening the tailgate hinge (A) mounting bolt, adjust the tailgate by moving it up and down or from side to side.
- Adjust the gap between the tailgate and body by turning the tailgate overslam bumpers (B).
- After loosening the tailgate striker (C) mounting bolts, adjust the striker by moving it back and forth or from side to side and then tighten the mounting bolts.
- Make sure the tailgate opens or closes properly.
Component Location
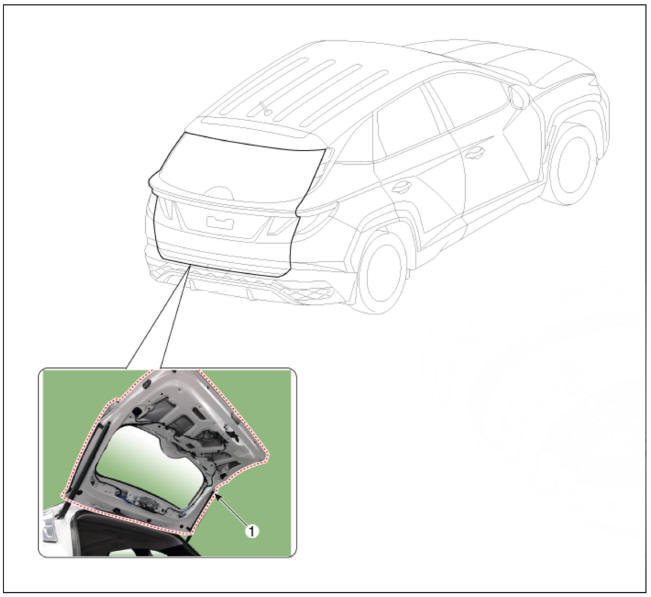
- Tailgate assembly
Replacement
WARNING
Wear gloves to protect hands from injury.
WARNING
Be care fill not to damage the tailgate and body.
WARNING
When removing and installing the tailgate, an assistant is needed.
- Disconnect the negative (-) battery terminal.
- Remove the tailgate lower trim.
(Refer to Tail Gate - "Tail Gate Trim")
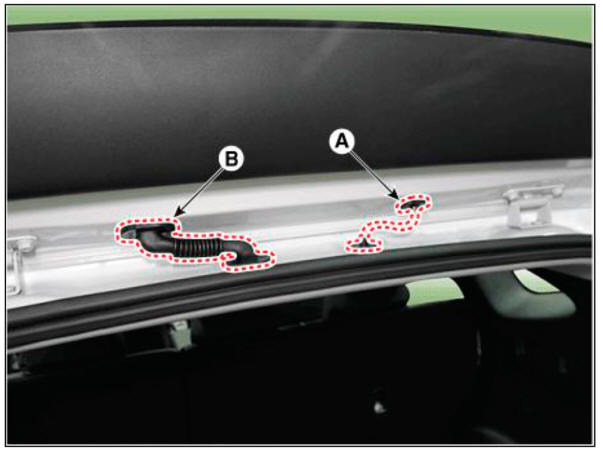
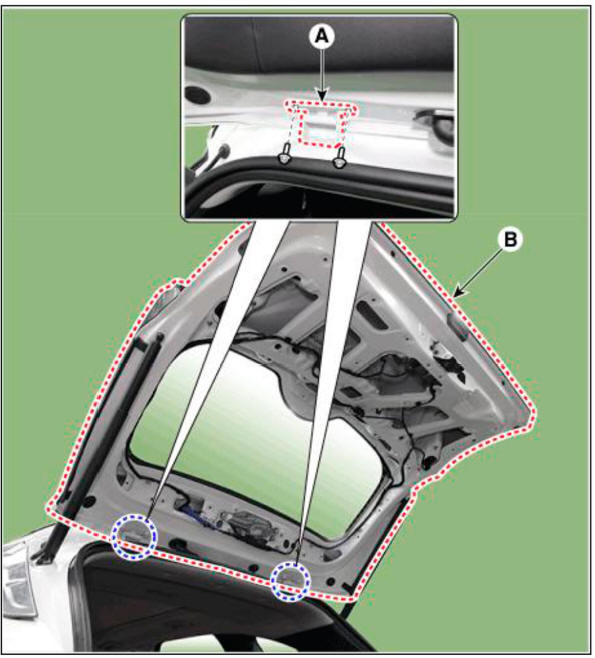
- Disconnect the washer nozzle (A) and connector (B)..
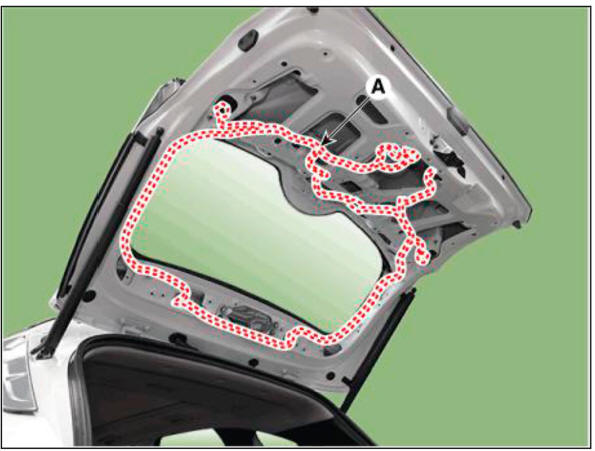
- Disconnect the connectors and tailgate wiring harness (A).
- Using a screwdriver, lift the socket clips (A) up slightly on both ends of the tailgate lifter (B).
- Loosen the tailgate hinge (A) mounting bolts, remove the tailgate assembly (B).
Tightening torque : 21.6 - 26.5 N.m (2.2 - 2.7 kgf.m, 15.9 - 19.5 lb-ft)
- To install, reverse removal procedure.
WARNING
- Make sure the tailgate locks / unlocks and opens / closes properly.
- Make sure the connectors are connected in properly.
- Adjust the tailgate alignment.
(Refer to Tail Gate - "Repair procedures")
Component Location
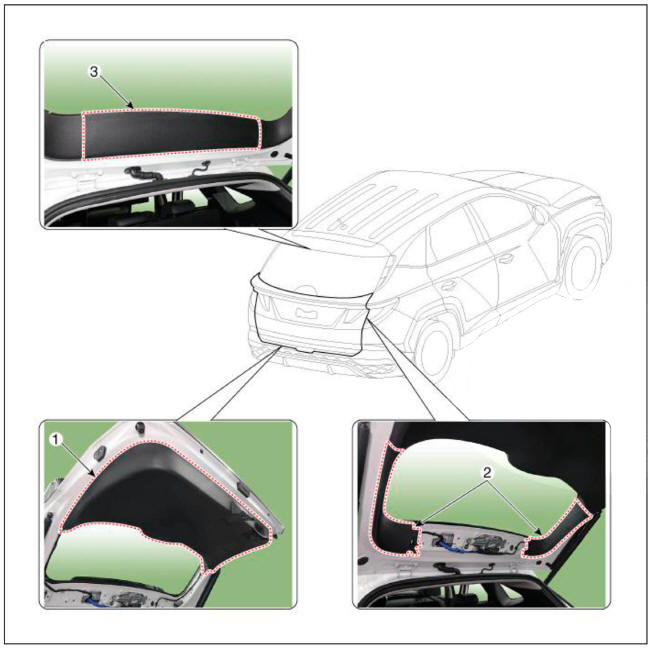
- Tailgate lower trim
- Tailgate side trim
- Tailgate upper trim
READ NEXT:
 Tail Gate - Replacement
Replacement
Tailgate upper trim
WARNING
When removing with a flat-tip screwdriver or remover, wrap
protective tape around the tools to
prevent damage to components.
Put on gloves to prevent hand injuries.
Using a screwdriver or rem
Tailgate latch assembly
Component Location
Tailgate latch assembly
Replacement
WARNING
When removing with a flat-tip screwdriver or remover, wrap
protective tape around the tools to prevent
damage to components.
Put on gloves to prevent hand injuries.
Fuel Filler Door
Component Location
Fuel filler door
Replacement
Fuel filler door cover
WARNING
When removing with a flat-tip screwdriver or remover, wrap
protective tape around the tools to
prevent damage to components.
Put on gloves to preve
SEE MORE:
Piston Pin - Reassembly
WARNING
Thoroughly clean all parts to assembled.
Before installing the parts, apply fresh engine oil to all
sliding and rotating surfaces.
Always use new gaskets, O-ring and oil seals.
Install the crankshaft position sensor wheel
When Using the CVVD fixture/ When not using the CVVD fixture
When Using the CVVD fixture
(1) Install the CVVD fixture (A) over the CVVD assembly.
(2) Remove the CVVD assembly.
When not using the CVVD fixture
(3) Remove the CVVD assembly.
Remove the Intake CVVT (A).
Remove the
Information
- Home
- Hyundai Tucson - Fourth generation (NX4) - (2020-2023) - Owner's Manual
- Hyundai Tucson - Fourth generation (NX4) - (2020-2023) - Workshop Manual
