Hyundai Tucson: Tailgate latch assembly
Hyundai Tucson - Fourth generation (NX4) - (2020-2023) - Workshop Manual / Body (Interior and Exterior) / Tail Gate / Tailgate latch assembly
Component Location
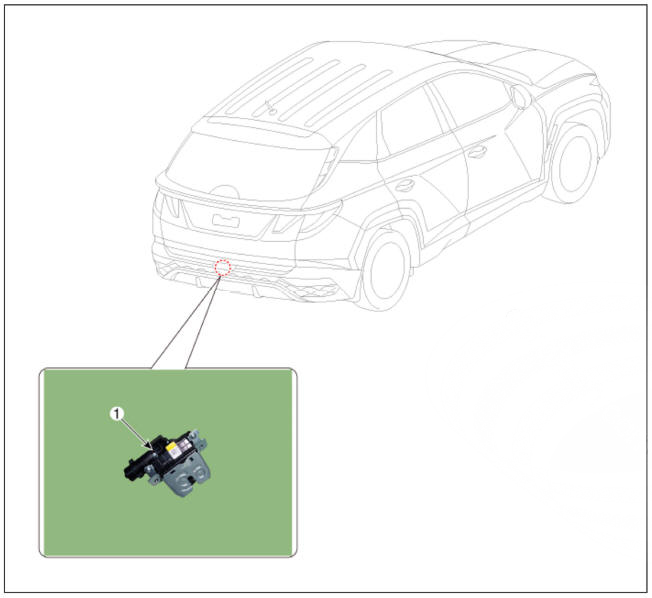
- Tailgate latch assembly
Replacement
WARNING
- When removing with a flat-tip screwdriver or remover, wrap protective tape around the tools to prevent damage to components.
- Put on gloves to prevent hand injuries.
- Disconnect the negative (-) battery terminal.
- Remove the tailgate lower trim.
(Refer to Tail Gate - "Tail Gate Trim")
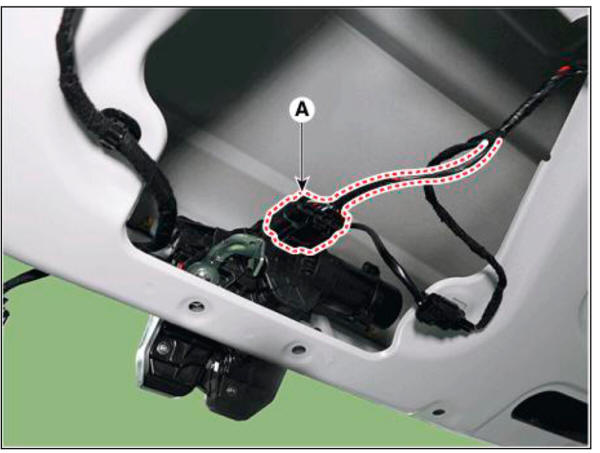
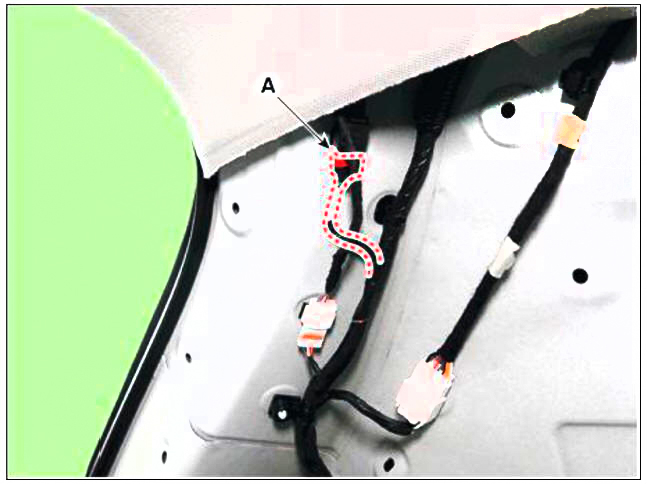
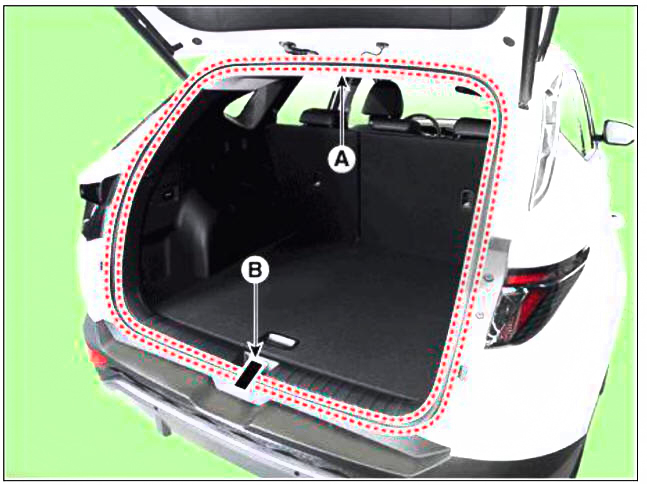
- Disconnect the tailgate latch connector (A).
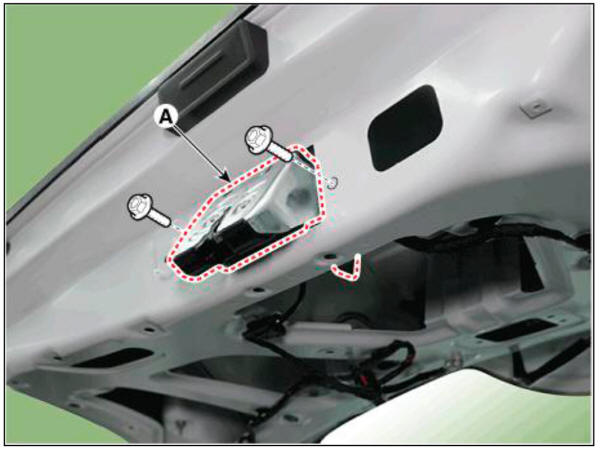
- Loosen the mounting bolts, remove the tailgate latch assembly (A).
Tightening torque : 21.6 - 26.5 N.m (2.2 - 2.7 kgf.m, 15.9 - 19.5 lb-ft)
- To install, reverse removal procedure.
WARNING
- Make sure the tailgate locks / unlocks and opens / closes properly.
- Make sure the connectors are connected in properly.
Replacement
WARNING
Wear gloves to protect hands from injury.
WARNING
Take care not to scratch the tailgate and body surface.
WARNING
When removing and installing the tailgate, an assistant is needed.
- Disconnect the negative (-) battery terminal.
- Remove the luggage side trim.
(Refer to Trunk Trim - "Luggage Side Trim")
- Disconnect the tailgate lifter connector (A).
- Using a screwdriver, lift up slightly the socket clips (A) of both ends on the lifter (B), and then remove the lifter from the bracket.
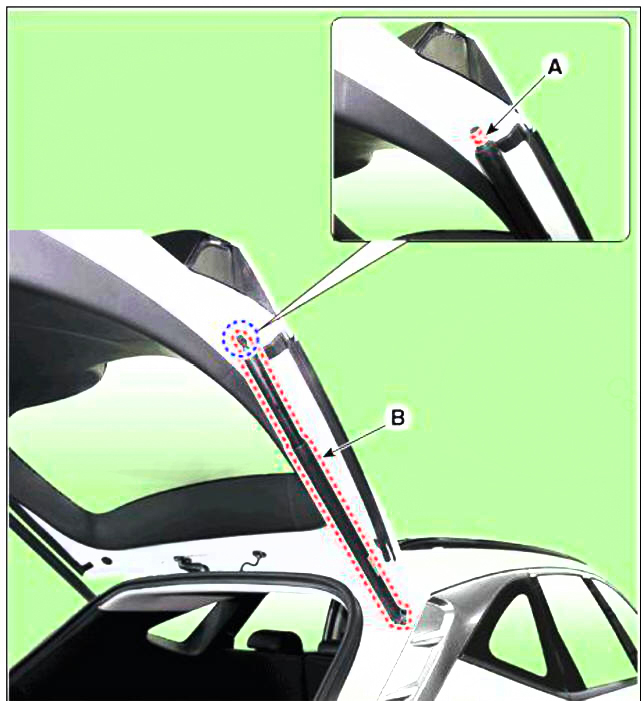
- Push the socket of the lifter into the bracket for installation.
WARNING
- Make sure the tailgate locks and opens properly and locks securely.
- Make sure the connectors are connected in properly.
- Make sure the tailgate locks / unlocks and opens / closes properly.
Replacement
WARNING
Do not apply sealant to the body.
- Remove the tailgate weatherstrip (A).
- To install, reverse removal procedure.
WARNING
When installing the tailgate weatherstrip, check the center-marking line (B).
Component Location
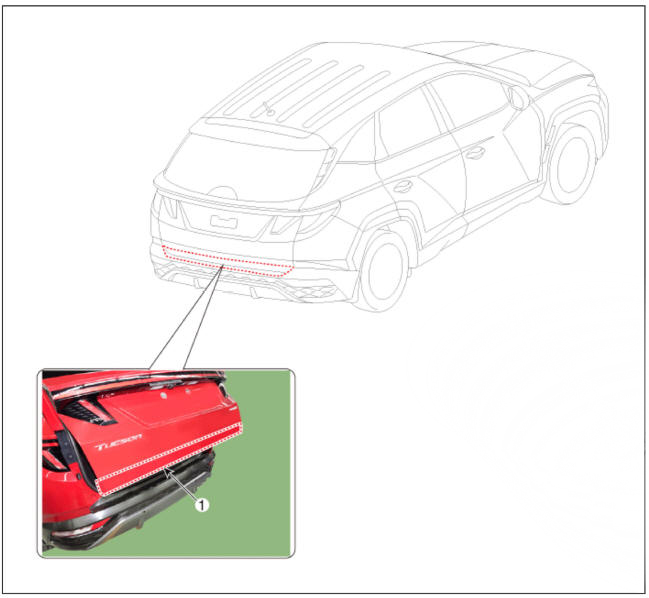
- Tailgate back panel molding
Replacement
WARNING
Put on gloves to prevent hand injuries.
WARNING
Take care not to scratch the tailgate and body surface.
- Using a screwdriver or remover, remove the tailgate back panel molding (A).
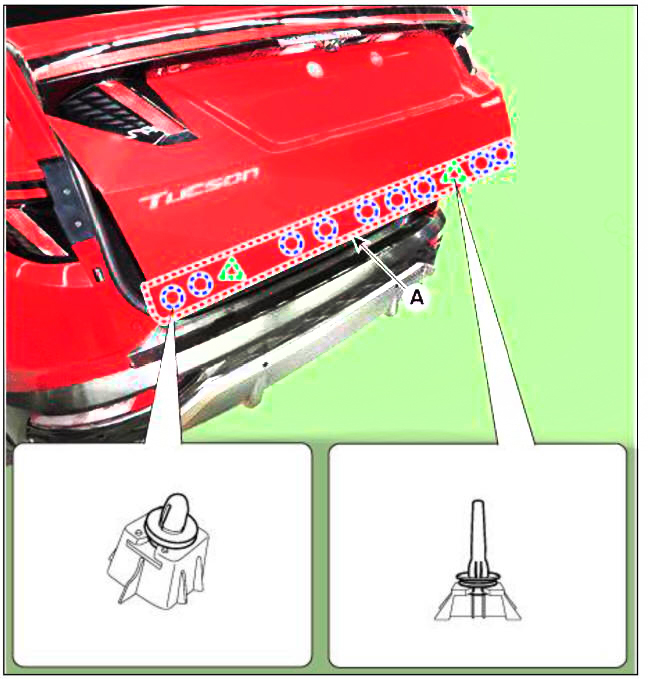
- To install, reverse removal procedure.
WARNING
Replace any damaged clips (or pin-type retainers).
READ NEXT:
 Fuel Filler Door
Component Location
Fuel filler door
Replacement
Fuel filler door cover
WARNING
When removing with a flat-tip screwdriver or remover, wrap
protective tape around the tools to
prevent damage to components.
Put on gloves to preve
Glass Adjustment
WARNING
Check the glass run channel for damage or deterioration, and replace
it if necessary.
Remove the front door trim.
(Refer to Front Door - "Front Door Trim")
Lower the glass by operating the power window switch until the gl
SEE MORE:
Driver Attention Warning (DAW)
Basic function
Driver Attention Warning will help
determine the driver's attention level by
analyzing driving pattern, driving time,
etc. while vehicle is being driven. Driver
Attention Warning will recommend a
break when the driver's atten
Rear center seat belt retractor
Components Location
Rear center seat belt retractor
Replacement
WARNING
When installing the belt, make sure not to damage the retractor.
Remove the roof trim.
(Refer to Roof Trim - "Roof Trim Assembly")
After loosening
Information
- Home
- Hyundai Tucson - Fourth generation (NX4) - (2020-2023) - Owner's Manual
- Hyundai Tucson - Fourth generation (NX4) - (2020-2023) - Workshop Manual
