Hyundai Tucson: Driveshaft Assembly- Inspection
Hyundai Tucson - Fourth generation (NX4) - (2020-2023) - Workshop Manual / Driveshaft and axle / Driveshaft Assembly / Driveshaft Assembly- Inspection
- Check the boot for water or foreign objects.
- Replace any defective parts.
Installation
The type can replace the wheel side joint boot
WARNING
- When assembling, be careful not to let dust and foreign substances enter.
- Driveshaft joints require special grease, so do not add any other type of grease.
- Boot bands must use the new one.
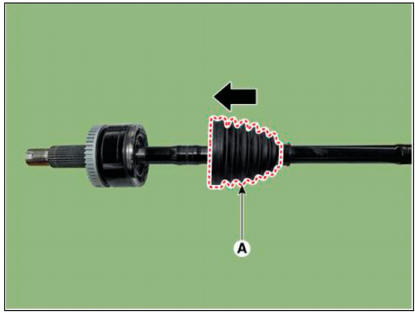
- Install the new boot (A) in the direction of the arrow.
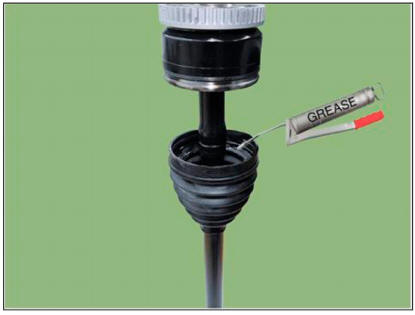
- Apply the grease specified inside the boot.
WARNING
- Use the grease provided with the joint/boot kit.
- Apply about 50 - 60% grease inside the boot.
- Driveshaft joints require special grease, so do not add any other type of grease.
- Install the wheel side boot (A) into the housing (B).

- Install the large diameter boot band (B) using SST (0K495-C5000).
Clearance (A): 2.0 mm or less.

- Install the small diameter boot band (B) using SST (0K495-C5000).
Clearance (A): 2.0 mm or less.
- Install the dynamic damper. If equipped
(Refer to Driveshaft Assembly - "Dynamic Damper")
- Install the transaxle side joint.
(Refer to Driveshaft Assembly - "Transaxle Joint")
- Install the front drive shaft.
(Refer to Driveshaft Assembly - "Front Driveshaft")
The type can not replace the wheel side joint boot
WARNING
- When assembling, be careful not to let dust and foreign substances enter.
- Driveshaft joints require special grease, so do not add any other type of grease.
- Boot bands must use the new one.
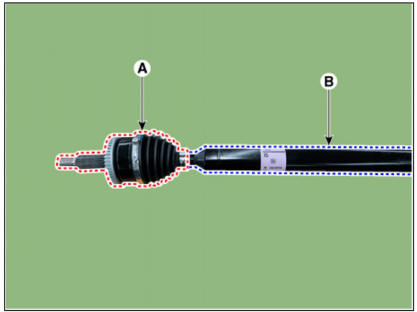
- Replace the wheel side joint assembly (A) and shaft (B).
WARNING
The wheel side joint boot can not be replaced, so replace the wheel side joint assembly (A) and shaft (B) together as an assembly.
- Remove the dynamic damper.
(Refer to Driveshaft Assembly - "Dynamic Damper")
- Install the transaxle side joint.
(Refer to Driveshaft Assembly - "Transaxle Joint")
- Install the front drive shaft.
(Refer to Driveshaft Assembly - "Front Driveshaft")
READ NEXT:
 Rear Axle Assembly- Removal- 2WD
Components
Rear brake disc
Rear hub assembly
Dust cover
Rear carrier assembly
Removal
2WD
WARNING
When lifting a vehicle using a lift, be careful not to damage the
lower parts of the vehicle (floor under cover,
fuel filter, fue
Rear Axle Assembly - Removal - 4WD
WARNING
When lifting a vehicle using a lift, be careful not to damage the
lower parts of the vehicle (floor under cover,
fuel filter, fuel tank, canister).
(Refer to General Information - "Lift Point")
Loosen the rear wheel nuts
SEE MORE:
Seats
The information provided may differ depending on which functions are
applicable to your vehicle.
Front seat
Forward and rearward
Seatback angle
Seat cushion angle*
Seat cushion height
Lumbar support (Driver's seat)*
Seat warmer*
A
Interior care
Interior general precautions
Prevent caustic solutions such as
perfume and cosmetic oil, from
contacting the interior parts because
they may cause damage or discoloration.
If they do contact the interior parts,
wipe them off immediately. See
Information
- Home
- Hyundai Tucson - Fourth generation (NX4) - (2020-2023) - Owner's Manual
- Hyundai Tucson - Fourth generation (NX4) - (2020-2023) - Workshop Manual
