Hyundai Tucson: Door scuff trim
- Front door scuff trim
- Rear door scuff trim
Replacement
Front door scuff trim
WARNING
- When removing with a flat-tip screwdriver or remover, wrap protective tape around the tools to prevent damage to components.
- Put on gloves to prevent hand injuries.
WARNING
Take care not to bend or scratch the trim and panels.
- Remove the front door body side weatherstrip.
(Refer to Front Door - "Front Door Side Weatherstrip")
- Using a screwdriver or remover and remove the front door scuff trim (A).
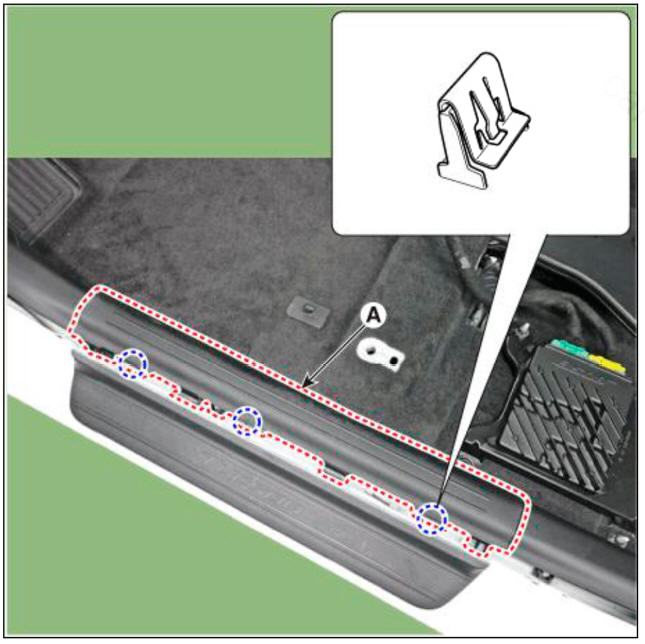
- To install, reverse removal procedure.
WARNING
Replace any damaged clips (or pin-type retainers).
Rear door scuff trim
WARNING
- When removing with a flat-tip screwdriver or remover, wrap protective tape around the tools to prevent damage to components.
- Put on gloves to prevent hand injuries.
WARNING
Take care not to bend or scratch the trim and panels.
- Remove the rear door body side weatherstrip.
(Refer to Rear Door - "Rear Door Side Weatherstrip")
- Remove the rear seat assembly.
(Refer to Rear Seat -"Rear Seat Assembly")
- Using a screwdriver and remove the rear door scuff trim (A).
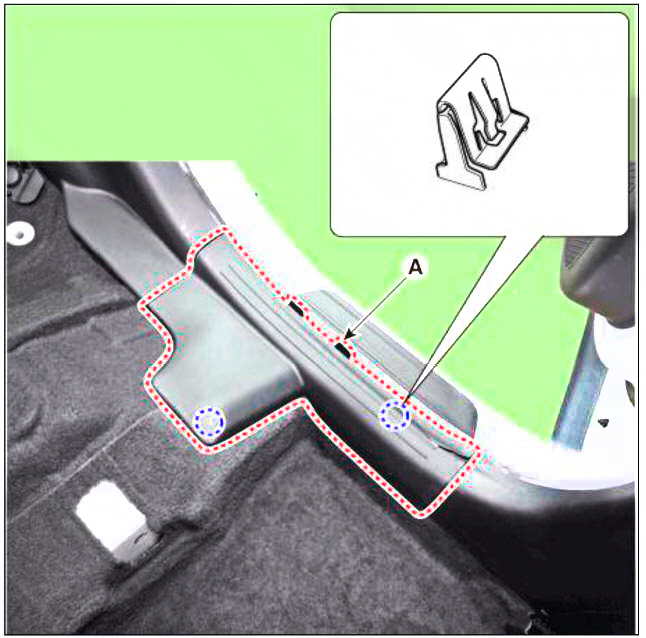
- To install, reverse removal procedure.
WARNING
Replace any damaged clips (or pin-type retainers).
READ NEXT:
 Door step trim
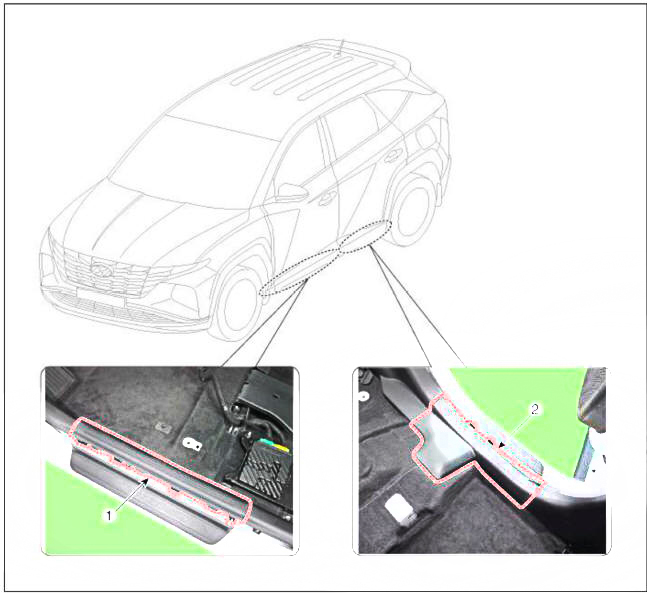
Component Location
Front door step trim
Rear door step trim
Replacement
WARNING
When piying with a flat-tip screwdriver, wrap it with
protective tape, and apply protective tape
around the related parts, to prevent damage.
Put
Front pillar trim
Component Location
Front pillar trim
Replacement
WARNING
When removing with a flat-tip screwdriver or remover, wrap
protective tape around the tools to
prevent damage to components.
Put on gloves to prevent hand injuries.
WA
Center pillar trim
Component Location
Center pillar lower trim
Center pillar upper trim
Replacement
Center pillar lower trim
WARNING
When removing with a flat-tip screwdriver or remover, wrap
protective tape around the tools to prevent
damage to
SEE MORE:
Battery Test Procedure
Connect the tester to the battery.
Red clamp to battery positive (+) terminal.
Black clamp to battery negative (-) terminal
WARNING
Connect clamps securely. If "CHECK CONNECTION" message is displayed
on the screen, reco
Power outlet
The power outlet is designed to provide
power for mobile telephones or other
devices designed to operate with vehicle
electrical systems. The devices should
draw less than 180 watts with the engine
running.
WARNING
Avoid electrical shocks.
Information
- Home
- Hyundai Tucson - Fourth generation (NX4) - (2020-2023) - Owner's Manual
- Hyundai Tucson - Fourth generation (NX4) - (2020-2023) - Workshop Manual
