Hyundai Tucson: Door step trim
Component Location
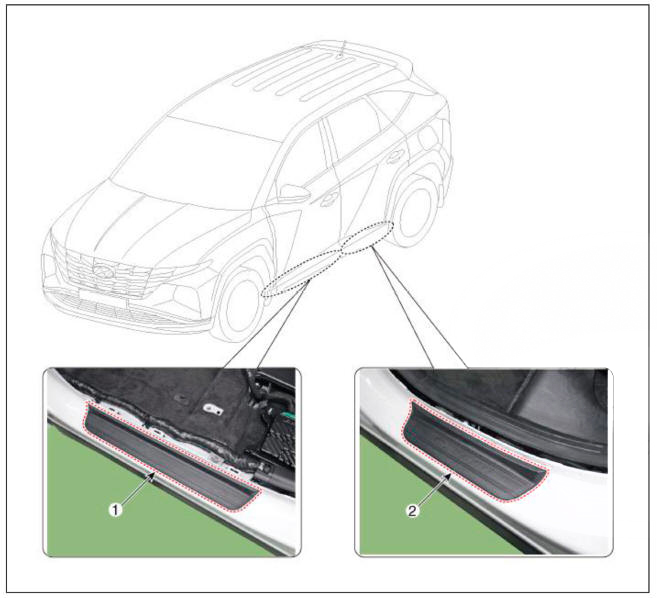
- Front door step trim
- Rear door step trim
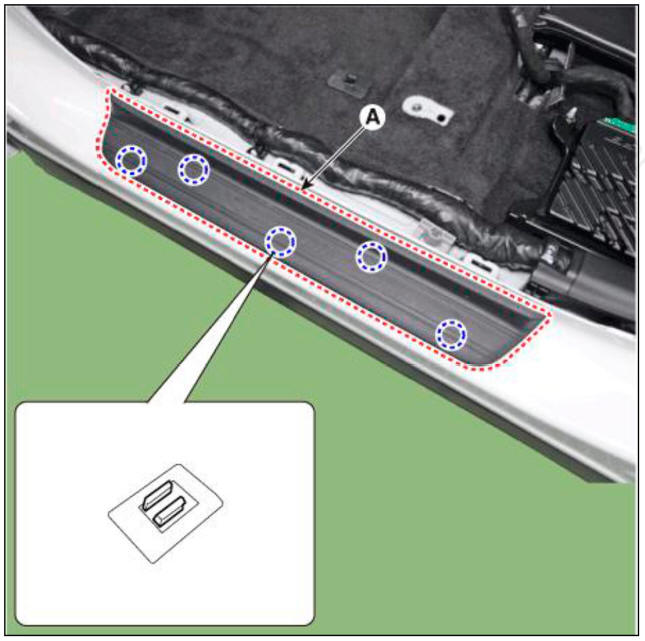
Replacement
WARNING
- When piying with a flat-tip screwdriver, wrap it with protective tape, and apply protective tape around the related parts, to prevent damage.
- Put on gloves to protect your hands.
WARNING
Take care not to bend or scratch the trim and panels.
- Using a screwdriver or remover and remove the front door step trim (A).
Front
Rear

- To install, reverse removal procedure.
WARNING
If the clip is damaged, install a new door step trim.
Component Location
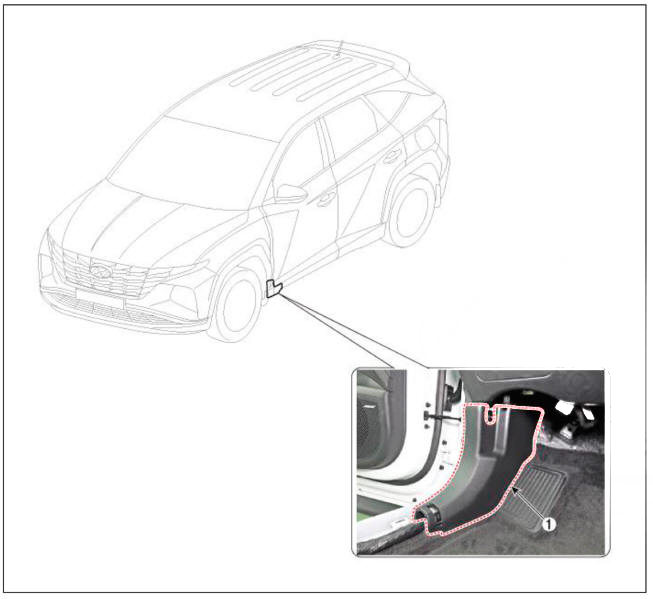
- Cwol side trim
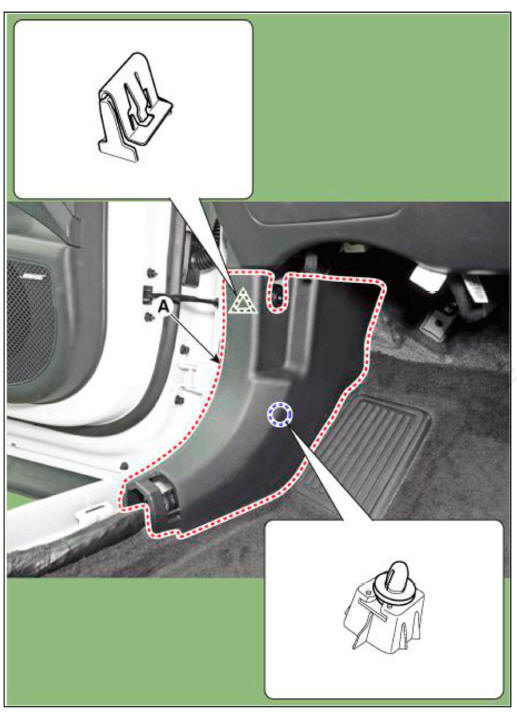
Replacement
WARNING
- When removing with a flat-tip screwdriver or remover, wrap protective tape around the tools to prevent damage to components.
- Put on gloves to prevent hand injuries.
WARNING
Take care not to bend or scratch the trim and panels.
- Remove the front door scuff trim.
(Refer to Interior Trim - "Door Scuff Trim")
- Remove the hood latch release handle.
(Refer to Hood - "Hood Latch Release Handle")
- Remove the front door body side weatherstrip.
(Refer to Front Door - "Front Door Side Weatherstrip")
- Using a screwdriver or remover, remove the cowl side trim (A).
- To install, reverse removal procedure.
WARNING
Replace any damaged clips (or pin-type retainers).
READ NEXT:
 Front pillar trim
Component Location
Front pillar trim
Replacement
WARNING
When removing with a flat-tip screwdriver or remover, wrap
protective tape around the tools to
prevent damage to components.
Put on gloves to prevent hand injuries.
WA
Center pillar trim
Component Location
Center pillar lower trim
Center pillar upper trim
Replacement
Center pillar lower trim
WARNING
When removing with a flat-tip screwdriver or remover, wrap
protective tape around the tools to prevent
damage to
Rear pillar trim
Component Location
Rear pillar trim
Replacement
WARNING
When removing with a flat-tip screwdriver or remover, wrap
protective tape around the tools to
prevent damage to components.
Put on gloves to prevent hand injuries.
WAR
SEE MORE:
Battery
Removal
Turn the ignition switch OFF and disconnect the battery (-) terminal
(A).
Tightening torque :
7.8 - 9.8 N.m (0.8 - 1.0 kgf.m, 5.8 - 7.2 Ib-ft)
Disconnect the battery (+) terminal (A).
Tightening torque :
7.8 - 9.8 N.m (0.
Driving Convenience
CRUISE CONTROL (CC) (IF EQUIPPED)
Cruise indicator
Set speed
Cruise Control will allow you to drive at
speeds above 20 mph (30 km/h) without
depressing the accelerator pedal.
Cruise Control (CC)
Cruise Control Operation
Operating c
Information
- Home
- Hyundai Tucson - Fourth generation (NX4) - (2020-2023) - Owner's Manual
- Hyundai Tucson - Fourth generation (NX4) - (2020-2023) - Workshop Manual
