Hyundai Tucson: Center pillar trim
Component Location
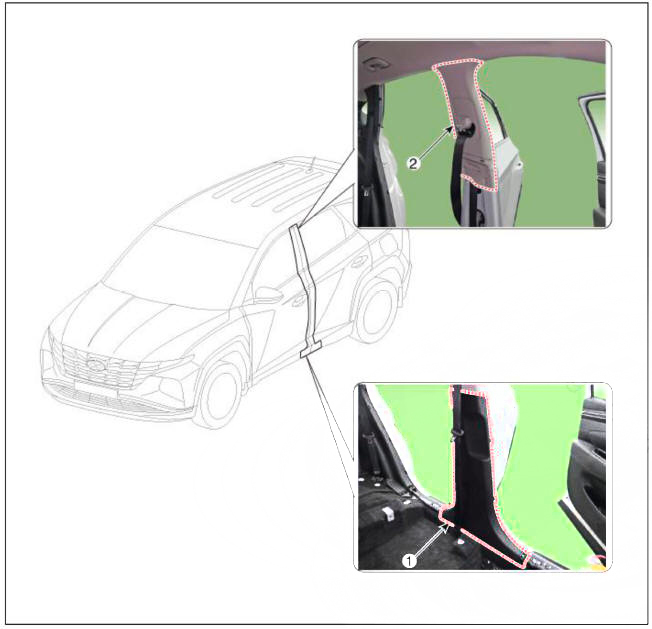
- Center pillar lower trim
- Center pillar upper trim
Replacement
Center pillar lower trim
WARNING
- When removing with a flat-tip screwdriver or remover, wrap protective tape around the tools to prevent damage to components.
- Put on gloves to prevent hand injuries.
WARNING
Take care not to bend or scratch the trim and panels.
- Remove the front and rear door scuff trim.
(Refer to Interior Trim -"Door Scuff Trim")
- Using a remover and remove the center pillar lower trim (A)
- To install, reverse removal procedure.
WARNING
Replace any damaged clips (orpin-type retainers).
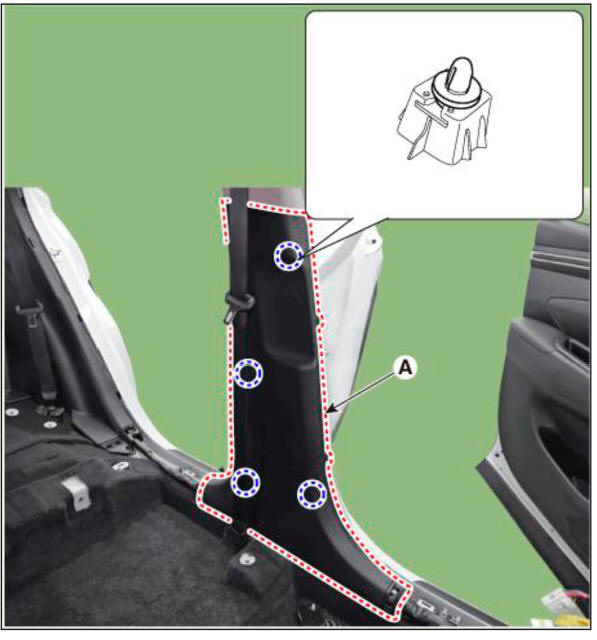
Center pillar upper trim
WARNING
- When removing with a flat-tip screwdriver or remover, wrap protective tape around the tools to prevent damage to components.
- Put on gloves to prevent hand injuries.
WARNING
Take care not to bend or scratch the trim and panels.
- Remove the center pillar lower trim.
(Refer to Interior Trim -"Center Pillar Lower Trim")
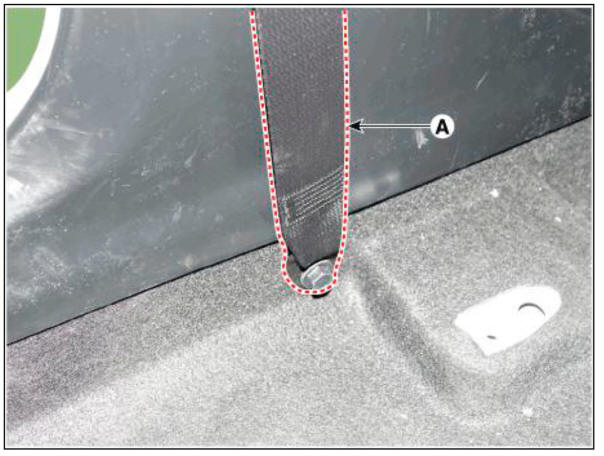
- Loosen the mounting bolt, remove the front seat belt lower anchor (A).
Tightening torque : 39.2 - 53.9 N.m (4.0 - 5.5 kgf.m, 28.9 - 39.8 lb-ft)
- Remove the center pillar upper trim (A).
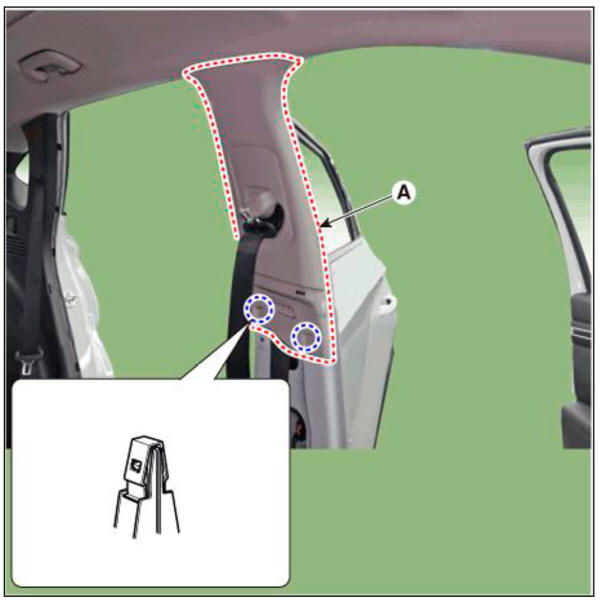
- To install, reverse removal procedure.
WARNING
Replace any damaged clips (orpin-type retainers).
READ NEXT:
 Rear pillar trim
Component Location
Rear pillar trim
Replacement
WARNING
When removing with a flat-tip screwdriver or remover, wrap
protective tape around the tools to
prevent damage to components.
Put on gloves to prevent hand injuries.
WAR
Trunk Trim
Components
Luggage tray
Wheel house pad
Luggage side trim
Rear transverse trim
Cargo screen
Luggage board
Rear transverse trim
Component Location
Rear transverse trim
Replacement
WARNING
When removing with a flat-tip screwdriver or remover, wrap
protective tape around the tools to
prevent damage to components.
Put on gloves to prevent hand injuries.
SEE MORE:
Compressor - Disassembly
Disassembly
Remove the front tire RH.
(Refer to Suspension System - "Wheel")
Loosen the drive belt.
(Refer to Engine Mechanical System - "Drive Belt")
Remove the clutch bolt (A) while holding the pulley with a clutch b
Drive mode integrated control system
The drive mode may be selected
according to the driver's preference or
road condition.
The system resets to be in the NORMAL
mode, when the engine is restarted.
Information
If there is a problem with the instrument
cluster, the drive mod
Information
- Home
- Hyundai Tucson - Fourth generation (NX4) - (2020-2023) - Owner's Manual
- Hyundai Tucson - Fourth generation (NX4) - (2020-2023) - Workshop Manual
