Hyundai Tucson: Differential Carrier Assembly - Reassembly
Reassembly
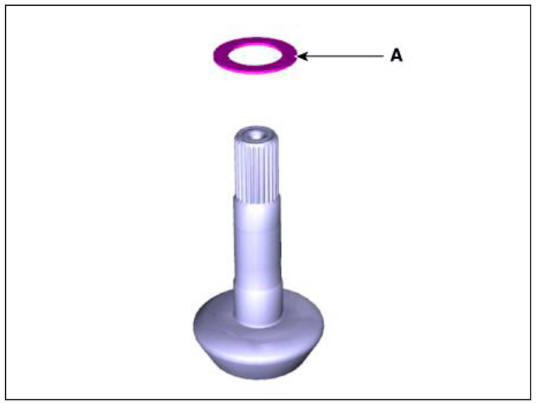
Pinion drive gear assembly
- Install the inner pinion bearing adjustment shim (A) 011 the pinion drive gear assembly.
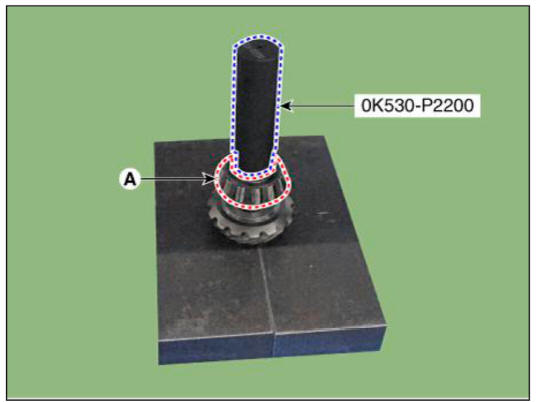
- Install the inner pinion bearing (A) on the pinion drive gear using SST (0K530-P2200) and press.
WARNING
Do not reuse the removed bearing.
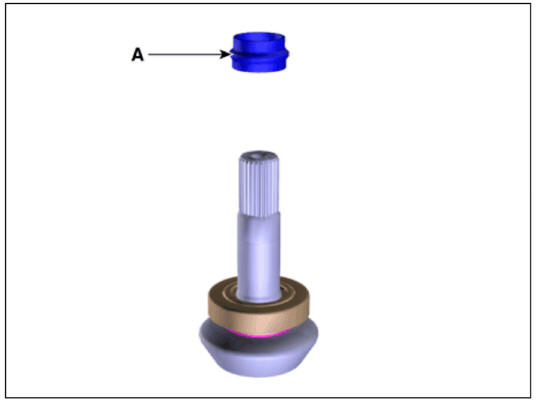
- Install the spacer (A) in the pinion drive gear assembly.
WARNING
When installing, make sure the spacer (A) is in the top side
direction. 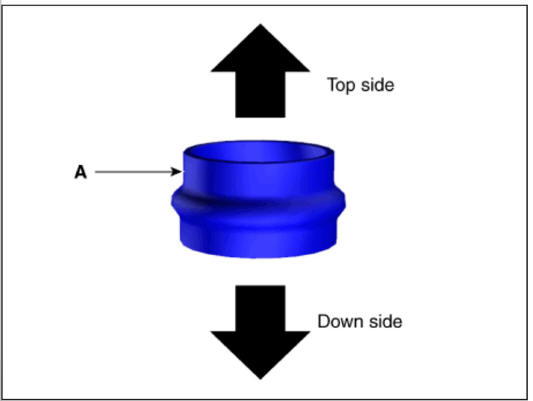
Differential gear assembly
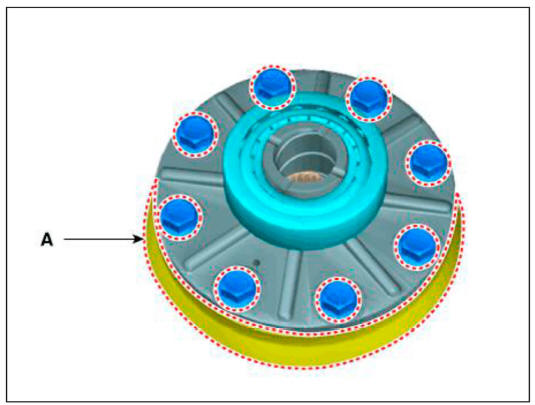
- Install the ring gear (A) on the gear carrier.
Tightening torque : 78.4 - 88.2 N m (8.0 - 9.0 kgf-m, 57.8 - 65.0 lb ft)
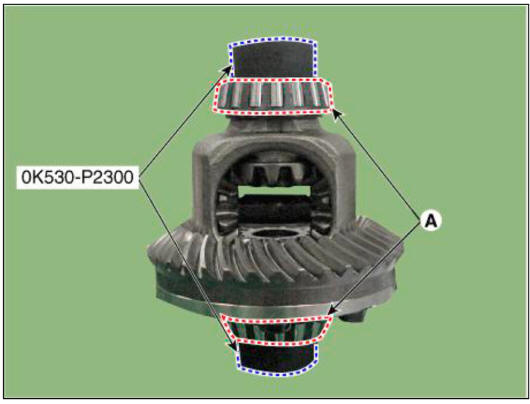
- Install the differential gear bearings (A) on both sides using the SST (0K530-P2300) and press.
WARNING
Do not reuse the removed bearing.
Differential carrier case
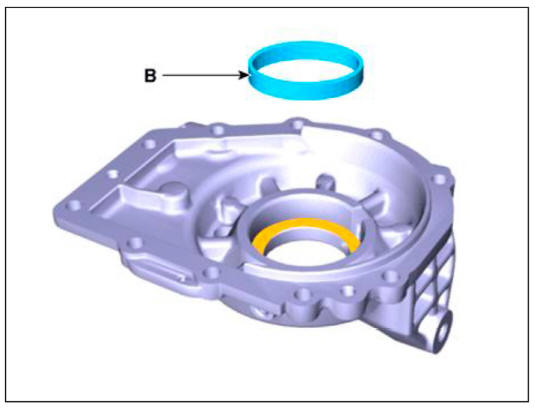
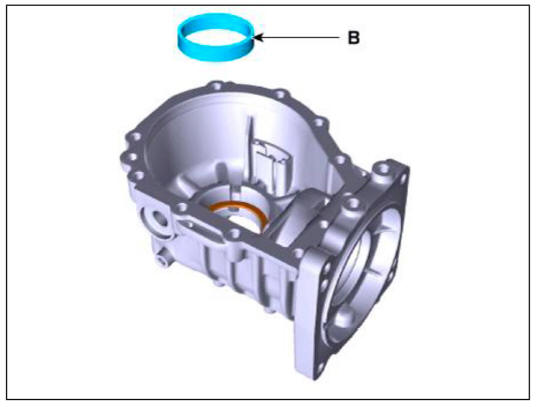
- Install the differential carrier case side cover bearing adjustment shim (A) and race (B).

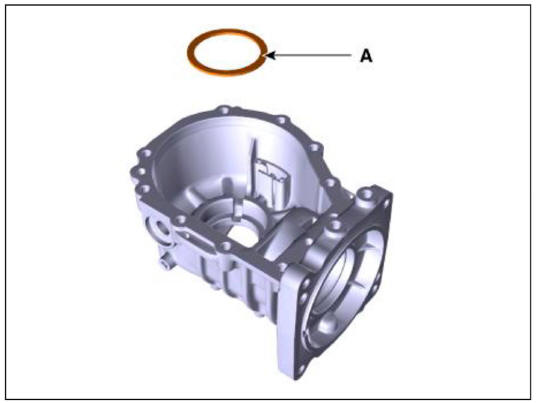
- Install the differential carrier case side bearing adjustment shim (A) and race (B).
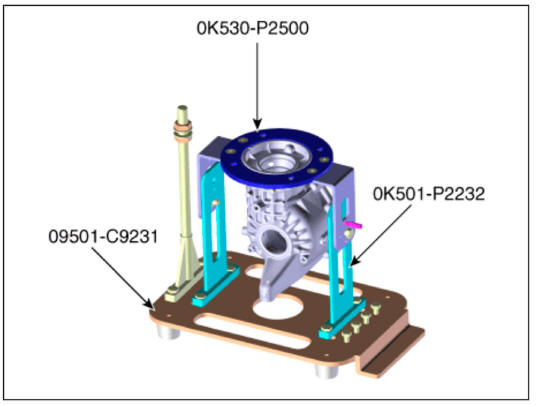
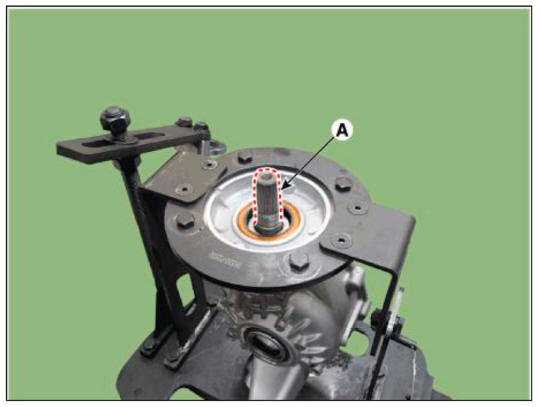
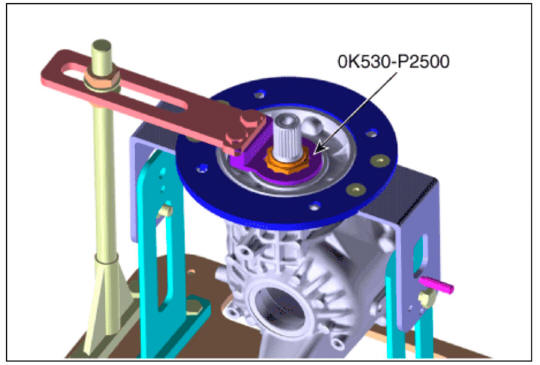
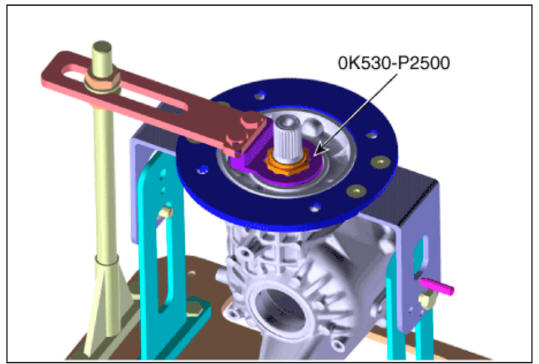
- Hold the differential carrier assembly using the SST (09501-C9231, 0K530-P2500, 0K501-P2232).
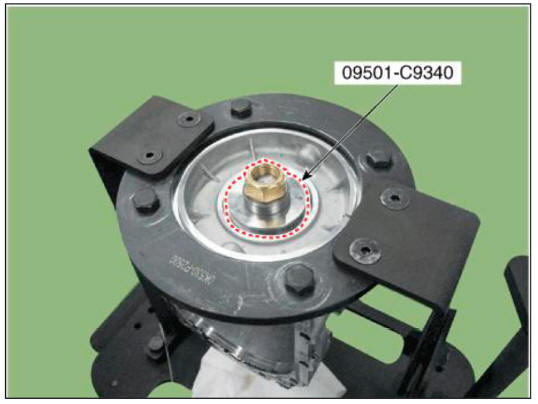
- Install the outer, inner pinion bearing race using SST (0Sb01-C9340).
WARNING
When installing, attach the race (A) with
a special tool as follows.
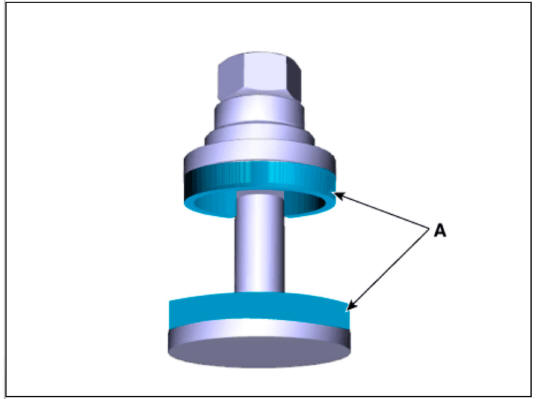
- Install the pinion drive gear assembly (A).
- Install outer pinion bearing (A) on pinion gear assembly.
WARNING
Do not reuse the removed bearing.
- Place the SST (0K530-P2200) on the pinion gear spline side and press the bearing (A) of the until the thread can engages the lock nut.
- Pre-tighten the pinion lock nut (A) to the thread 011 the side of the pinion gear spline.
WARNING
When you installing lock nut (A), replace lock nut with a new one.
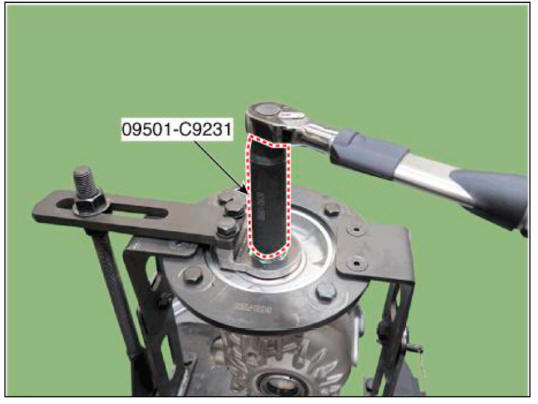
- Fix the lock nut using the SST (0K530-P2500).
- Tighten the pinion gear lock nut using SST (09501-C9231) to press the outer bearing.
- Remove the SST (0K530-P2500).
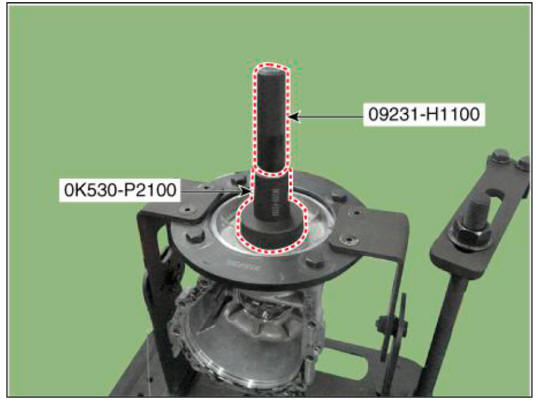
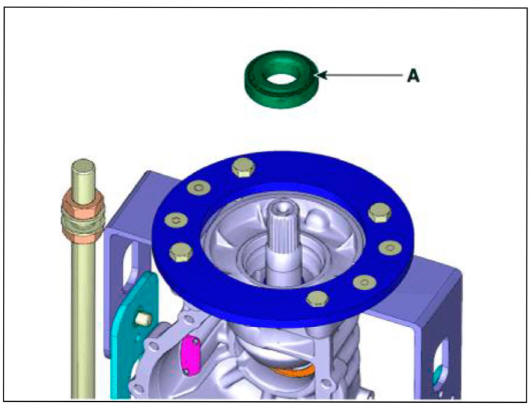
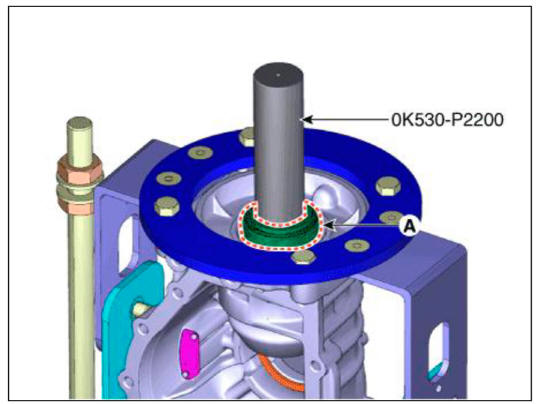
- Press the pinion oil seal using SST (0K530-P2100, 09231-H1100).
WARNING
- Make sure that the gap between the differential carrier case and the pinion oil seal is 0 - 0.5 mm.
- When installing oil seal, replace oil seal with a new one.
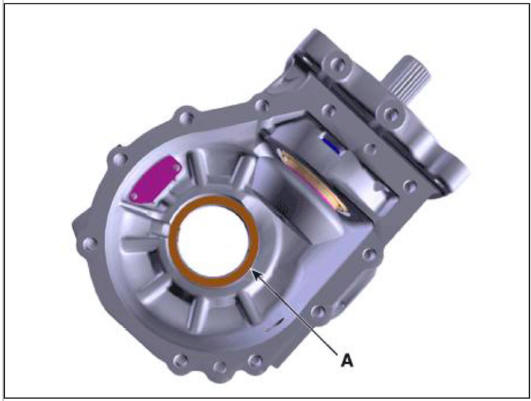
- Install the differential gear assembly (A) in the differential carrier case.
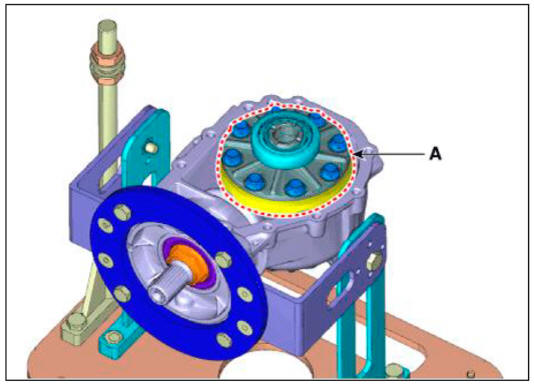
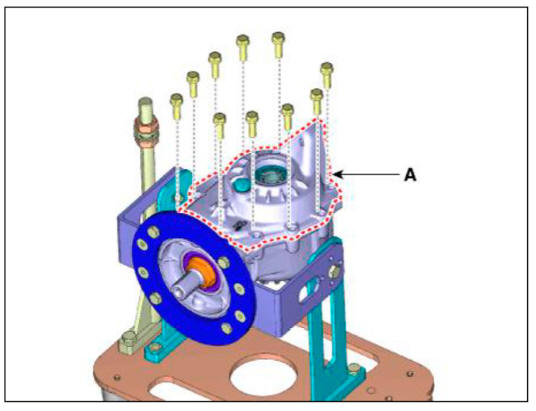
- Install the differential carrier case side cover (A).
Tightening torque : 39.2 - 49.0 N m (4.0 - 5.0 kgf rn, 28.9 - 36.1 lb ft)
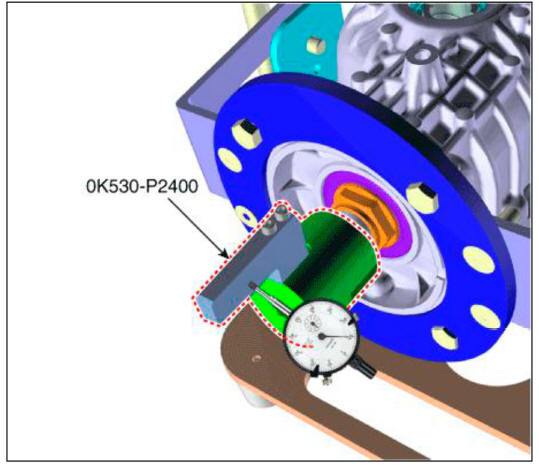
- Install SST (0K530-P2400) on the pinion drive gear spline side and set the dial gauge on the case.
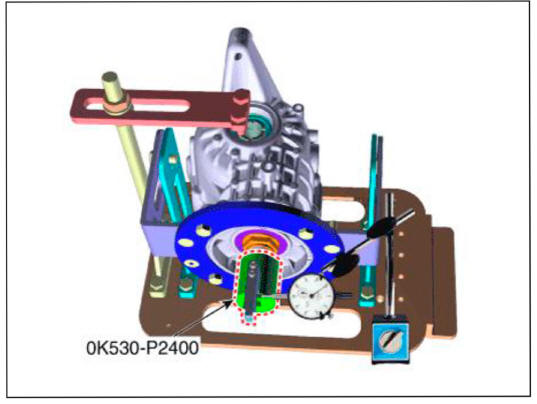
WARNING
- After setting the dial gauge on the gear to be measured, adjust the dial gauge to zero.
- Secure the dial gauge to the housing to prevent it from moving or shaking.
- When measuring, be care fill that the dial gauge or jig does not interfere with the gear.
- Make the measuring surface part and dial gauge at right angles.
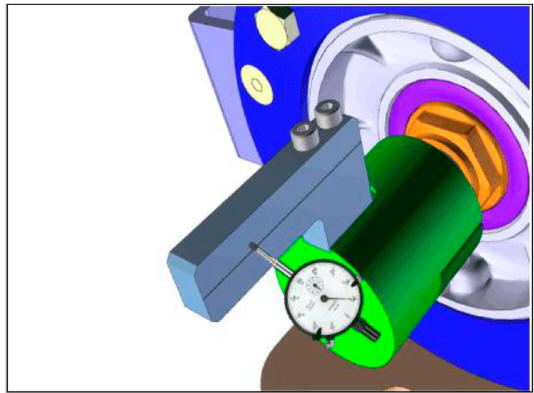
- After moving the SST (0K530-P2400) left and right, read the dial gauge and measure the backlash
WARNING
- After reading dial gauge, adjust backlash to be within the
standard value range below.
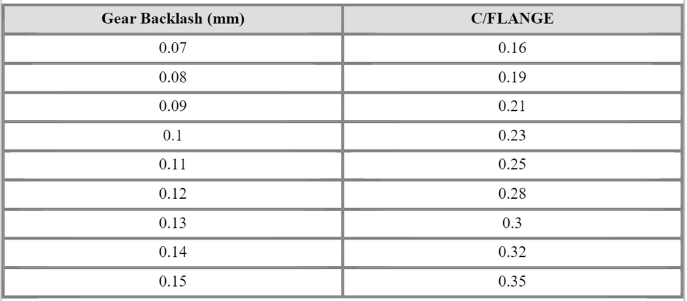
- If the measured value deviates from the
standard value specification, bearing adjustment shim (A) 011
the differential carrier case side.

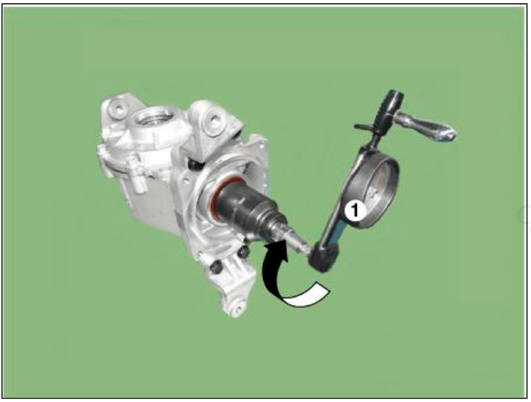
- Measure the total preload.
Tightening torque : 114.7 - 262.8 N-rn (11.7 - 26.8 kgf m. 84.6 - 193.8 lb ft)
WARNING
- Maintain constant rotation while measuring (about 60 RPM).
- If the measured value deviates from the
standard value specification, bearing adjustment shim (A) on
the differential carrier case side.


- Loosen the bolt and remove the differential carrier case side cover (A).
Tightening torque : 39.2 - 49.0 N m (4.0 - 5.0 kgf rn, 28.9 - 36.1 lb ft)
- Apply the sealant on the adhesive side between differential carrier case and side cover.
WARNING
- Remove the used sealant before applying the sealant.
- Apply evenly 2 - 3mm along the surface of the case.
- Install the differential case side cover (A).
Tightening torque : 39.2 - 49.0 N m (4.0 - 5.0 kgf rn, 28.9 - 36.1 lb ft)
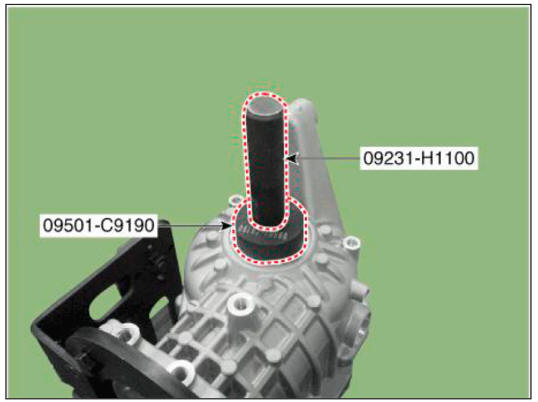
- Install the oil seal on both sides of the differential carrier case using the SST (09501-C9190, 09231-H1100).
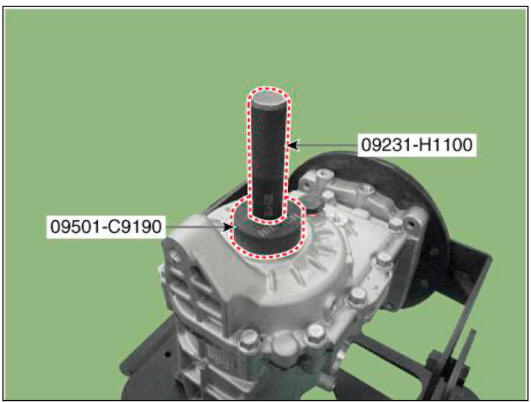
WARNING
When installing oil seal, replace oil seal with a new one.
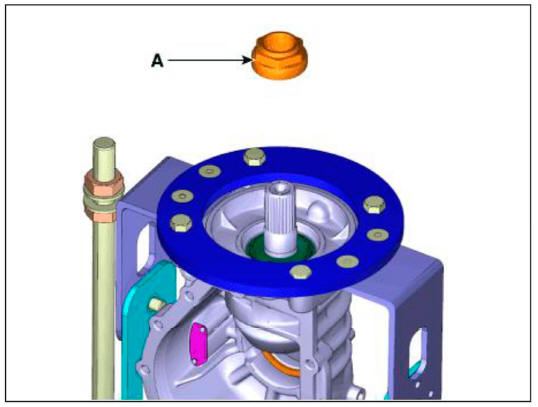
- Install the drain plug packing (A) and drain plug (B) on the differential carrier case.
Tightening torque : 49.0 - 68.6 N-m (5.0 - 7.0 kgfrn, 36.2 - 50.6 lb ft)
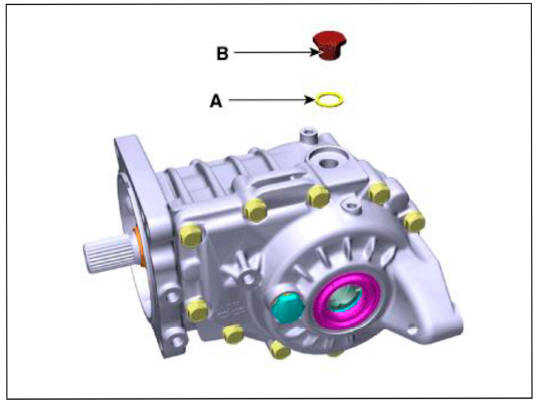
WARNING
When installing drain plug packing (A), replace drain plug packing (A) with a new one.
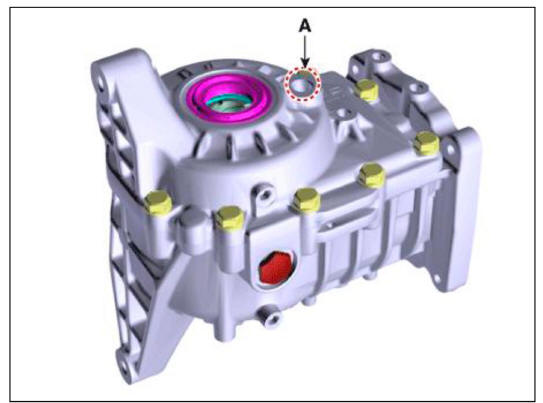
- Add new gear oil through filler plug hole (A).
Hypoid gear oil API GL-5, SAE 75W/85
(SK HCT-5 gear oil 75w/85 or equivalent oil)
0.58+-0.05
- Install the filler plug (A) and filler gascket (B).
Tightening torque : 39.2 - 58.8 N m (4.0 - 6.0 kgfm, 28.9 - 43.4 lb ft)
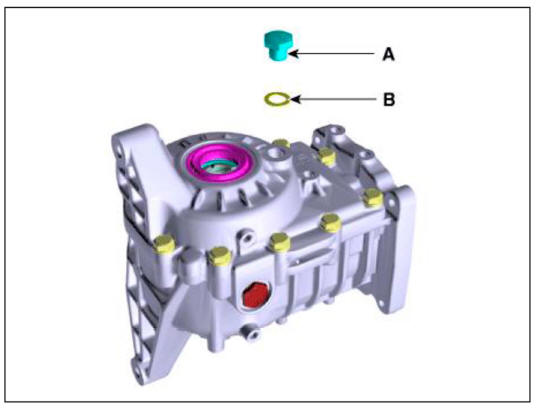
WARNING
When installing filler plug gascket (A), replace filler plug gascket (A) with a new one.
READ NEXT:
 Differential Carrier Assembly- Installation
Installation
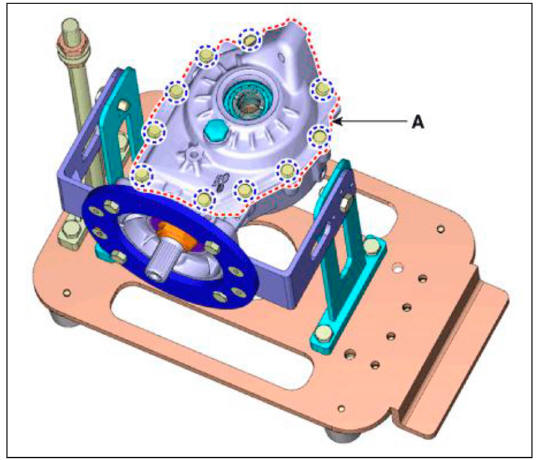
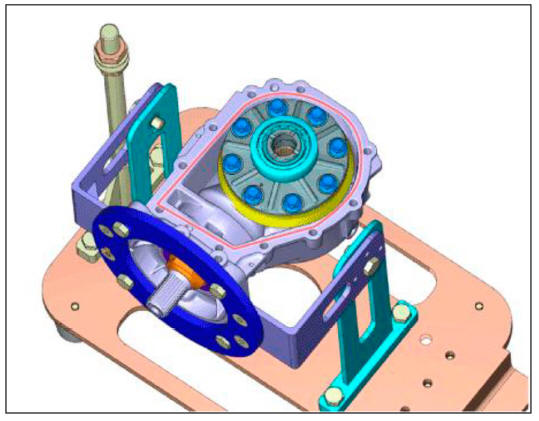
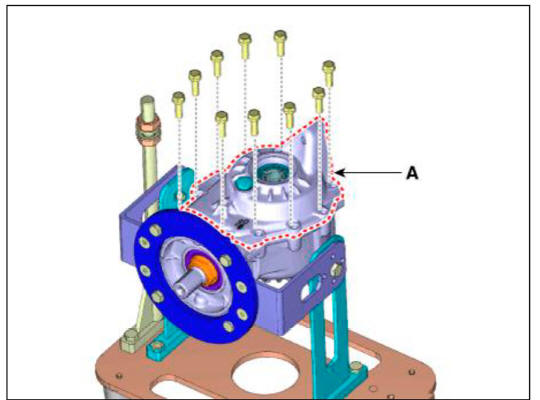
Install the differential carrier bracket (A).
Install the jack and intall the differential carrier assembly (A).
Tightening torque :
68.6 - 88.3 N m (7.0 - 9.0 kgf m , 50.6 - 65.1 lb ft)
Install the coupling ass
General Information
Troubleshooting
Wheel and tire diagnosis
Rapid wear at the center
Center-tread down to fabric due to
excessive over inflated tires
Lack of rotation
Excessive toe on drive wheels
Heavy acceleration on drive
Rapid wear at both sh
SEE MORE:
DCT (Dual Clutch Transmission) System (SBW)
Troubleshooting
Specifications
Clutch Actuator
Gear Actuator
Inhibitor Switch
Type: Combination of output signals from 4 terminals
Specifications
Input speed sensor
Tightening Torques
Lubricants
Rear bumper assembly
Component Location
Rear bumper assembly
Replacement
WARNING
When removing with a flat-tip screwdriver or remover, wrap
protective tape around the tools to prevent
damage to components.
Put on gloves to prevent hand injuries.
Information
- Home
- Hyundai Tucson - Fourth generation (NX4) - (2020-2023) - Owner's Manual
- Hyundai Tucson - Fourth generation (NX4) - (2020-2023) - Workshop Manual
