Hyundai Tucson: Auto Lighting Control System
Description
It's a system that uses illumination sensor to automatically turn ON the tail lamp and head lamp based on the change in surrounding environment's illumination condition. It activates when the vehicle enters/ exits tunnel, or when the illumination condition in surrounding environment changes due to rain, snow, or fog. Precautions corresponding to the use of this system are as follows.
- Do not add another device on top of this device.
- Be sure to switch to manual during poor visibility climate, such as fog, heavy rain, or cloudy weather.
- Illumination intensity in an actual vehicle is not always constant, and lamp ON/OFF time may very depending on the climate, season, and surrounding environment.
- Use this system only during sunrise and sunset period, and manually control lamp ON/OFF for general conditions.
- Error may occur if light block coating that may change interior illumination is applied.
Component Location
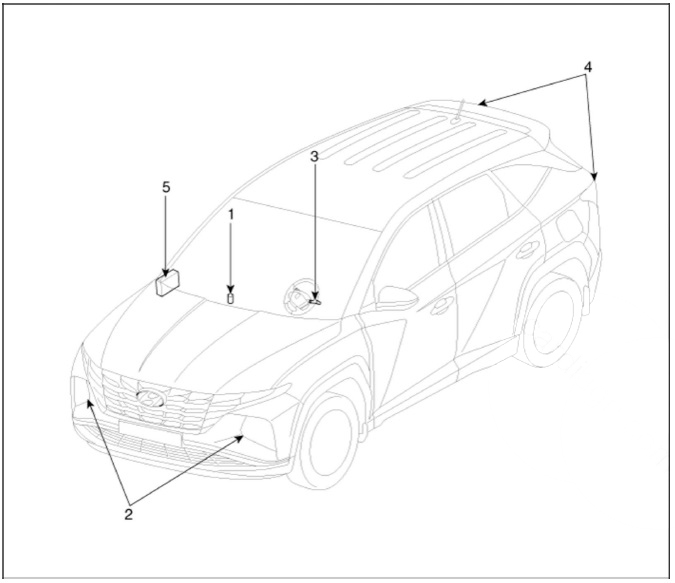
- Auto light sensor
- Head lamps
- Lighting switch (Auto)
- Tail lamps
- IBU (Integrated Body Control Unit)
Specifications
Inspection
Check if the auto light control operates like a timing chart shown below.
Tail lamp output and head lamp (Low) output is controlled based on the auto light sensor's input (illumination intensity) when the Auto Light Switch in Multi-Function Switch is turned ON, and the vehicle is in IGN1 or IGN2 ON Mode.
If IGN1 = ON, BCM detects this voltage, and if the voltage exceeds rated voltage, then auto light failure occurs, (below 4V or above 6V)
Failure Occurrence :
If auto light failure occurs, the head lamp must be turned ON regardless of sun
light level. This
is to prevent the head lamp from being turned OFF in case of auto light failure
during night
time.
Removal
- Disconnect the negative (-) battery terminal.
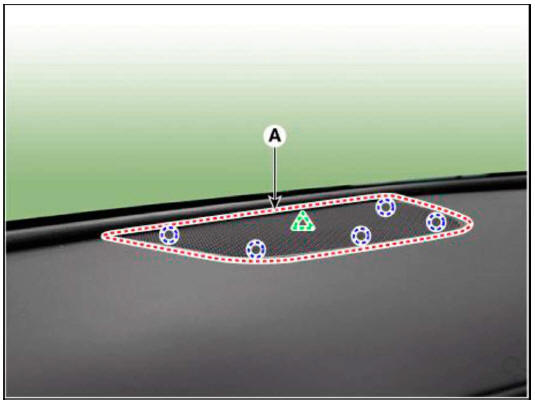
- Remove the crash pad upper garnish (A).
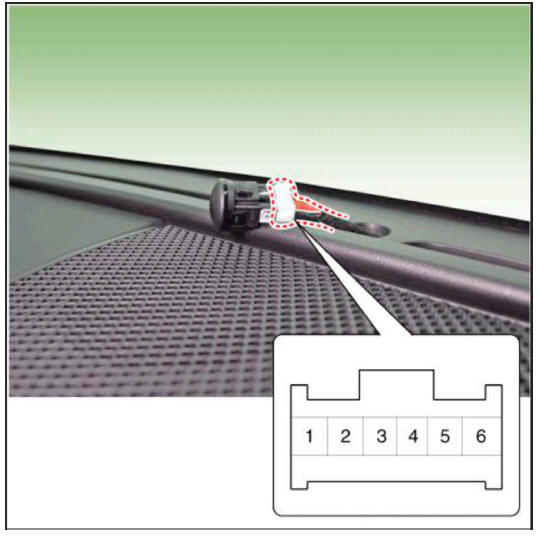
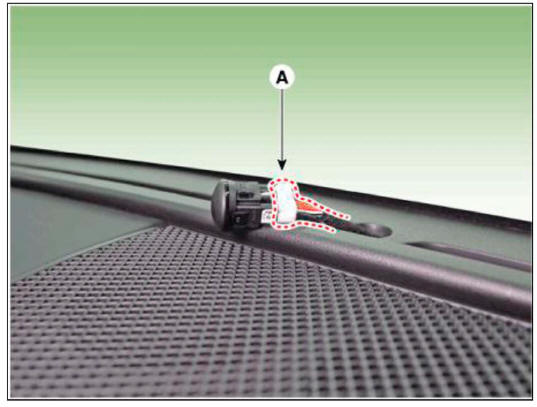
- After removing the crash pad upper garnish, insert hand and push up the photo sensor (A) from the inside to remove it.

- Disconnect the auto light sensor connector (A).
Installation
- Connect the auto light sensor connector and install the auto light sensor.
READ NEXT:
 Auto Head Lamp Leveling Device
Component Location
Head lamp leveling actuator (Inside head lamps)
Head lamp leveling switch
Removal
Disconnect the negative (-) battery terminal.
Remove the crash pad lower panel.
(Refer to Body - "Crash Pad Lower Panel&q
Button Engine Start System
Description
The System offers the following features :
Changing the state of engine ignition and power by using the start
button.
Controlling external relays for ACC / IGN1 / IGN2 terminal switching and
STARTER, without use of mechanical
Operation for each function of button starting
Electric power ON / Ignition ON
The electric power state changes within the range of OFF ->ACC->IGN->OFF
by pressing the button without stepping on
the brake (Or with stepping on the brake) inside the car with FOB key (However.
SEE MORE:
Drive Belt System- Removal and Installation
Components
Crankshaft Damper Pulley
Drive Belt Tensioner
Drive Belt
Removal and
Installation
Fix the drive belt tensioner.
(1) Insert the drive belt tensioner by installing fixing pin (A) after
turning the drive belt tensione
Diagnosis With Diagnostic Tool
In the body electrical system, failure can be quickly diagnosed by using
the vehicle diagnostic system (diagnostic tool).
The diagnostic systemf diagnostic tool) provides the following information.
(1) Fault Code Searching : Checking fai
Information
- Home
- Hyundai Tucson - Fourth generation (NX4) - (2020-2023) - Owner's Manual
- Hyundai Tucson - Fourth generation (NX4) - (2020-2023) - Workshop Manual
