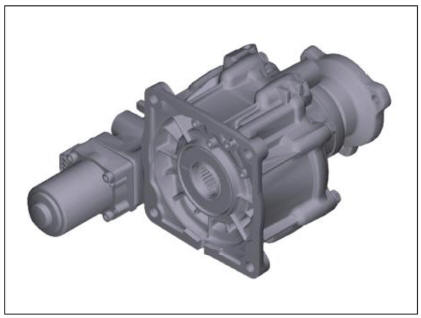
Hyundai Tucson: Coupling Assembly- Removal
Hyundai Tucson - Fourth generation (NX4) - (2020-2023) - Workshop Manual / Wheel Drive (4WD) System / Coupling Assembly / Coupling Assembly- Removal
Inspection
WARNING
All units are filled up with coupling fluid (ultra-low viscosity ATF) prior to shipping. Inspection, fillup, and replacement of coupling fluid is therefore not necessary (zero maintenance, lifetime fluid).
Removal
WARNING
Coupling Maintenance Precautions
Maintain the coupling at a horizontal level.
- Refer to the handling caution level (A) when servicing the
coupling (removal, installation, replacement,
etc.).
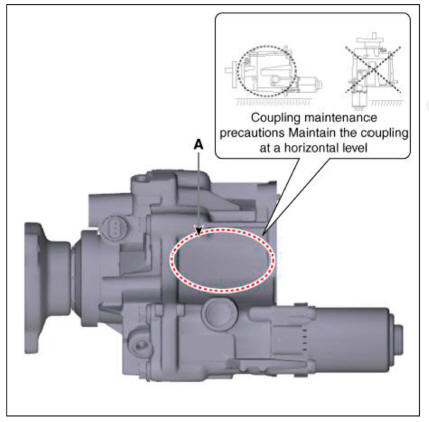
- Always maintain a horizontal posture.
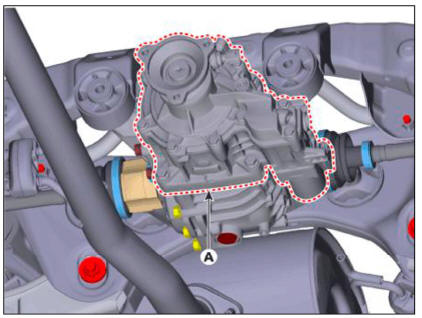
- Loosen the rear propeller shaft assembly mounting bolts and then removing the rear propeller shaft assembly (A).
Tightening torque : 49.0 - 68.6N.rn (5.0 - 7.0kgf.m, 36.2 - 50.61b-ft)
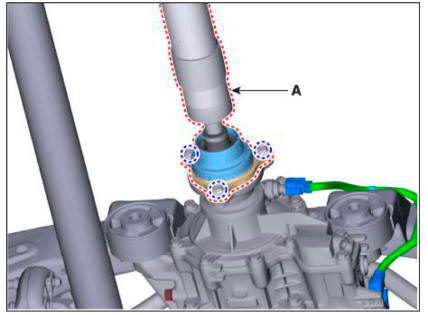
- Using a flat tool, separate the propellar shaft from 4WD coupling assembly.
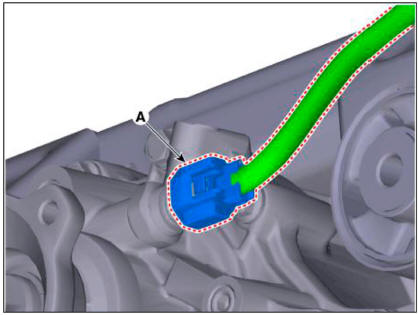
- Disconnect the oil hydrulic motor connector (A).
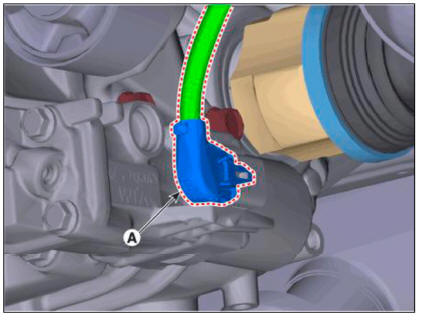
- Disconnect the pressure sensor connector (A).
- Loosen the bolts and then removing the coupling assembly (A).
Tightening torque : 58.9 - 64.7 N.m (5.8 - 6.6kgf.m, 41.9 - 47.7 lb-ft)
READ NEXT:
 Coupling Assembly- Installation
To install, reverse the removal procedures.
WARNING
Smear the splines (A) with molybdenum type high pressure grease.
When install the coupling, be careful not to damage the oil
seal (B).
After replacing the coupling, reset the 4
Oil Hydraulic Motor (Actuator) Inspection Procedure
Removal
Remove the coupling assembly.
(Refer to 4 Wheel Drive (4WD) System - "Direct Electro Hydraulic Actuator
Coupling")
Keep going perpendicular state after remove the coupling assembly.
WARNING
Keep going perpend
Measuring the resistance of the pressure sensor
Turn ignition switch OFF.
Disconnect the pressure sensor connector.
Measure resistance between sensor terminal and terminal.
Check the measured resistance. (Refer to table)
Table 1
Removal
Remove the coupling assembly.
(Refer to
SEE MORE:
Cylinder head cover
Removal
Disconnect the battery negative terminal.
Remove the cylinder head cover.
(Refer to Cylinder Head Assembly - "Cylinder Head Cover")
Turn the crankshaft damper pulley so that No. 1 piston is at top dead
center.
(1)
Parking Brake System
Components
Lever Type
Parking brake pedal assembly
Equalizer assembly
Parking brake cable
Pedal Type
Parking brake pedal assembly
Front parking brake cable
Equalizer assembly
Rear parking brake cable
Removal
Disconnec
Information
- Home
- Hyundai Tucson - Fourth generation (NX4) - (2020-2023) - Owner's Manual
- Hyundai Tucson - Fourth generation (NX4) - (2020-2023) - Workshop Manual
