Hyundai Tucson: Cooling Fan Assembly
Hyundai Tucson - Fourth generation (NX4) - (2020-2023) - Workshop Manual / Engine Mechanical System / Cooling System / Cooling Fan Assembly
Components
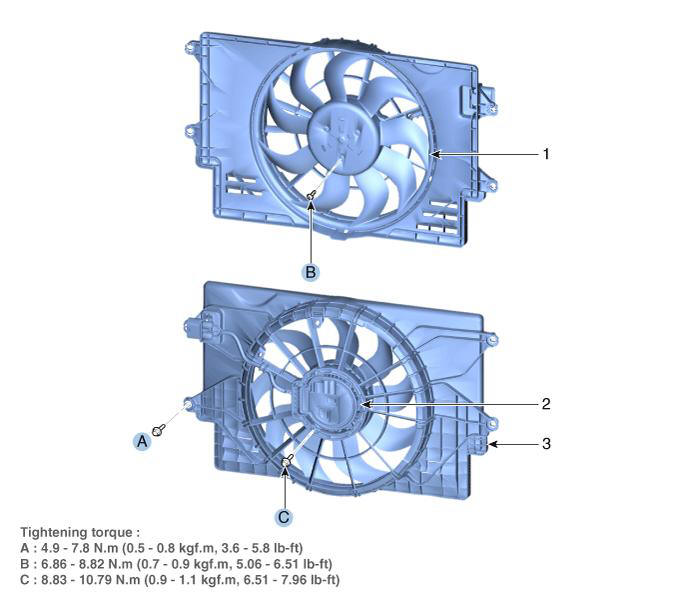
- Cooling fan
- Fan motor
- Cooling fan shroud
Cooling Fan Assembly
- Disconnect the negative battery terminal.
- Remove the radiator.
(Refer to Cooling System - "Radiator")
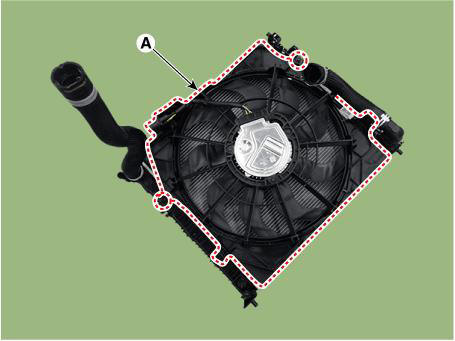
- Remove the cooling fan (A) from the radiator.
Tightening torque: 4.9 - 7.8 N.m (0.5 - 0.8 kgf.m, 3.6 - 5.8 Ib-ft)
- Install in the reverse order of removal.
Disassembly
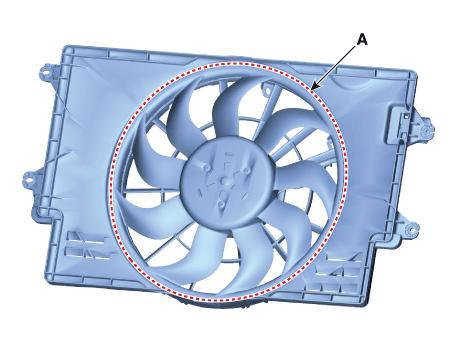
- Remove the cooling fan (A) from the cooling fan assembly.
Tightening torque : 6.86 - 8.82 N.m (0.7 - 0.9 kgf.m, 5.06 - 6.51 Ib-ft)
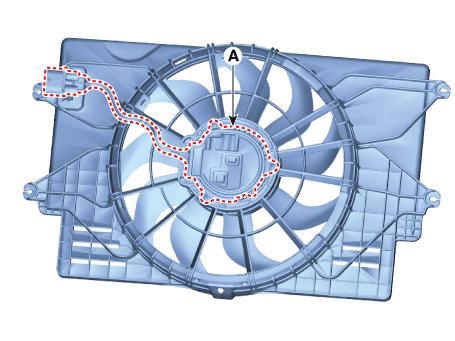
- Remove the fan motor (A) from the cooling fan shroud.
Tightening torque : 8.83 - 10.79 N.m (0.9 - 1.1 kgf.m, 6.51 - 7.96 Ib-ft)
- Install in the reverse order of removal.
Inspection
READ NEXT:
 Fan motor
Turn ignition switch "OFF" and connect the diagnostic tool to the Data
Link Connector.
With the gear shift in P (Park) position and ignistion switch "ON" (LED
of the Power button illuminates in Red), select the "fo
Integrated Thermal Management Module (ITM)
Components
Integrated thermal management module (ITM)
Heater pipe
Heater hose
Turbo charger coolant hose
Heater pipe A
Heater pipe A gasket
Oil cooler hose A
Oil cooler pipe
Integrated Thermal Management Module (ITM)
WARNING
Heater Pipe
Disconnect the battery negative terminal.
Remove the engine cover.
(Refer to Engine and Transaxle Assembly - "Engine Cover")
Remove the engine room under cover.
(Refer to Engine and Transaxle Assembly - "Engine Room Unde
SEE MORE:
Oil Pump Chain
Disconnect the battery negative terminal.
Remove the timing chain.
(Refer to Timing System - "Timing Chain")
Remove the oil pump chain tensioner (A).
Tightening torque :
9.8 - 11.8 N.m (1.0 - 1.2 kgf.m, 7.2 - 8.7 lb-ft)
Front Brake Caliper
Components
Caliper body
Caliper carrier
Pad inner shim
Pad retainer
Brake pad
Removal
Loosen the wheel nuts slightly.
Raise the vehicle, and make sure it is securely supported.
Remove the front wheel and tire (A) from the f
Information
- Home
- Hyundai Tucson - Fourth generation (NX4) - (2020-2023) - Owner's Manual
- Hyundai Tucson - Fourth generation (NX4) - (2020-2023) - Workshop Manual
