Hyundai Tucson: Control Cable- Installation
Hyundai Tucson - Fourth generation (NX4) - (2020-2023) - Workshop Manual / Intelligent Manual Transaxle (IMT) System / Control Cable / Control Cable- Installation
Installation
WARNING
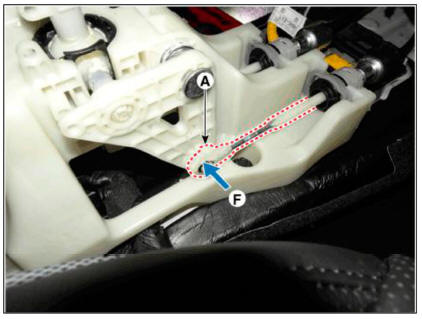
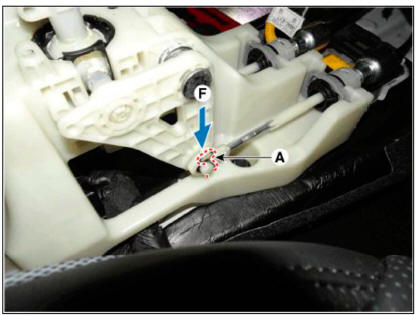
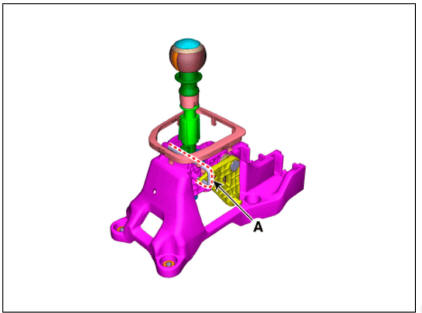
Check if the 4th fixing pin (A) is installed.

- Install the control cable retainer (B) and then tightening the nuts (A).
Tightening torque: 11.8 - 14.7 N.m (1.2 - 1.5 kgf.m, 8.7 - 10.8 lb-ft)
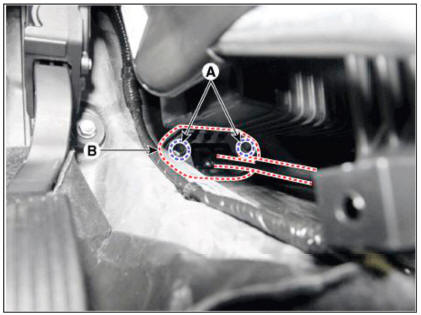
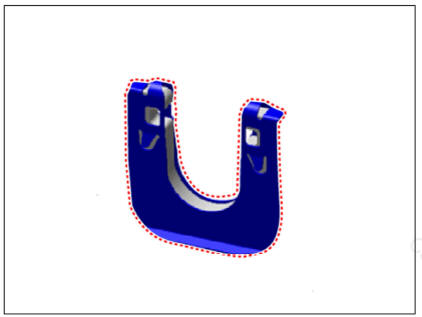
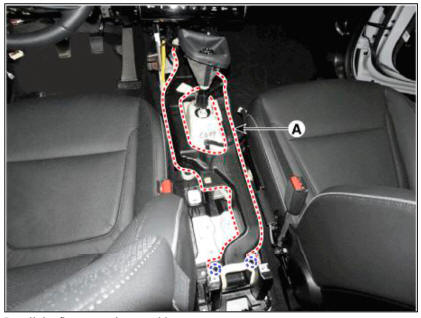
- Install the clip, in the shape of a MU"(A), from the cable end by spreading it towards both sides.
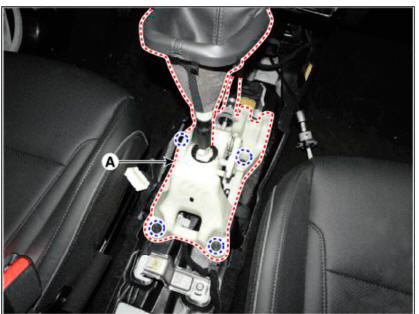
- Install the shift lever (A) after tightening the bolts.
Tightening torque : 8.8 - 13.7 N.m (0.9 - 1.4 kgf.m, 6.5 - 10.1 lb-ft)
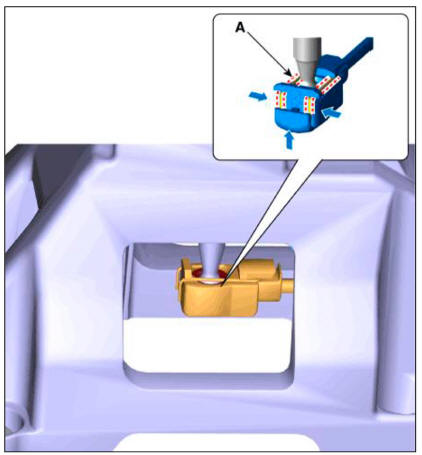
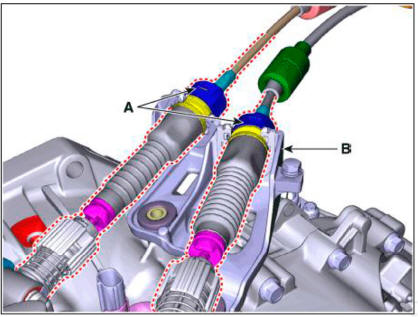
- Insert the shift cable socket (A) in the "F" direction.

- Insert the select cable socket (A) in the "F" direction.
- Insert the select cable end (A) in the "F" direction.
- Insert the snap pin (A) in the "F" direction.
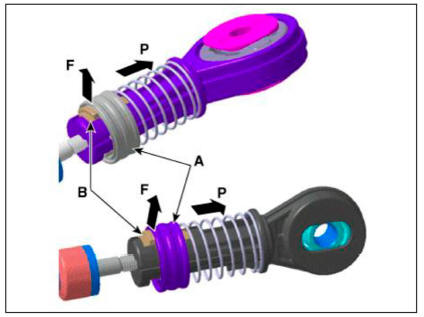
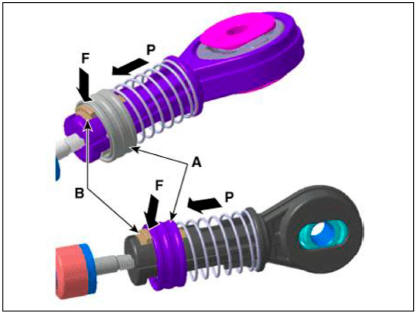
- Move the adjust locking button (B) in the direction of "F" with pulling the holder (A) in the direction of "P".
- Install the control cable.
WARNING
- Replace the cable clip with new clip.
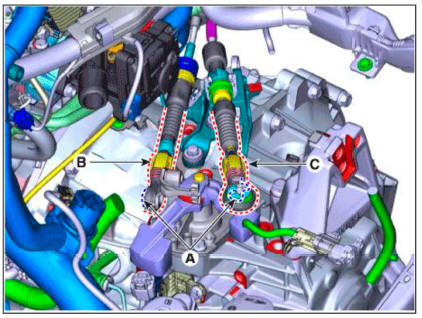
- Insert the control cable (A) correctly into the bracket (B).
- When installing, please install by hand.
1)Install the snap pin (A).
2)Install the select cable (B) and then shift cable (C).
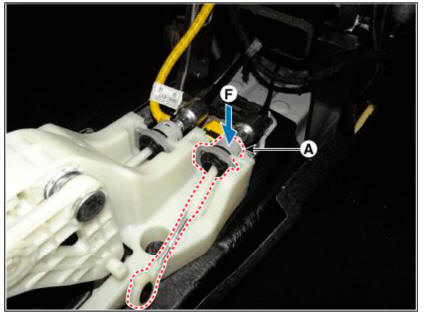
- Tighten the holder (A) to the "P" directions after fixing the adjust locking button (B) in the "F" direction.
WARNING
- After assembling the snap pin, be sure to fixing the adjust locking button.
- If the cable boot is twisted, attach the cable by rotating the boot to loosen it, then pull the cable to see if there is a possibility that the cable will come off the bracket.
- Install the batteiy and batteiy tray.
(Refer to Engine Electrical System - "Battery")
- Install the air duct and air cleaner assembly.
(Refer to Engine Mechanical System - "Air Cleaner")
- Remove the 4th fixing pin (A).
- Install the floor air duct (A).
- Install the floor console assembly.
(Re fer to Body (Interior and Exterior) - " Floor Console")
- Connect the negative (-) batteiy cable.
WARNING
- New shift lever assembly is mounted in the 4th fixing pin.
- After installation, remove the 4th fixed pin.
- Check operating of lever of transaxle side when operating shift lever after assembly. (1~6,R)
- If the jamming occurs at each stage when changing gears, readjust the cable length.
READ NEXT:
 Control Shaft Complete
Components and Components Location
Control shaft complete
Description
-Component location : Control shaft complete is mounted on the top of
the manual transaxle, and
select & shift cable are equipped.
Function : Change the g
General Information
Troubleshooting
Specifications
Dual clutch transmission
Clutch actuator
Gear actuator
Inhibitor Switch
Input speed sensor
Tightening Torques
Lubricants
Special Service Tools
Tool
(Number and
Nam
SEE MORE:
DCT (Dual Clutch Transmission) System (SBC) - Installation
Installation
To install, reverse the removal procedure.
WARNING
Matters that require attention when installing the dual clutch
transmission (DCT) to engine
l)Check the pilot bearing (B) and external damper (A) on the side of
engine for a
Air cleaner
Filter replacement
The air cleaner filter can be cleaned for
inspection using compressed air. Do not
attempt to wash or to rinse it, as water
will damage the filter. If soiled, the air
cleaner filter must be replaced.
Pull up the air
Information
- Home
- Hyundai Tucson - Fourth generation (NX4) - (2020-2023) - Owner's Manual
- Hyundai Tucson - Fourth generation (NX4) - (2020-2023) - Workshop Manual
