Hyundai Tucson: Floor Console - SBC type
Hyundai Tucson - Fourth generation (NX4) - (2020-2023) - Workshop Manual / Body (Interior and Exterior) / Floor Console / Floor Console - SBC type
SBC type
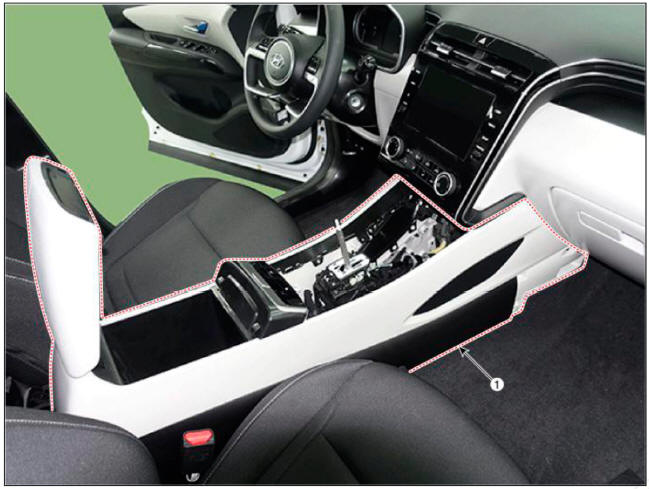
- Floor console assembly
SBC type
WARNING
- When removing with a flat-tip screwdriver or remover, wrap protective tape around the tools to prevent damage to components.
- Put on gloves to prevent hand injuries.
WARNING
Take care not to bend or scratch the trim and panels.
- Disconnect the negative (-) battery terminal.
- Remove the console upper cover.
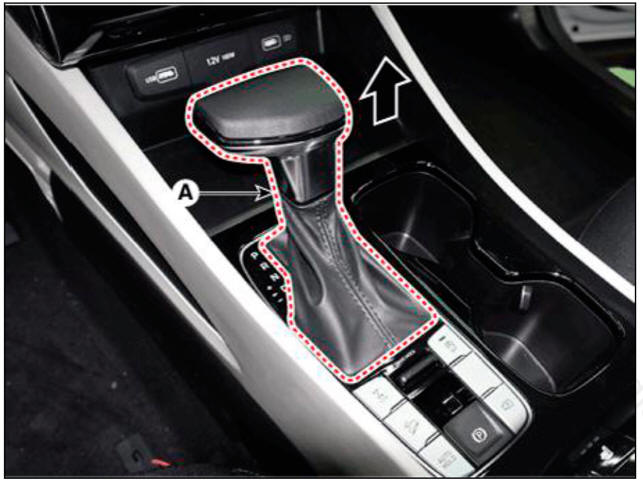
AT
- To remove the gear knob & gear boots (A) pull both of it up.
- Remove the console upper cover (A).
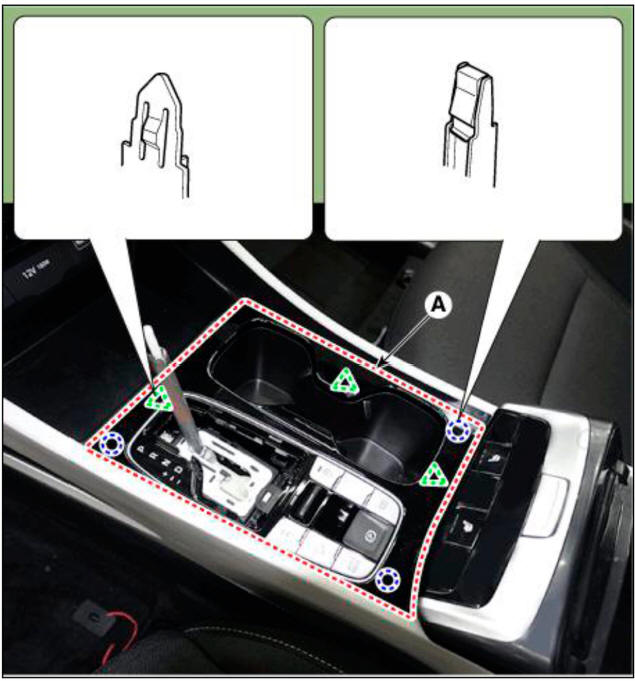
- Disconnect the console upper cover connector (A).
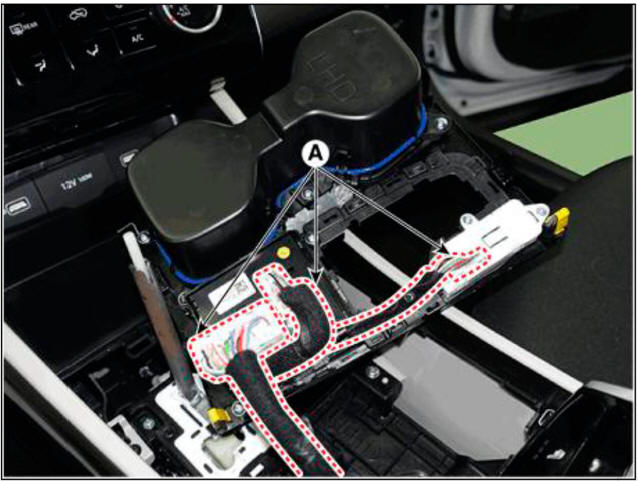
MT
- Separate the gear boots (A).
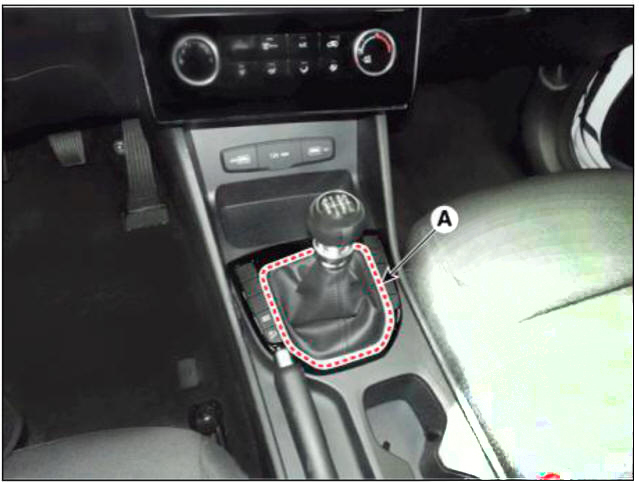
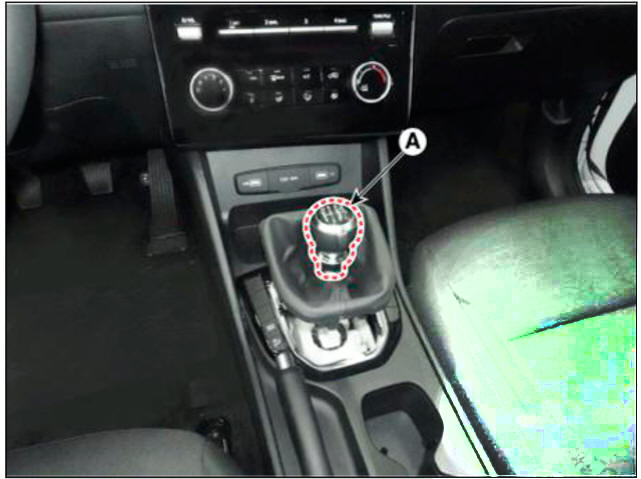
WARNING
Do not remove the gear knob (A).
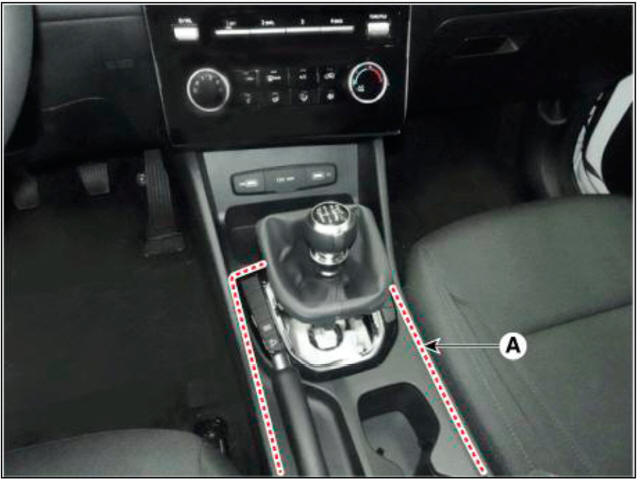
- Remove the console upper cover (A).
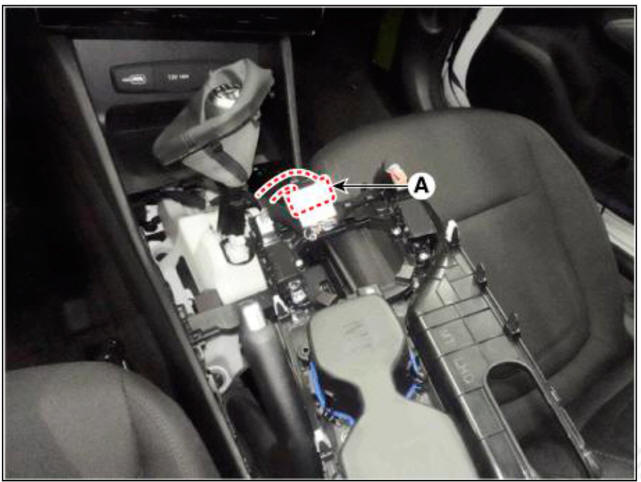
- Disconnect the console upper cover connector (A).
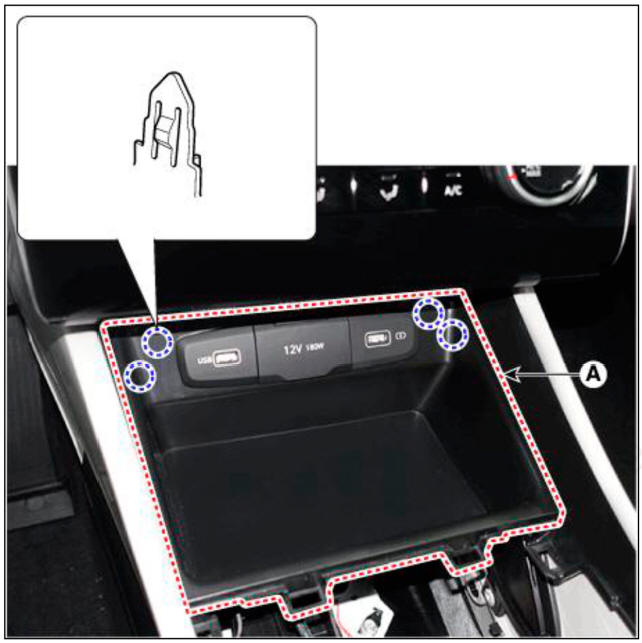
- Remove the console tray (A).
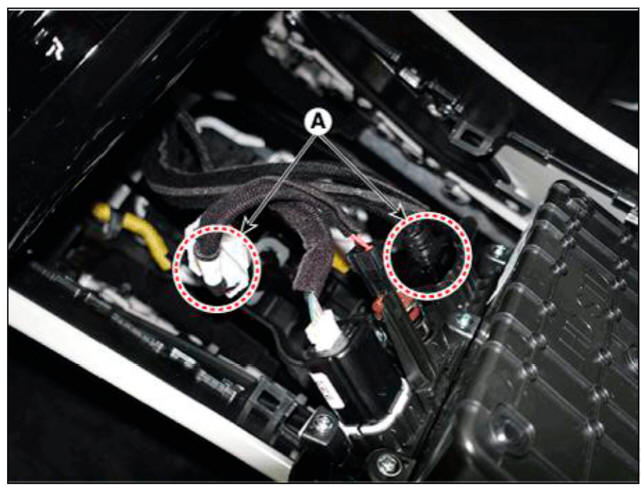
- Disconnect the connectors (A).
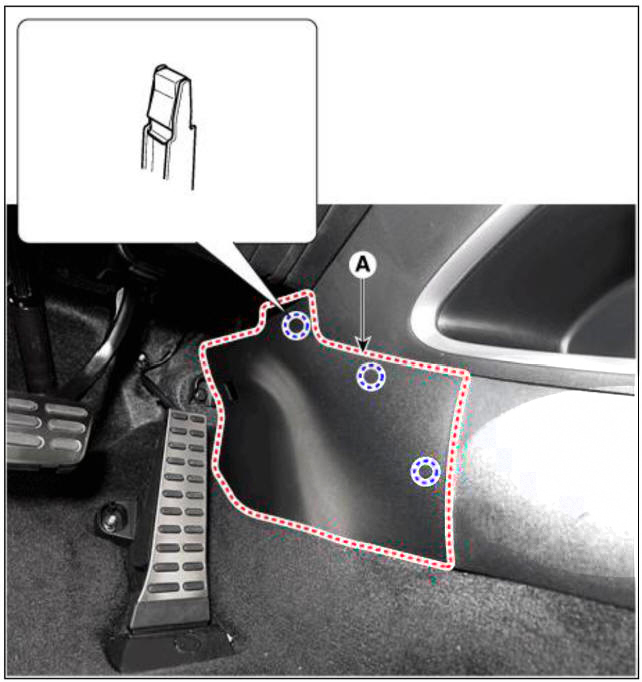
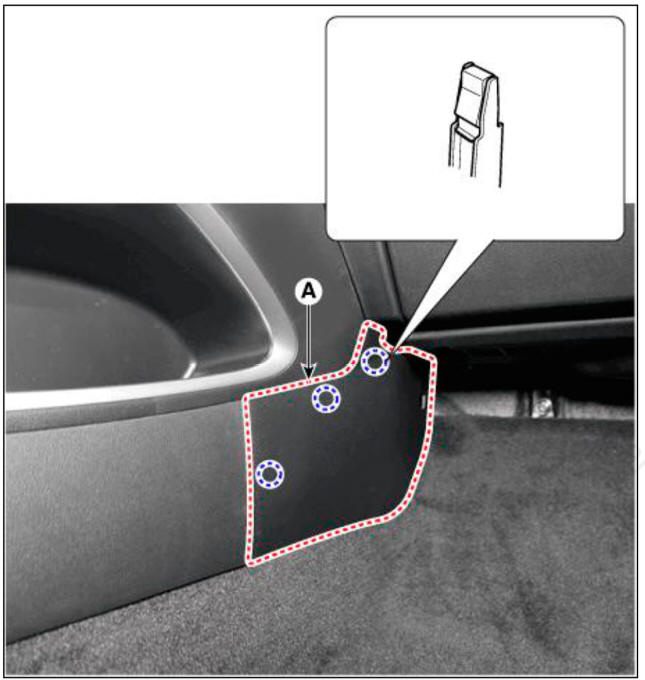
- Remove the console side cover (A)
LH
RH
- Remove the storage box mat (A).
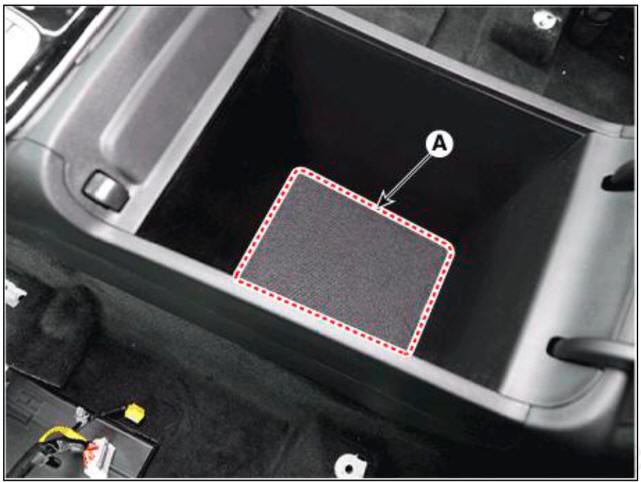
- Disconnect the connector (A).
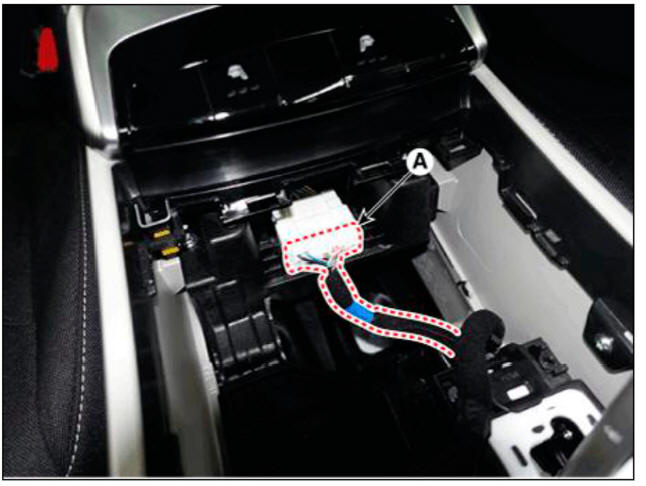
- Loosen the mounting bolts and screws, remove the floor console assembly (A)
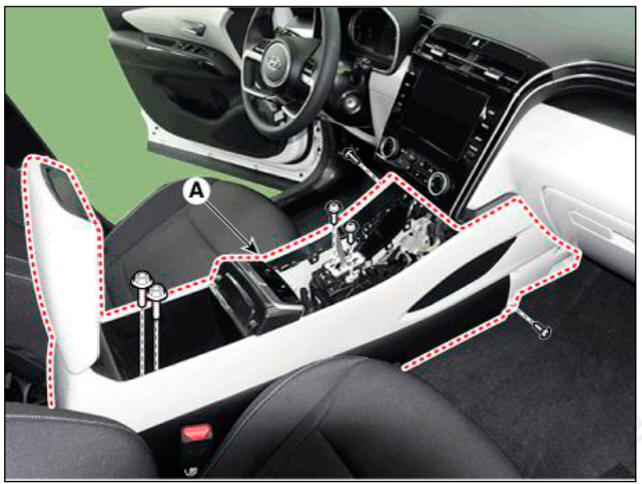
- To install, reverse removal procedure.
WARNING
- Make sure the connector is connected properly.
- Replace any damaged clips (or pin-type retainers).
READ NEXT:
 Rear console cover
Component Location
Rear console cover
Replacement
WARNING
When removing with a flat-tip screwdriver or remover, wrap
protective tape around the tools to
prevent damage to components.
Put on gloves to prevent hand injuries.
W
Console armrest
Component Location
Console armrest
Replacement
WARNING
When removing with a flat-tip screwdriver or remover, wrap
protective tape around the tools to
prevent damage to components.
Put on gloves to prevent hand injuries.
WARN
Crash Pad
Components
Crash pad side cover LH
Crash pad lower panel
Crash pad assembly
Crash pad side cover RH
SEE MORE:
Steering wheel
Electric Power Steering (EPS)
The system assists you with steering the
vehicle. If the vehicle is turned off or
if the power steering system becomes
inoperative, you may still steer the
vehicle, but it will require increased
steering effort.
Battery Pack Assembly Inlet Duct/ Battery Pack
Assembly Outlet Duct
Removal and
Installation
Battery Pack Assembly Inlet Duct
Turn the ignition switch OFF and disconnect the battery (-) terminal.
Remove the luggage board (A).
Separate the inlet cooling duct (A) in the direction of the arrow.
Tigh
Information
- Home
- Hyundai Tucson - Fourth generation (NX4) - (2020-2023) - Owner's Manual
- Hyundai Tucson - Fourth generation (NX4) - (2020-2023) - Workshop Manual
