Hyundai Tucson: Battery Pack Assembly Inlet Duct/ Battery Pack Assembly Outlet Duct
Hyundai Tucson - Fourth generation (NX4) - (2020-2023) - Workshop Manual / Engine Electrical System / 48V Battery System / Battery Pack Assembly Inlet Duct/ Battery Pack
Assembly Outlet Duct
Removal and Installation
Battery Pack Assembly Inlet Duct
- Turn the ignition switch OFF and disconnect the battery (-) terminal.
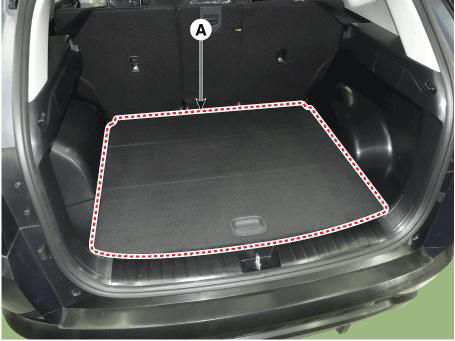
- Remove the luggage board (A).
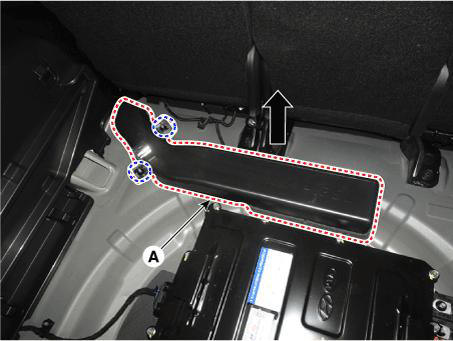
- Separate the inlet cooling duct (A) in the direction of the arrow.
Tightening torque : 7.8 - 11.8 N.m (0.8 - 1.2 kgf.m, 5.8 - 8.7 lb-ft)
- Install in the reverse order of removal.
Battery Pack Assembly Outlet Duct
- Turn the ignition switch OFF and disconnect the battery (-) terminal.
- Remove the luggage board (A)

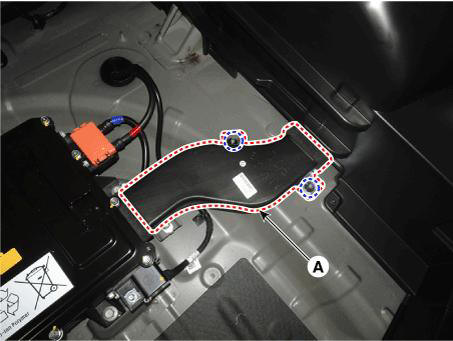
- Remove the outlet cooling duct (A).
Tightening torque : 7.8 - 11.8 N.m (0.8 - 1.2 kgf.m, 5.8 - 8.7 lb-ft)
- Install in the reverse order of removal.
READ NEXT:
 Battery Module Inlet Duct
Turn ignition switch OFF and disconnect the battery (-) terminal.
Remove the 48V battery assembly
(Refer to 48V Battery System - "Repair procedures")
Remove the battery cover (A) after loosening the mounting bolts.
Tightening
Battery Module Inlet B Duct
Remove the 48V battery assembly.
(Refer to 48V Battery System - "Repair procedures")
Remove the battery pack assembly inlet duct B (A) after loosening the
mounting bolts.
Install in the reverse order of removal.
Sp
Engine Room Under Cover
Removal
Turn the ignition switch OFF and disconnect the battery (-) terminal.
Remove the engine room under cover.
(Refer to Engine Mechanical System - "Engine Room Under Cover")
Disconnect the ground cable (A).
Tightening to
SEE MORE:
GPF Regeneration
This procedures is to forcibly regenerate the GPF with scan tool when the GPF
doesn't have been regenerated during driving. For
example, if the vehicle has repeated "Low speed driving" or "Short distance
driving", the GPF
System maintenance
Cabin air filter
[A] : Outside air, [B] : Recirculated air
[C] : Cabin air filter, [D] : Blower
[E] : Evaporator core, [F] : Heater core
The cabin air filter is installed behind
the glove box. It filters the dust or other
pollutants that en
Information
- Home
- Hyundai Tucson - Fourth generation (NX4) - (2020-2023) - Owner's Manual
- Hyundai Tucson - Fourth generation (NX4) - (2020-2023) - Workshop Manual
