Hyundai Tucson: Timing System - Installation
Hyundai Tucson - Fourth generation (NX4) - (2020-2023) - Workshop Manual / Engine Mechanical System / Timing System / Timing System - Installation
- Install the crankshaft sprocket (A).
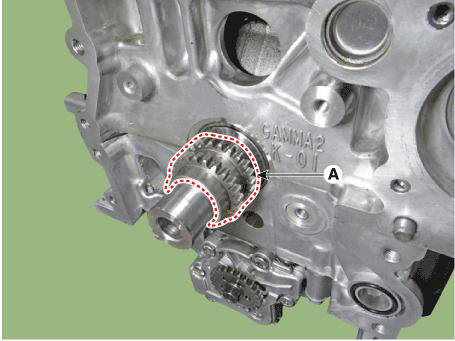
- Place the crankshaft key at the left 180º.
- Install the oil pump chain.
(Refer to Lubrication System - "Oil Pump")
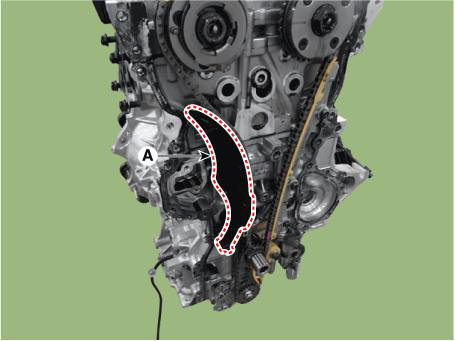
- Install the timing chain (A).
WARNING
- When installing the timing chain, be sure that the timing mark (A) of each sprocket is matched with the timing mark (B) (color link) of the timing chain.
Intake CVVT Timing Mark
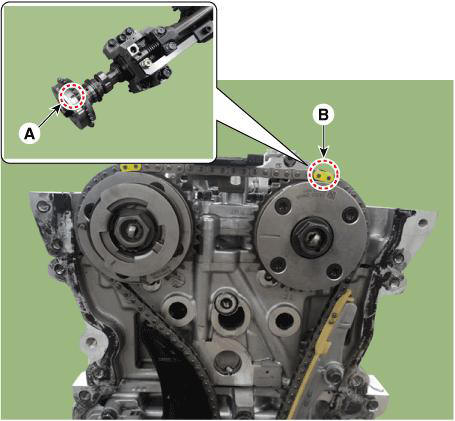
Exhaust CVVT Timing Mark
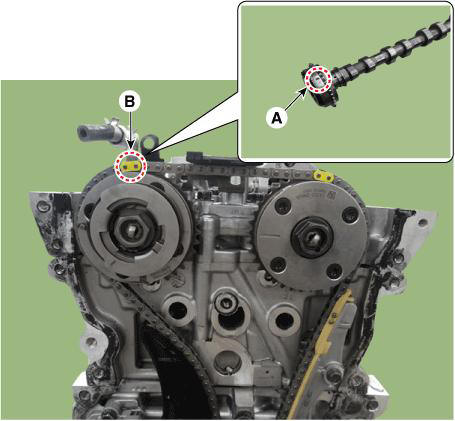
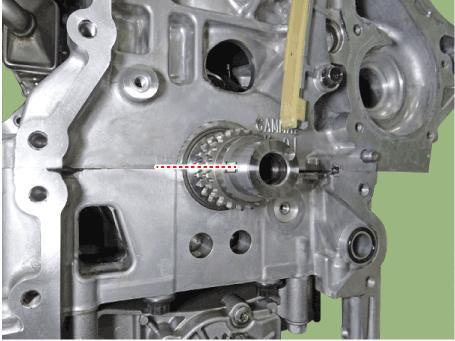
Crankshaft Sprocket Timing Mark
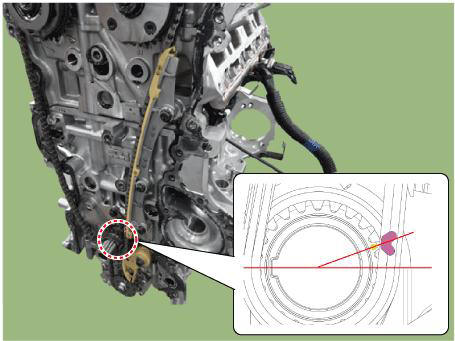
- Confirm that the TDC marks on the intake and exhaust CVVT sprockets are aligned with the top surface of cylinder head.
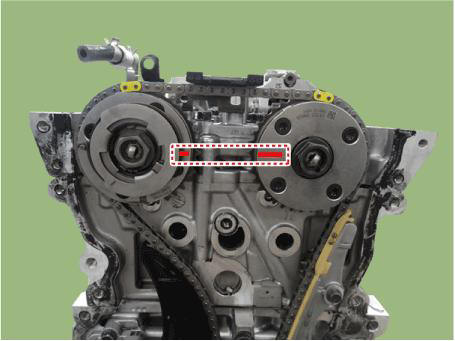
- Install the timing chain guide (A).
Tightening torque : 9.8 - 11.8 N.m (1.0 - 1.2 kgf.m, 7.2 - 8.7 lb-ft)
- Install the timing chain tensioner arm (A).
Tightening torque : 9.8 - 11.8 N.m (1.0 - 1.2 kgf.m, 7.2 - 8.7 lb-ft)
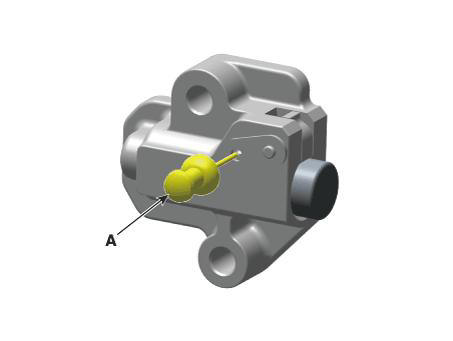
- Install the timing chain tensioner (A).
Tightening torque : 9.8 - 11.8 N.m (1.0 - 1.2 kgf.m, 7.2 - 8.7 lb-ft)

WARNING
- Install the timing chain tensioner, and then remove the pin
(A).
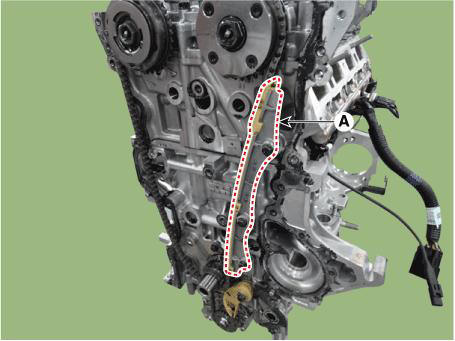
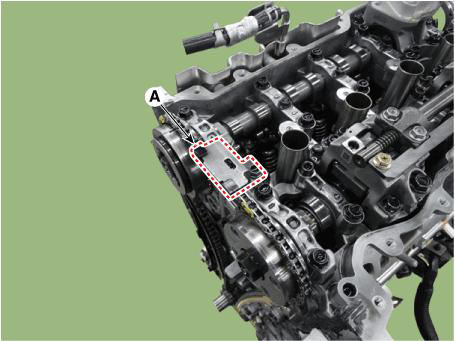
- Install the cam to cam guide (A).
Tightening torque : 9.8 - 11.8 N.m (1.0 - 1.2 kgf.m, 7.2 - 8.7 lb-ft)
- After rotating crankshaft 2 revolutions in regular direction (clockwise viewed from front), confirm that the TDC marks on the intake and exhaust CVVT sprockets are aligned with the top surface of cylinder head

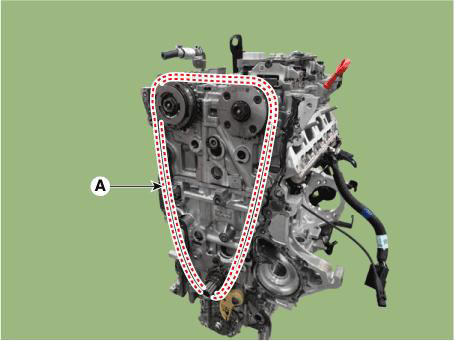
- Install the timing chain cover.
(Refer to Timing System - "Timing Chain Cover")
- Install the other parts in the reverse order of removal
READ NEXT:
 48V Battery System - Description
Description
The Mild Hybrid Electric Vehicle (MHEV) uses hybrid power source (Engine,
MHSG), so its fuel efficiency is relatively high
and exhaust emission is very small compared to the traditional vehicle which
uses only engine as power source
SEE MORE:
Brake Tube Engine Room
Components
Removal
WARNING
Be careful not to damage the parts located under the vehicle
(floor under cover, fuel filter, fuel tank and
canister) when raising the vehicle using the lift.
(Refer to General Information - "Lift and Su
Intelligent speed limit assist (ISLA)
Intelligent Speed Limit Assist uses
information from the detected road sign
and navigation system to inform the
driver of the speed limit and additional
information of the current road. Also,
Intelligent Speed Limit Assist helps the
driver to m
Information
- Home
- Hyundai Tucson - Fourth generation (NX4) - (2020-2023) - Owner's Manual
- Hyundai Tucson - Fourth generation (NX4) - (2020-2023) - Workshop Manual
