Hyundai Tucson: Seat heater
Components
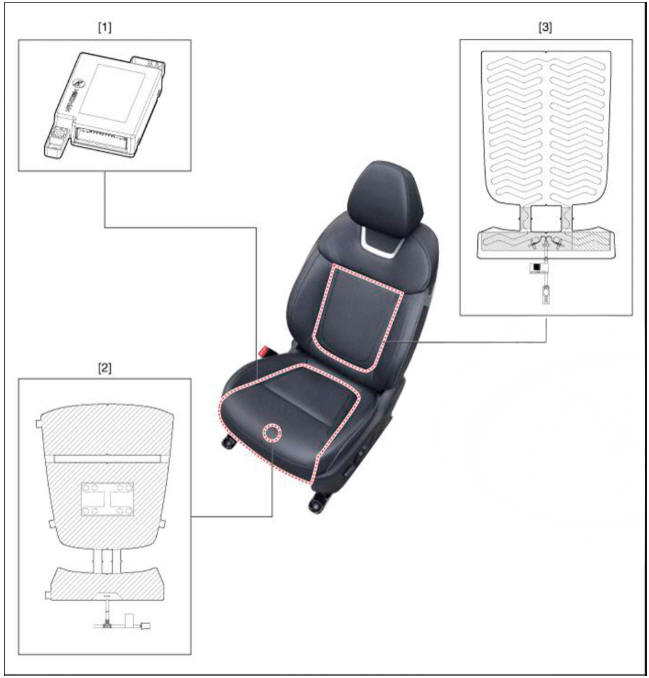
- Seat heater unit
- Seat cushion heater
- Seat back heater
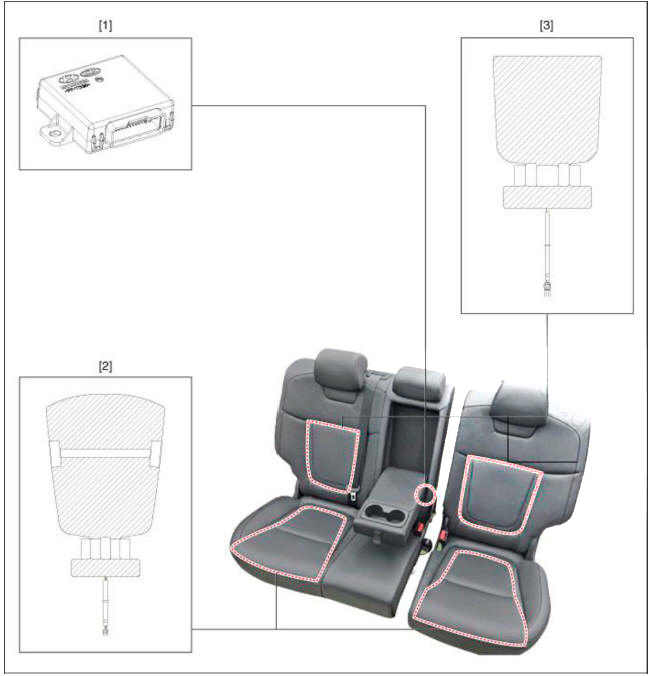
- Second line seat heater unit
- Second line seat cushion heater
- Second line seat back heater
Driver/Passenger Seat Heater
Components

Second Line Seat Heater
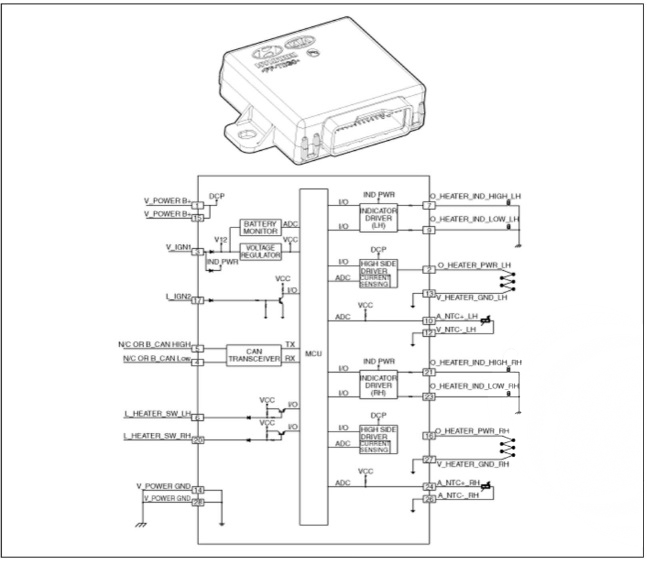
Driver/Passenger
Inspection
- Check for continuity and measure the resistance between terminals.
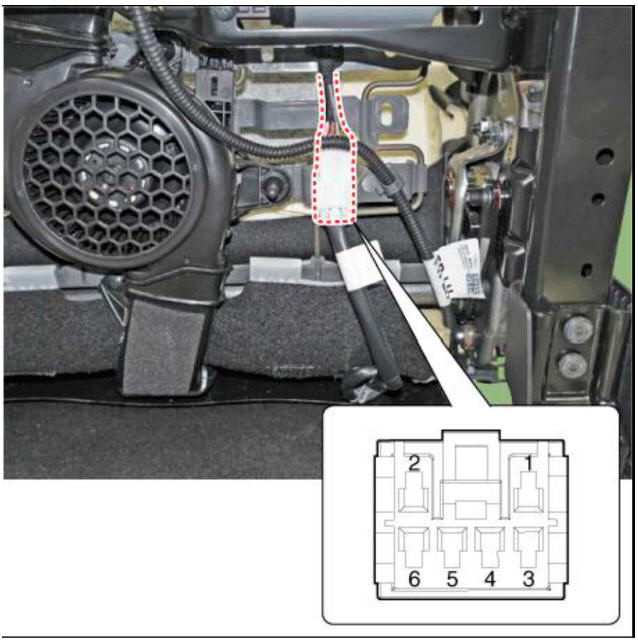

- Operate the seat heater after connecting the connector, and then check the thermostat by measuring the temperature of seat surface.

Diasgnosis mode
- Enter the diagnostic mode referring to below description.
- In failure mode, press the ventilation seat button for 4 seconds and release it.
- Press the ventilation seat button for 2 seconds and release it.
- Lastly, press the ventilation seat button for 4 seconds and release it.
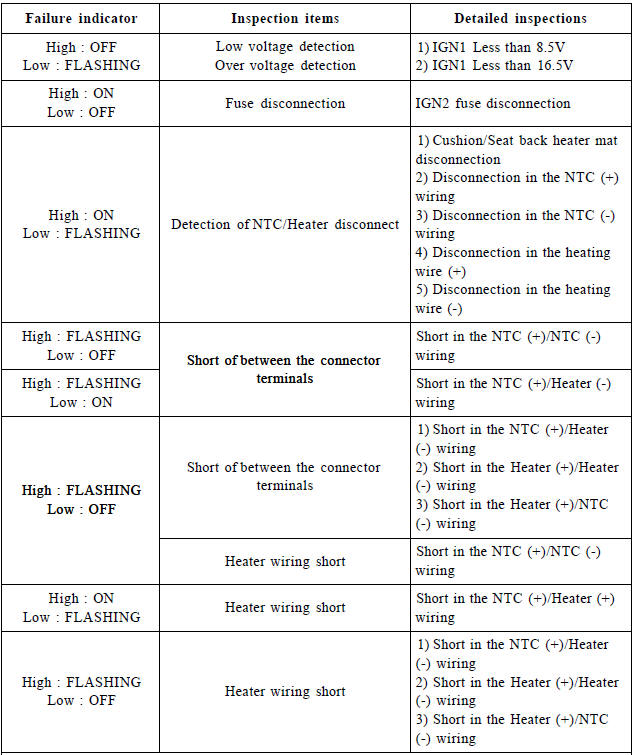
- When entering the failure mode, the LED of the ventilation seat button turns ON/OFF/blinks at each stage.
- After entering the diagnosis mode, you can check what failed by checking the blinking LED.
- The table below indicates the failure based on priority, upper item means higher priority.
- If more than one failure is detected, higher priority failure is displayed through the LED flashing pattern.
- Lower priority failure will be displays if higher priority failure is reset.
Heater Switch
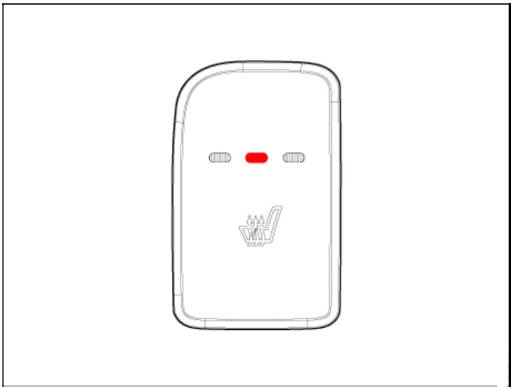
Driver/Passenger

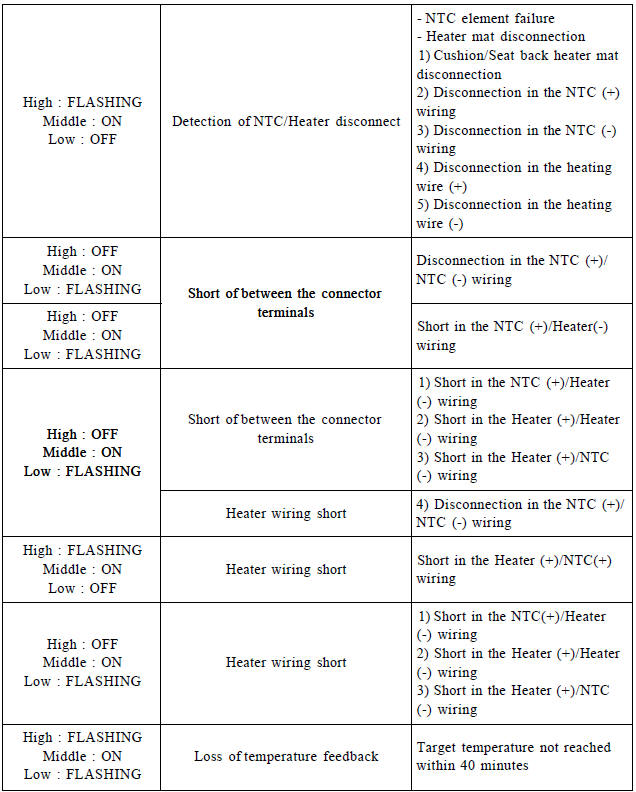
Second line seat heater

- If you press the seat heater button for more than five seconds, the LED for malfunctioning memory will blink four times and the recorded memory will be deleted.
- Pressing the IGN OFF button will end the diagnosis mode for the seat.
- You can check whether the heating seat system works properly after turning the IGN ON. If you want to check the error code, you can refer to the procedure of 2 above.
Removal
Seat Cushion Heater
- Disconnect the negative (-) battery terminal.
- Remove the cushion assembly after separating the seat cusion cover.
(Refer to Body - "Front Seat Cushion Cover") (Refer to Body - "Rear Seat Cushion Cover")
Seat Back Heater
- Disconnect the negative (-) battery terminal.
- Remove the seat back cover.
(Refer to Body - "Front Seat Back Cover") (Refer to Body - "Rear Seat Back Cover")
Installation
- Install the seat cover with seat cushion/back assembly.
- Install the front/rear seat.
- Connect the negative (+) battery terminal.
READ NEXT:
 Seat heater (Ventilation)
Components
Seat cushion heater (Ventilation)
Seat heater (Ventilation) unit
Seat back heater (Ventilation)
Circuit Diagram
Inspection
Driver/Passenger
Check for continuity and measure the resistance between terminals.
 Front seat heater switch / Rear seat heater switch
Front seat heater switch
Rear seat heater switch
Circuit Diagram
Connector Pin Information
Removal
When removing with a flat-tip screwdriver or remover, wrap protective
tape around the tools to
prevent damage to components.
 Air ventilation seat
Component Location
Air ventilation seat blower
Air ventilation seat control unit
Air ventilation seat duct
Components
Removal
Cushion Blower
Remove the front seat assembly.
(Refer to Body - "Front Seat Assembly")
SEE MORE:
 Hood
Hood
Adjustment
After loosening the hinge (A) mounting bolt, adjust the hood (B) by
moving it up and down or from side to side and tighten
the bolt.
Adjust the hood height by moving the hood overslam bumpers (C) up and
down.
After loosenin
 Knock Sensor (KS)
Description
Knocking is a phenomenon characterized by undesirable vibration and noise and
can cause engine
damage.
Knock Sensor (KS) is installed on the cylinder block and senses engine knocking.
When knocking
occurs, the vibration from the
Information
- Home
- Hyundai Tucson - Fourth generation (NX4) - (2020-2023) - Owner's Manual
- Hyundai Tucson - Fourth generation (NX4) - (2020-2023) - Workshop Manual