Hyundai Tucson: Air ventilation seat
Hyundai Tucson - Fourth generation (NX4) - (2020-2023) - Workshop Manual / Body Electrical System / Seat Electrical / Air ventilation seat
Component Location

- Air ventilation seat blower
- Air ventilation seat control unit
- Air ventilation seat duct
Components
Removal
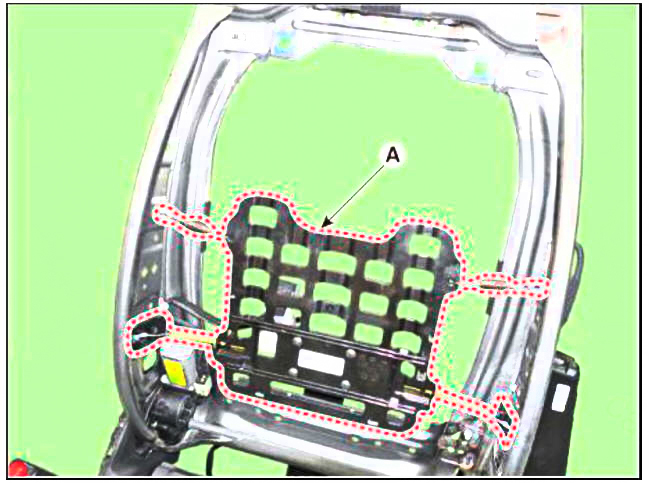
Cushion Blower
- Remove the front seat assembly.
(Refer to Body - "Front Seat Assembly")
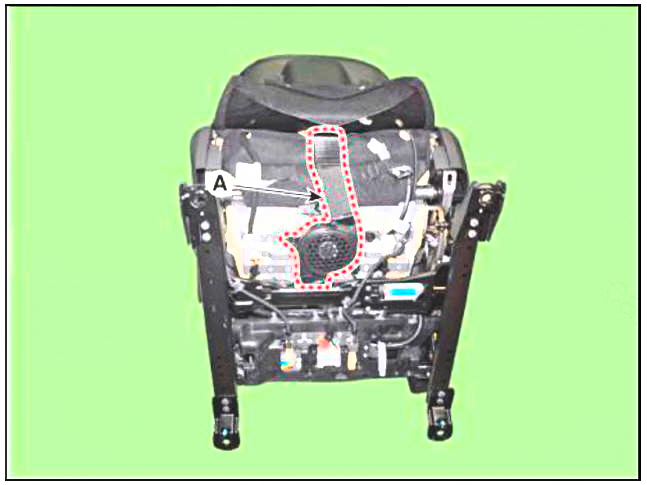
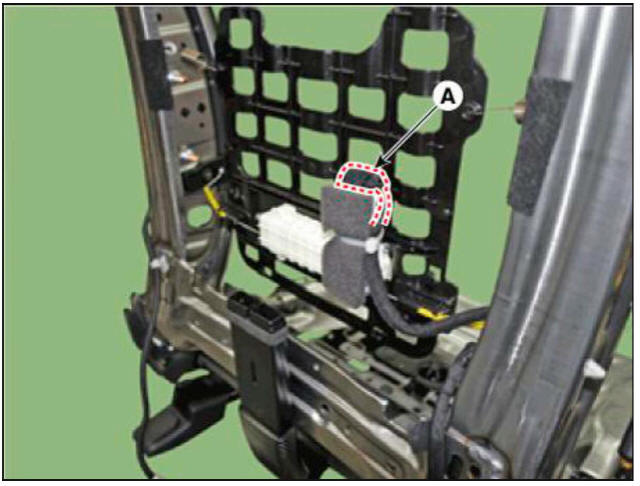
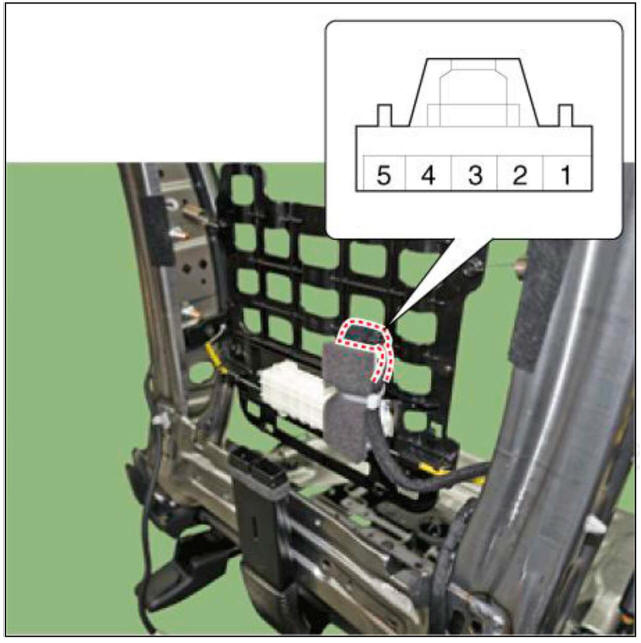
- Remove the cushion blower(A) after loosening the disconnecting the connector.
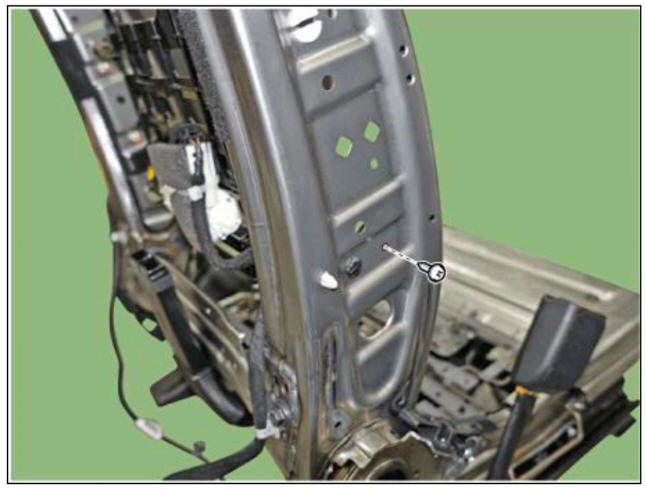
Air Duct
- Remove the front seat back cover.
(Refer to Body - "Front Seat Back Cover")
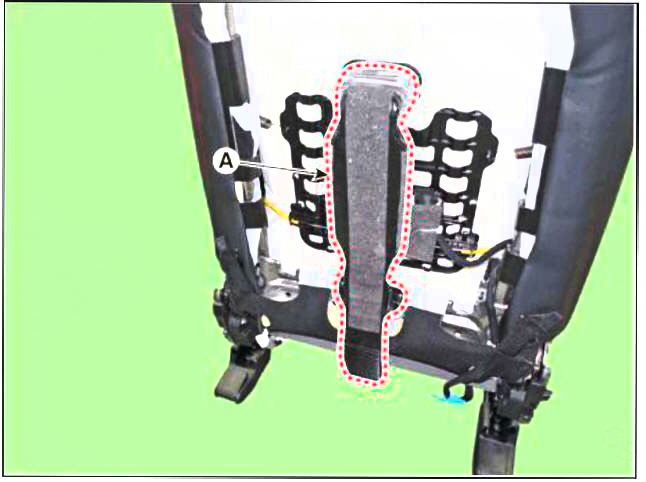
- Remove the air duct (A) after loosening mounting screws.
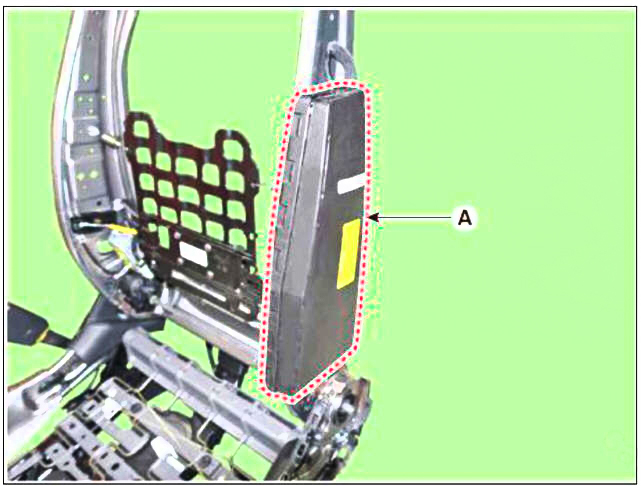
Air Ventilation Unit
- Remove the front seat assembly.
(Refer to Body - "Front Seat Assembly")
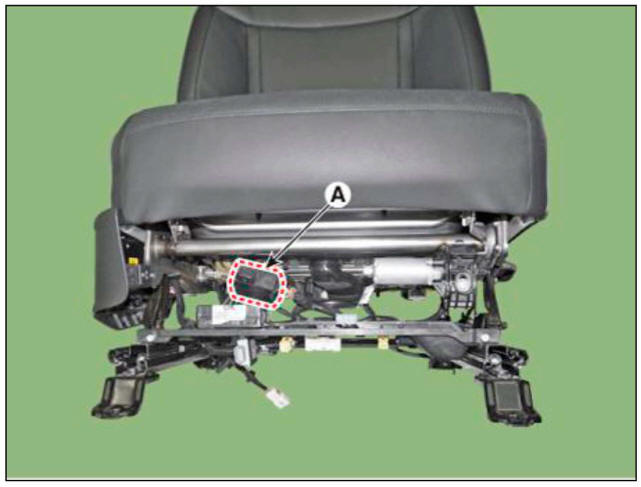
- Remove the air ventilation unit (A) after loosening mounting screws.

- Remove the air ventilation unit (A) after disconnecting unit connector.
Installation
Cushion Blower
- Install the cushion blower.
- Install the front seat assembly.
Air Ventilation Unit
- Install the air ventilation unit.
- Install the front seat assembly.
Air Duct
- Install the air duct.
- Install the front seat back cover.
Inspection
Diagnosis mode
- You can enter the diagnosis mode by turning the ventilation seat button on.
- Enter the diagnostic mode referring to below description.
- In failure mode, press the ventilation seat button for 4 seconds and release it.
- Press the ventilation seat button for 2 seconds and release it.
- Lastly, press the ventilation seat button for 4 seconds and release it.
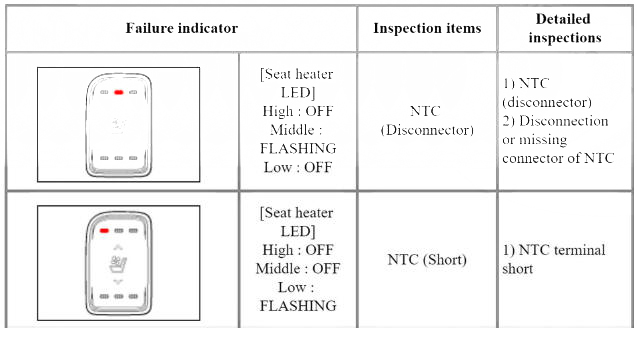
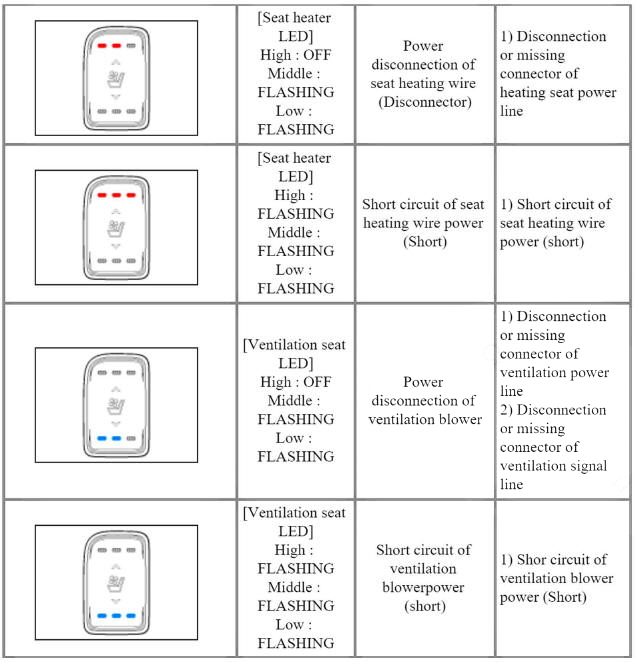
- When entering the failure mode, the LED of the ventilation seat button turns ON/OFF/blinks at each stage.
- After entering the diagnosis mode, you can check what failed by checking the blinking LED.
Ventilation & Heater Switch
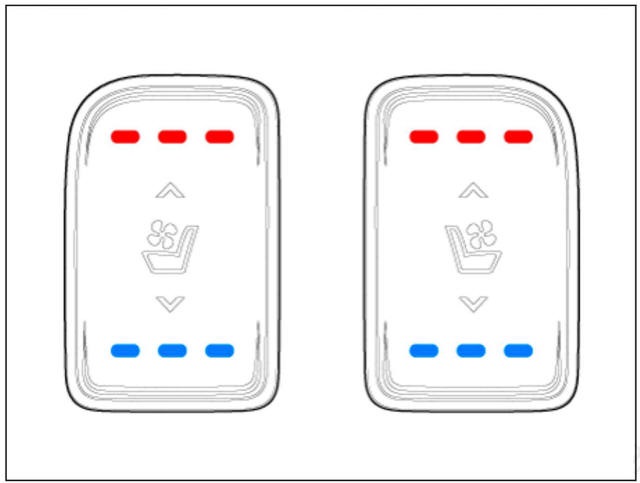
- You can check the malfunctioning by checking the blinking LED.
- The ventilating seat unit will record the malfunctioning that occurred.
- If you press the seat heater button for more than five seconds, the LED for malfunctioning memory will blink four times and the recorded memory will be deleted.
- Pressing the IGN OFF button will end the diagnosis mode for the ventilating seat.
- You can check wheter the ventilating seat system works properly after turning the IGN ON. If you want to check the error code, you can refer to the procedure of 2 above.
Removal
- Disconnect the negative (-) battery terminal.
- Remove the front seat back cover.
(Refer to Body - "Front Seat Back Cover")
- Disconnect motor connecotor (A).
- Remove the front side airbag (A).
- Remove the lumber support cable bracket after loosening mounting screws.
- Remove the lumber support (A).
Installation
- Install the lumber support assembly.
- Install the seat back cover.
Inspection
- Remove the front seat back cover.
- When the battery power is supplied to the motor connector, check the motor for smooth operation.
- Reverse the connections and check that the motor turns in reverse.
- If the motor runs abnormally, replace it.
READ NEXT:
 Power Relay (Type A)
Component Location
Engine room junction block
ICU Junction block
Inspection
Power Relay (Type A)
There should be continuity between the No.30 and No.87 terminals when
power and ground are
connected to the No.85 and No.86
ICU (Integrated Central Control Unit)
Dscription and Operation
ICU (Integrated Central Control Unit) is an integrated model of smart
junction block and central gateway.
It performs the function of conventional "Smart junction block" and the function
of communication med
SEE MORE:
IMS (Integrated Memory)
Description
The optimal seat position set by the driver is memorized into the power seat
unit by using IMS switch.
In case of the position change, the seat can restore its preset position by IMS
switch.
It has safety functions of restoring
Highway Driving Assist (HDA)
Highway Driving Assist is designed to
help detect vehicles and lanes ahead,
and help maintain distance from the
vehicle ahead, maintain the set speed,
and help center the vehicle in the
lane while driving on the highway (or
motorway).
Info
Information
- Home
- Hyundai Tucson - Fourth generation (NX4) - (2020-2023) - Owner's Manual
- Hyundai Tucson - Fourth generation (NX4) - (2020-2023) - Workshop Manual
