Hyundai Tucson: Rear seat cushion assembly
Hyundai Tucson - Fourth generation (NX4) - (2020-2023) - Workshop Manual / Body (Interior and Exterior) / Rear Seat / Rear seat cushion assembly
Component Location
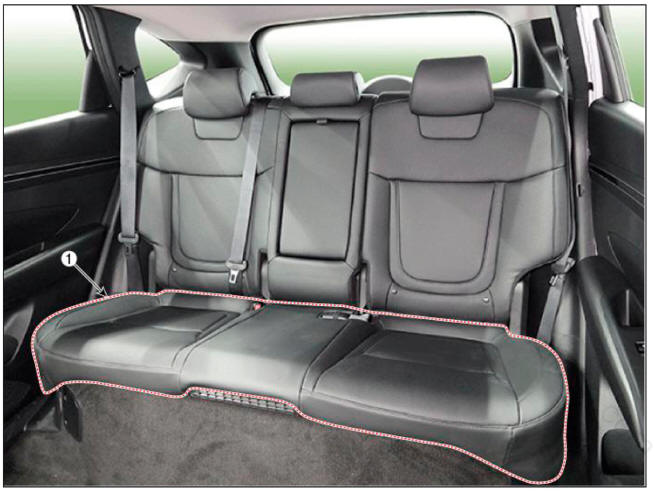
- Rear seat cushion assembly
Replacement
WARNING
Put on gloves to protect your hands.
WARNING
Take care not to bend or scratch the rear seat assembly.
- Remove the rear seat cushion assembly.
(Refer to Rear Seat - "Rear Seat Assembly")
- After removing the Velcro tape (A) and hog-ring clips (B) inside the rear seat cushion cover, remove the seat cushion cover (C).
WARNING
Be careful not to deviate from the pads, insert wires, and aplix.
Front side
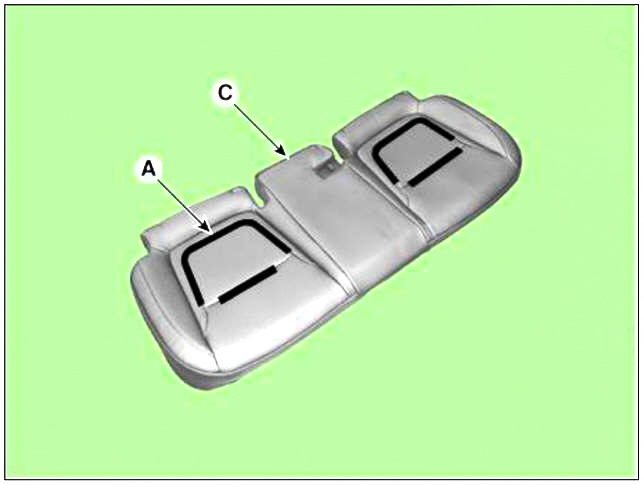
Rear side
- To install, reverse the removal procedure.
WARNING
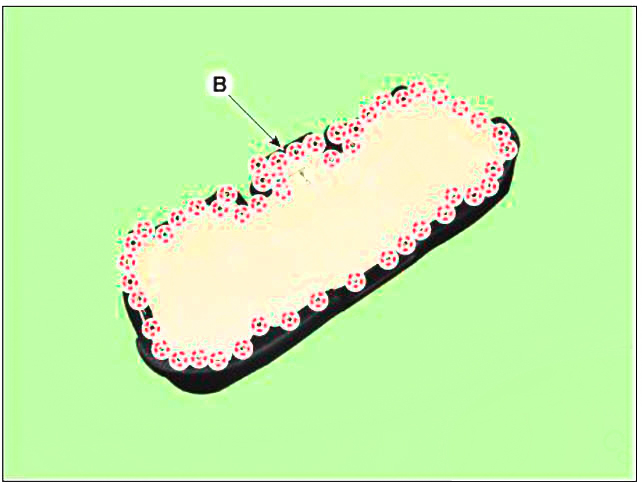
- To prevent wrinkles, make sure that the cover (B) is stretched evenly before connecting the hog - ring clips (A).
- Replace the hog-ring clips with new ones using special tool (C)
(09880 - 4F000).
READ NEXT:
 Front Seat Belt
Components
Front seat belt retractor
Height adjust
Rear seat belt retractor
Rear seat belt buckle RH
Rear seat belt buckle CTR
Rear seat belt buckle LH
Front seat belt pretensioner
Component Location
Front seat belt pretensioner
Replacement
WARNING
When installing the belt, make sure not to damage the pretensioner.
Disconnect the negative (-) battery terminal.
Remove the center pillar upper trim.
(Refer to
Height adjust
Component Location
Height adjust
Replacement
Remove the front seat belt upper anchor.
(Refer to Front Seat Belt - "Front Seat Belt Pretensioner")
After loosening the mounting bolts, then remove the height adjust (A).
T
SEE MORE:
Ignition System - Description
The ignition coil is a kind of small transformer that transforms the battery
voltage to 30 kV or more to
create a spark in the spark plug gap in the cylinder.
The igniter embedded in the ignition coil includes the power transistor and it
is a
Inspection (With diagnostic tool)
In the body electrical system, failure can be quickly diagnosed by using
the vehicle diagnostic system (diagnostic tool).
The diagnostic system (diagnostic tool) provides the following information.
(1) Fault Code Searching : Checking failu
Information
- Home
- Hyundai Tucson - Fourth generation (NX4) - (2020-2023) - Owner's Manual
- Hyundai Tucson - Fourth generation (NX4) - (2020-2023) - Workshop Manual
