Hyundai Tucson: Rear door trim
Component Location
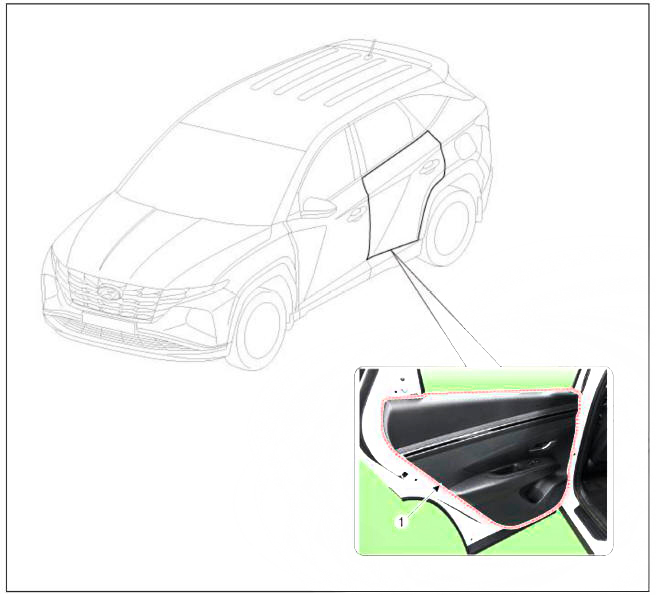
- Rear door trim
Replacement
WARNING
- When removing with a flat - tip screwdriver or remover, wrap protective tape around the tools to prevent damage to components.
- Put on gloves to prevent hand injuries.
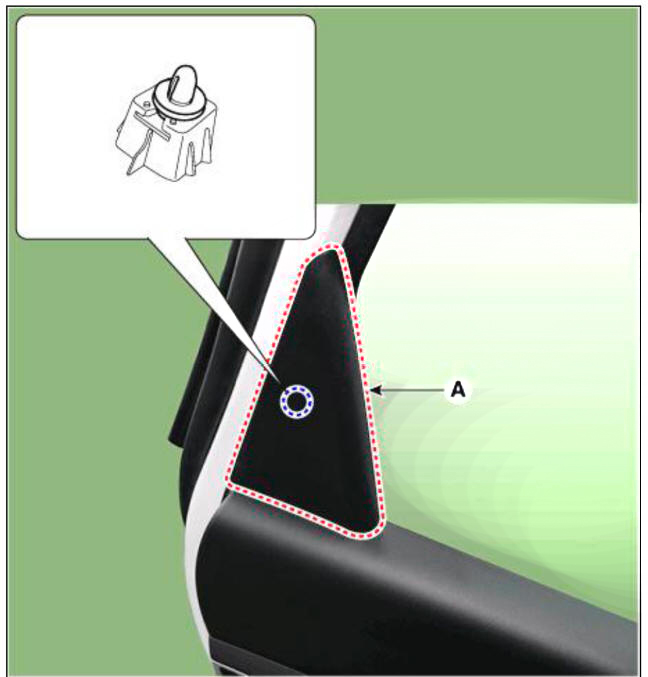
- Using a screwdriver or remover, remove the rear door delta inner cover (A).
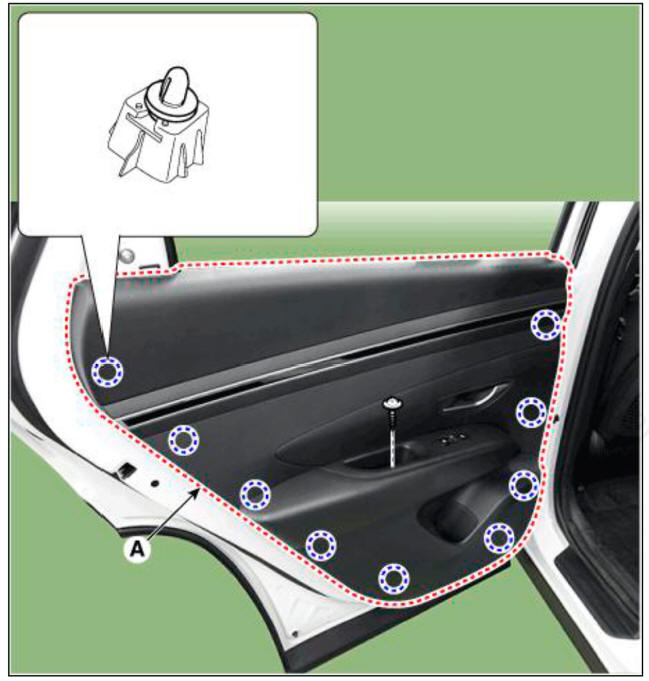
- After loosening the mounting screws, remove the rear door trim (A).
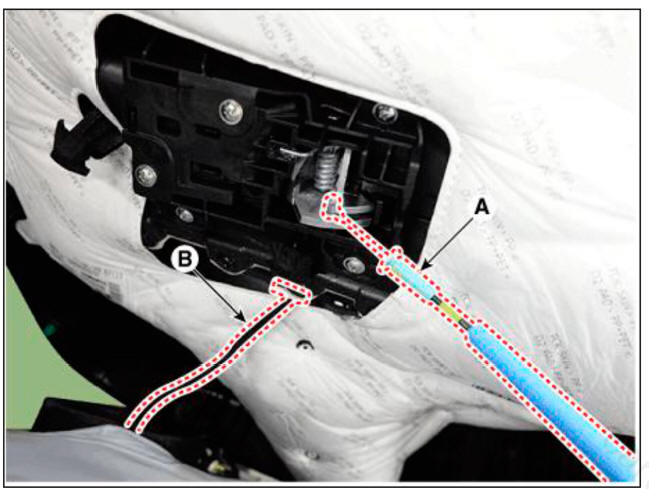
- Disconnect the rear door inside handle cable (A) and connector (B).
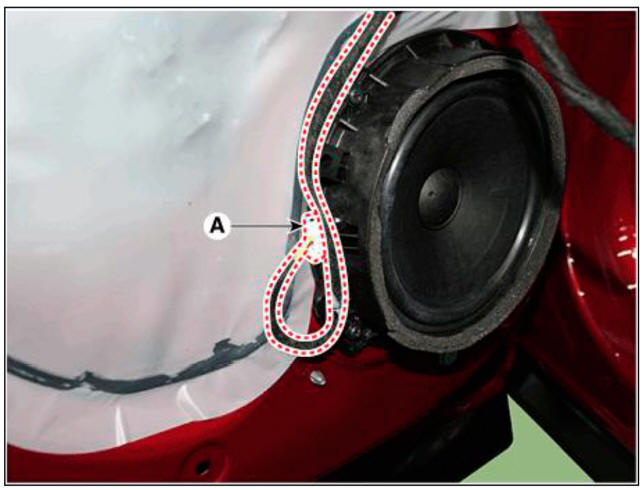
- Press the lock pin, separate the speaker connector (A).
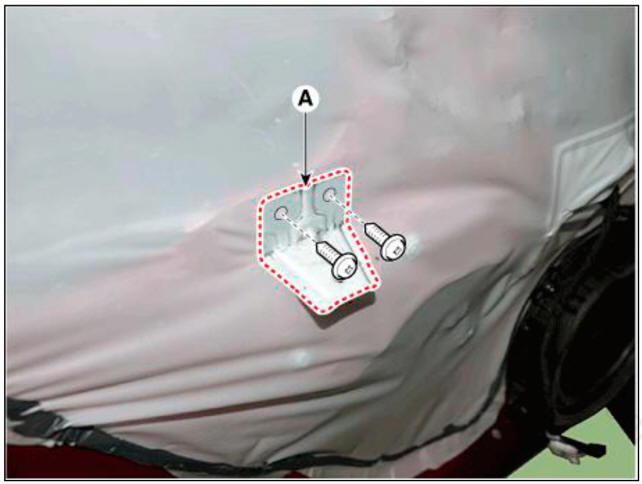
- Loosen the mounting screws, remove the hanlde mounting support bracket (A).
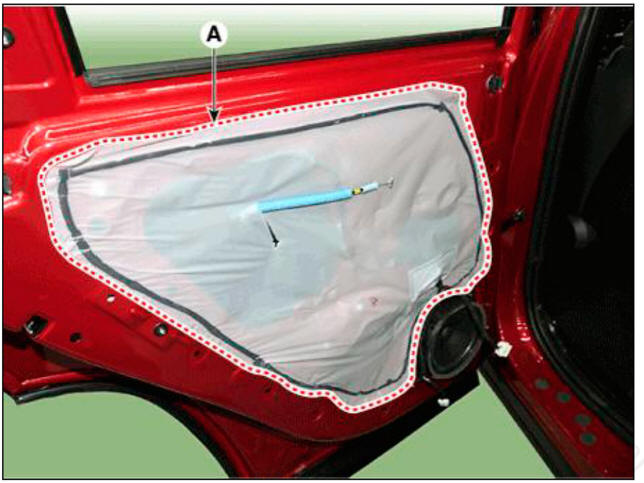
- Remove the rear door trim seal (A).
- To install, reverse the removal procedure.
WARNING
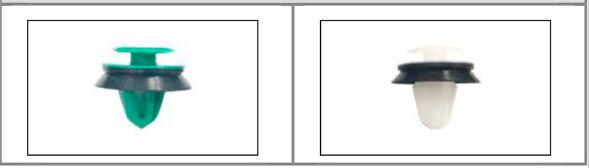
- Be sure to replace the clip (fastener) when re-installing after detaching the door trim.
In case of non-exchange, watertightness / exit problems may occur
 Water tightness prevention
- Make sure the connector is connected properly.
- Make sure the door locks / unlocks and opens / closes properly
- Replace any damaged clips (or pin-type retainers).
- Make sure the glass is operated properly.
READ NEXT:
 Rear door trim - Removal
Remove the rear door trim.
(Refer to Rear Door - "Rear Door Trim")
After loosening the mounting screws, remove the rear door inside handle
(A).
To install, reverse removal procedure.
WARNING
Make sure the door locks
Rear door window glass
Component Location
Rear door window glass
Replacement
WARNING
When removing with a flat-tip screwdriver or remover, wrap
protective tape around the tools to prevent
damage to components.
Put on gloves to prevent hand injuries.
Rear door outside handle
Component Location
Rear door outside handle
Replacement
Rear Door Outside Handle Assembly
WARNING
When removing with a flat-tip screwdriver or remover, wrap
protective tape around the tools to prevent
damage to components.
Put
SEE MORE:
Front View Camera System - Variant Coding
Components Location
Front camera
Speaker (Cluster)
Variant Coding
WARNING
When you need variant coding:
Replace Front View Camera with a new one
* EOL Variant Coding and calibration required for new replacement
Front View Camer
Controller
Component
Connector Pin Function
Replacement
Disconnect the negative (-) battery terminal.
Remove the front monitor.
(Refer to Body Electrical System - "Front Monitor")
Remove the heater & AJC control unit (A).
Information
- Home
- Hyundai Tucson - Fourth generation (NX4) - (2020-2023) - Owner's Manual
- Hyundai Tucson - Fourth generation (NX4) - (2020-2023) - Workshop Manual
