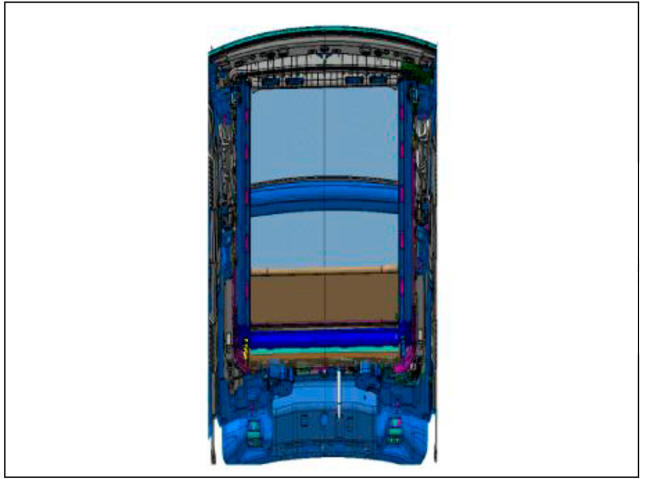
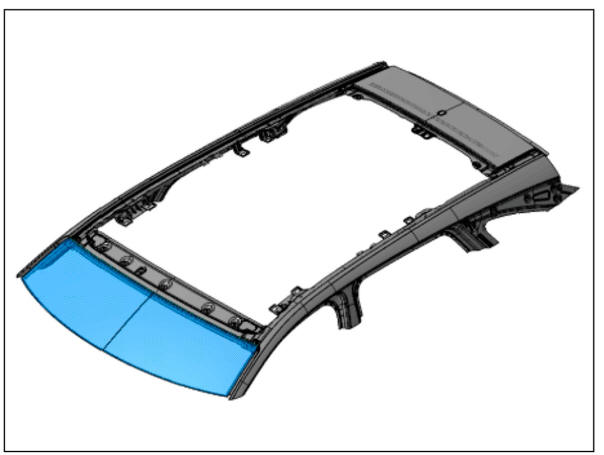
Hyundai Tucson: Panorama Sunroof - Removal
- Remove the roof trim.
(Refer to Roof Trim - "Roof Trim Assembly")
- Open the roller blind using the panorama sunroof switch.
WARNING
Leave 10 - 20cm (0.3937 - 0.7874 in) of the roller blind unopened.
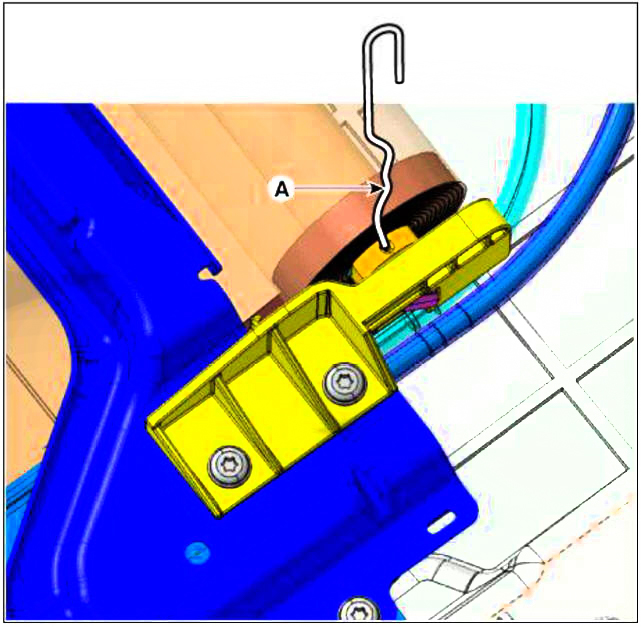
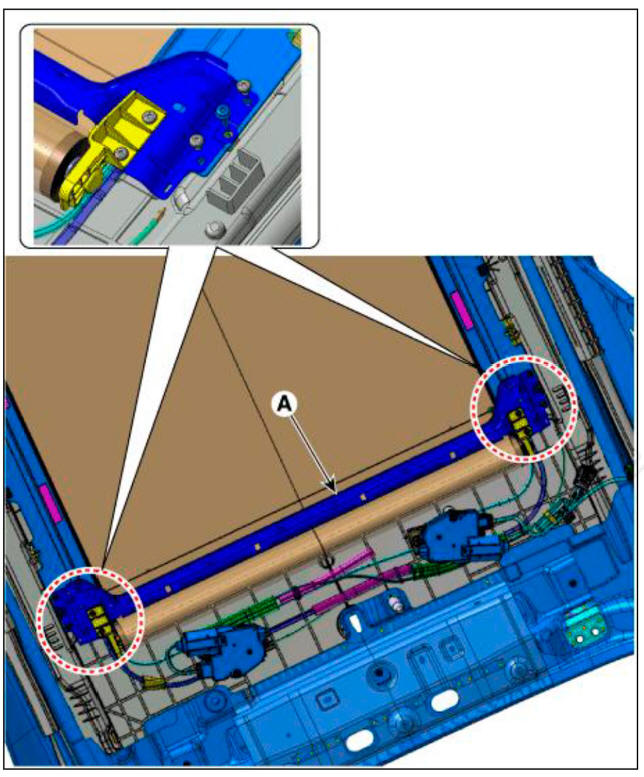
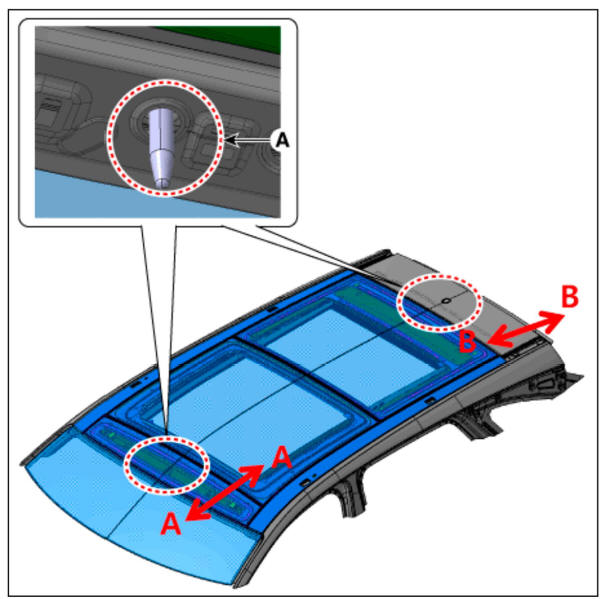
- Remove the roller blind bars (A) by pulling ((D) and rotating ((g)) both the roller blind bars.
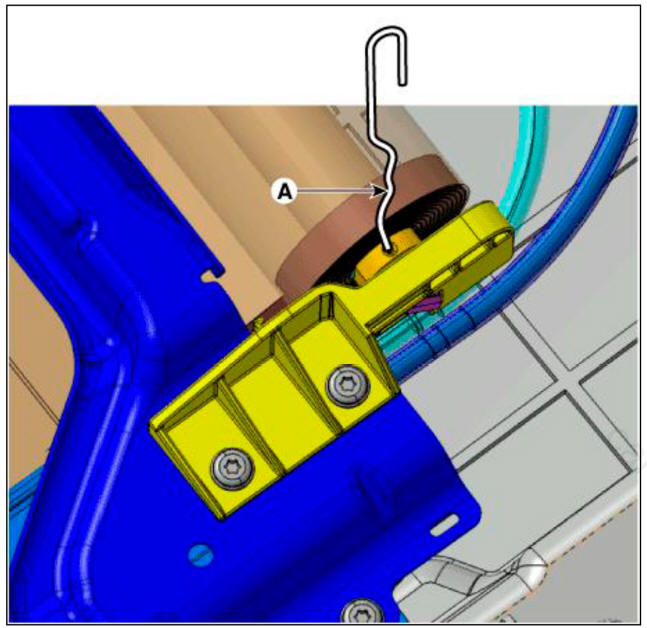
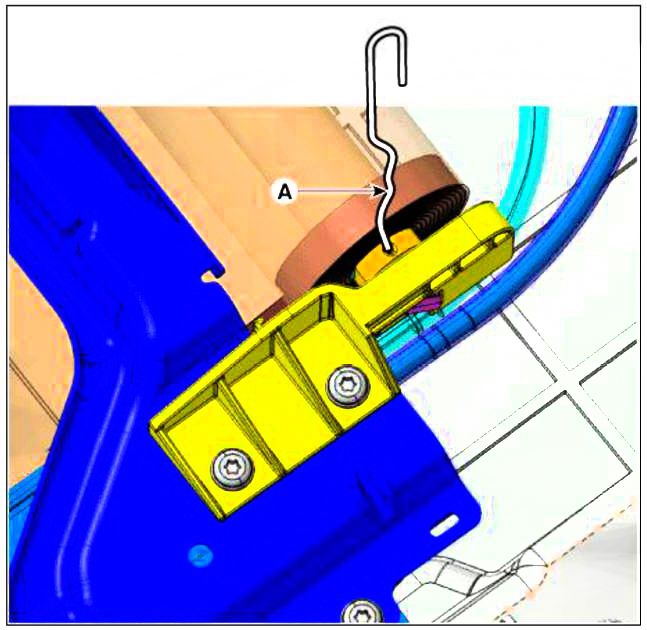
- Put a fixed pin (A) into the hole located inside the groove of the right
side roller blade side bracket.
Becarefiil not to release tension.
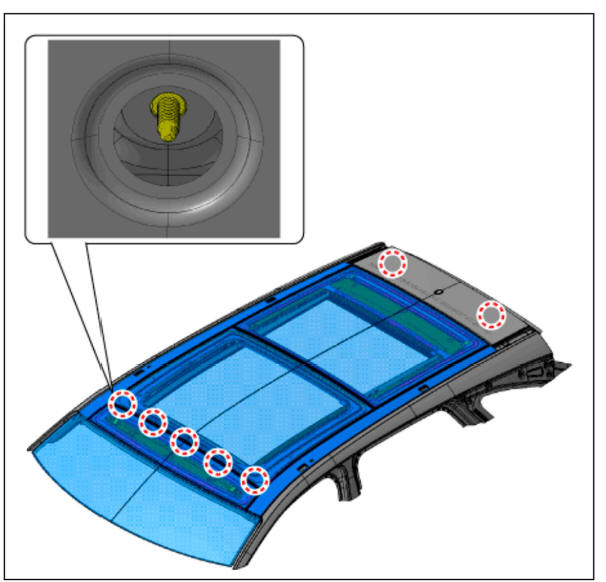
- Loosen the mounting screws, remove the roller blind lower support panel (A).

Panorama Sunroof - Installation
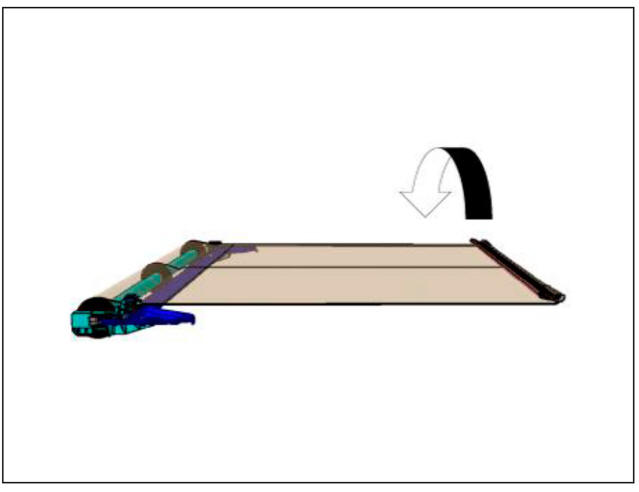
- Remove the roller blind fixing fin (A) and then pull out the roller
blind by approximate 100cm.
After that, reinstall the fixing pin.
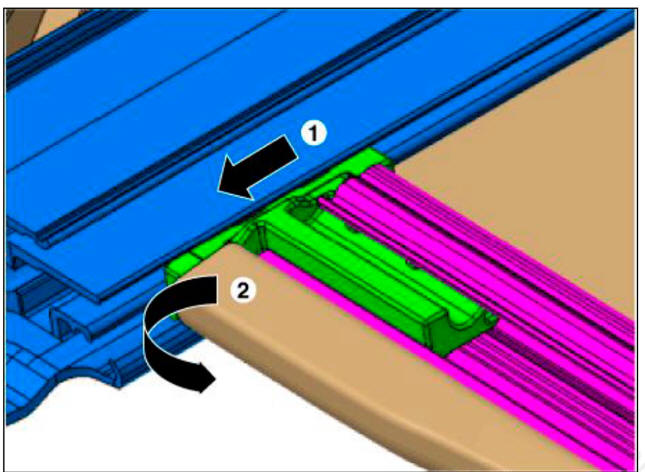
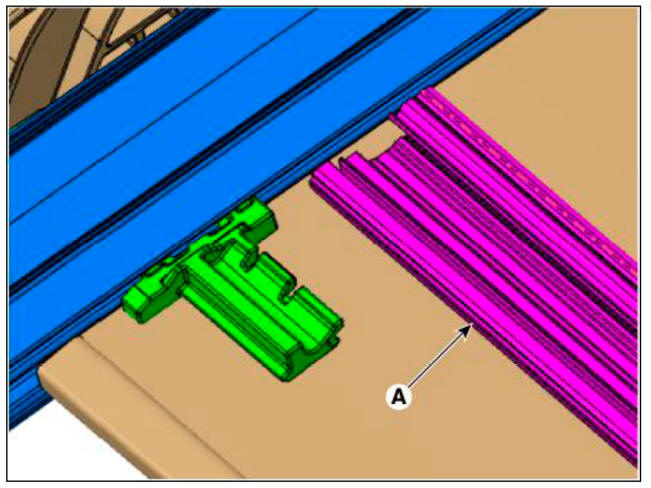
- Insert the techlon on both ends of roller blind to the guide (Preparation of roller blind is finished).
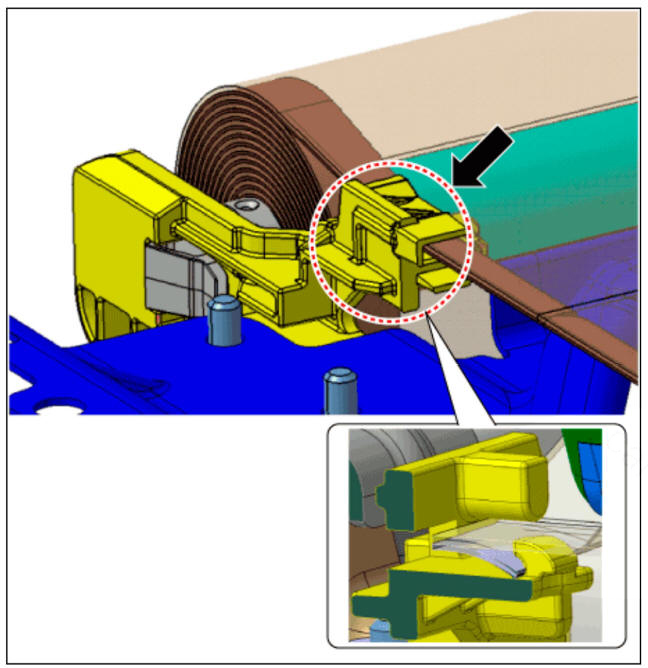
- Insert the techlon portion of blind to the rail.
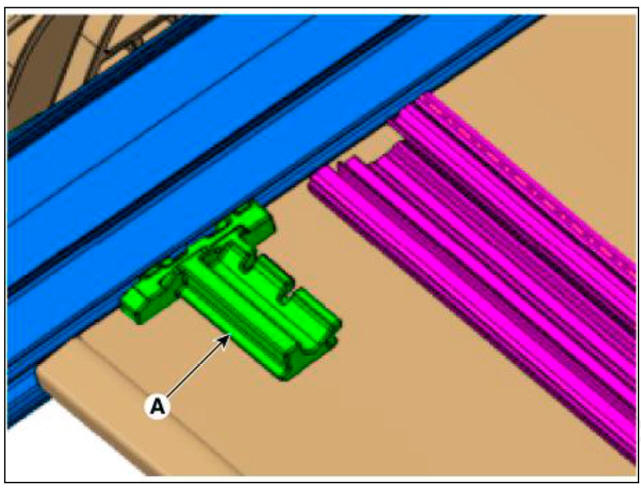
- Fix the handle to the roller blind shoe (A).
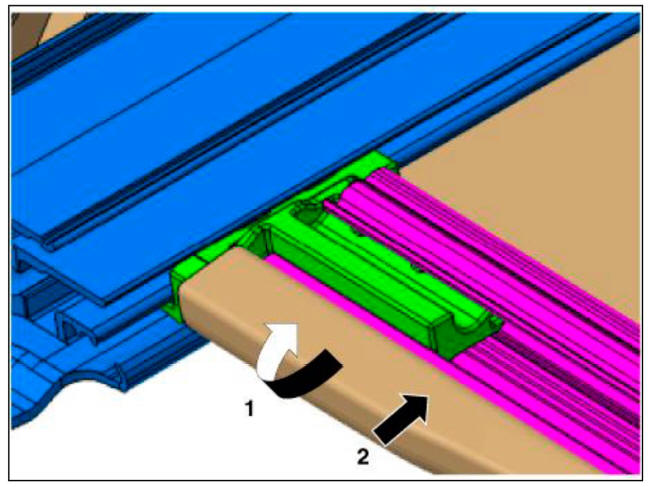
- Remove the roller blind fixing pin (A) and then insert the roller blind to rail.
- Tighten the mounting screws after installing the roller blind lower suppeort (A).
Removal
WARNING
In order to remove panorama sunroof assembly use tools as follows.
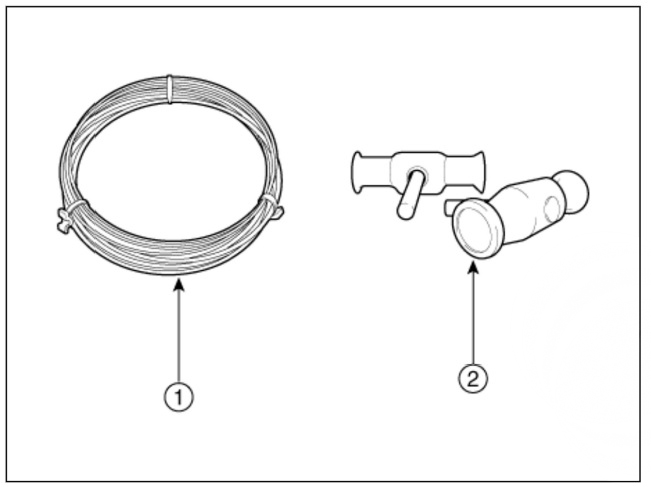
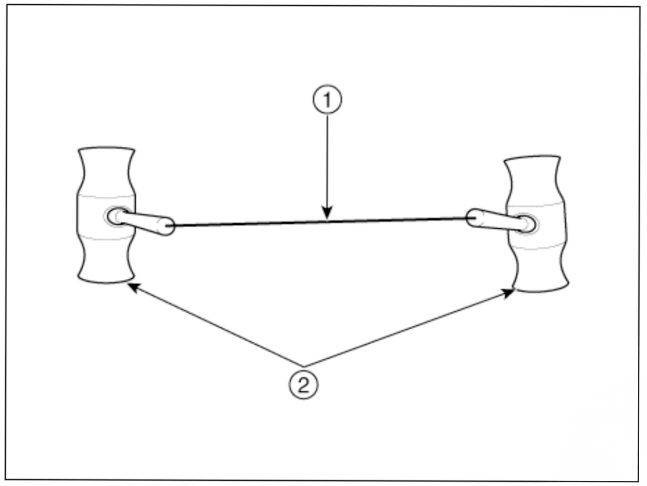
Tooling Diagram 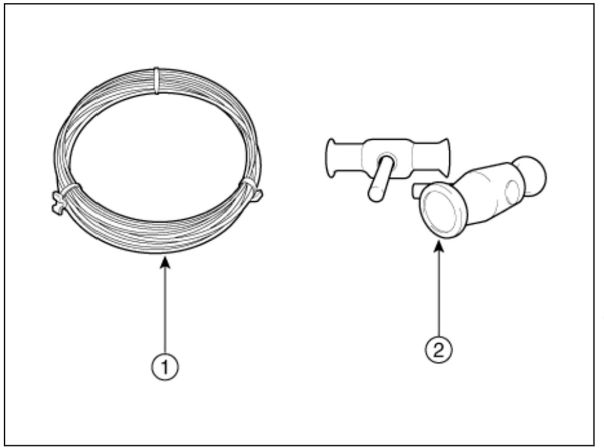
- Square wire
- Insert type wire grip
Tooling Assembly Diagram
- Tighten square wire (1) inserting it in the hole of Insert type
wire grip (2)

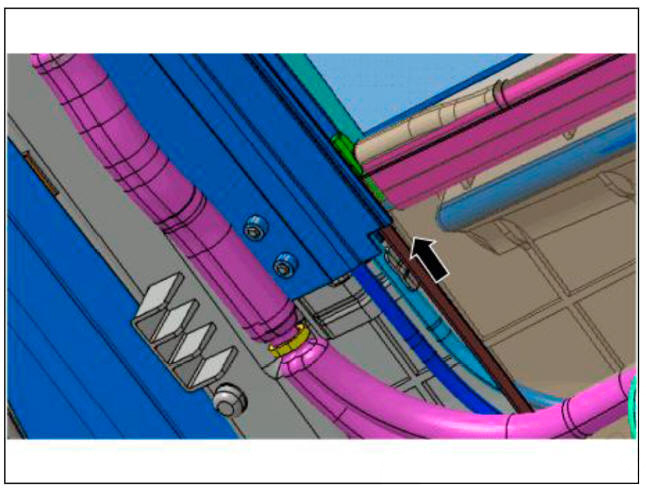
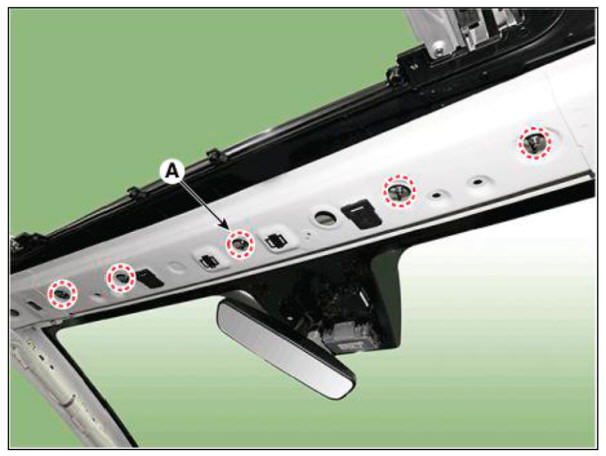
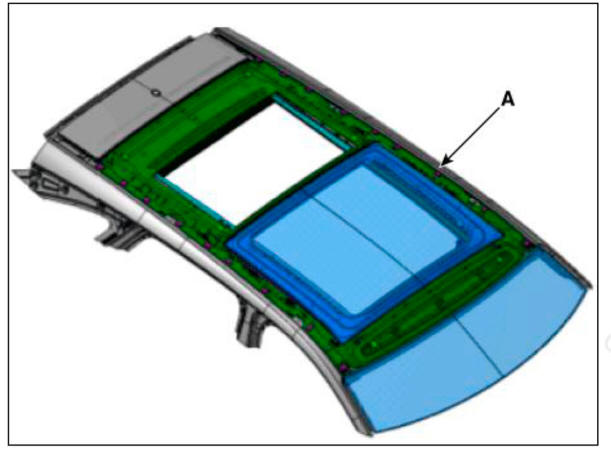
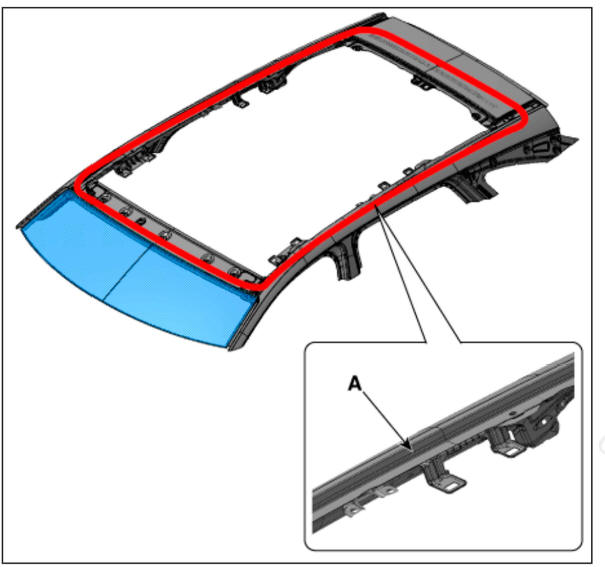
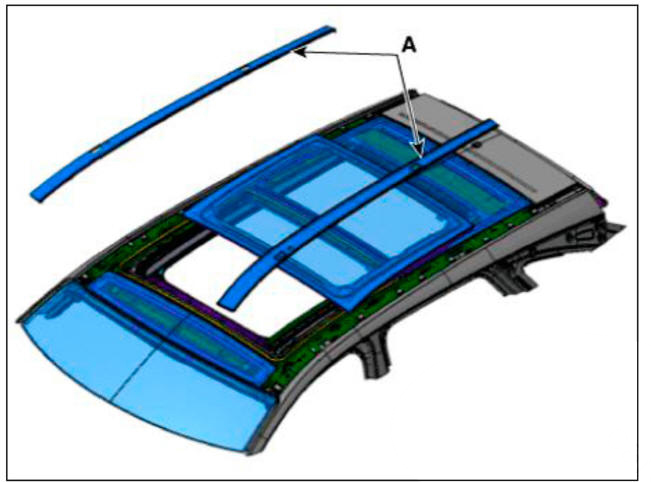
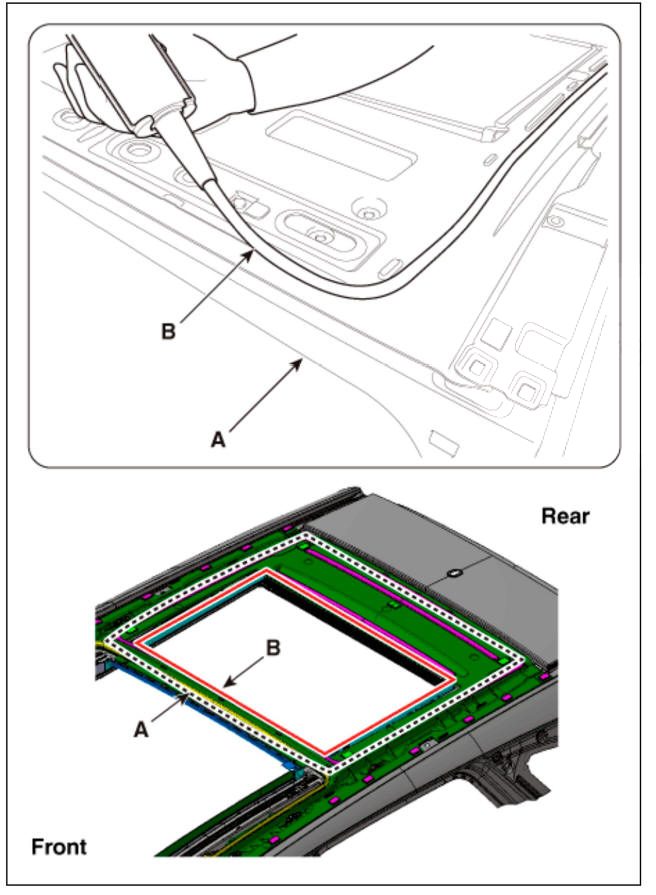
- Remove the roof side molding (A).

- Remove the roof trim.
(Refer to Roof Trim - "Roof Trim Assembly")
- Remove the front glass.
(Refer to Panorama Sunroof - "Front Glass")
- Completely close the movable glass using the panorama sunroof switch.
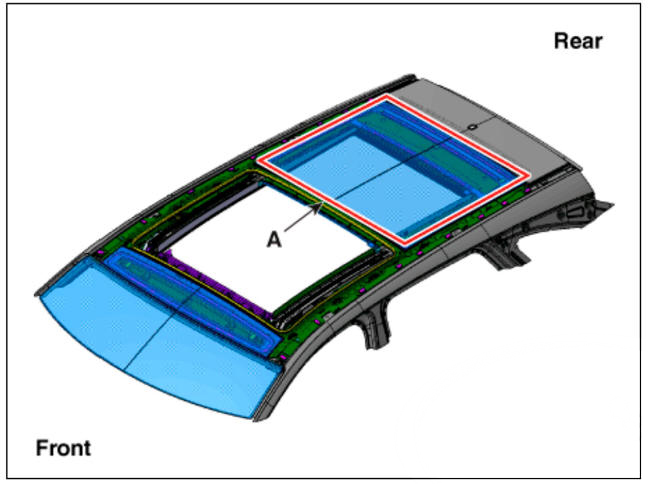
- Remove the rear glass.
(Refer to Panorama Sunroof - "Rear Glass")
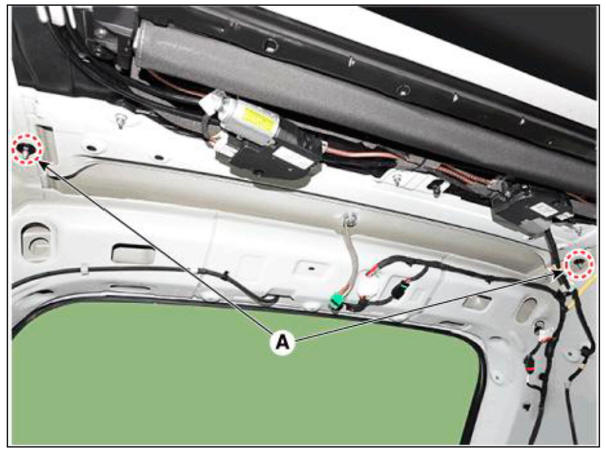
- Remove the panorama sunroof side bracket.
 Front
Front
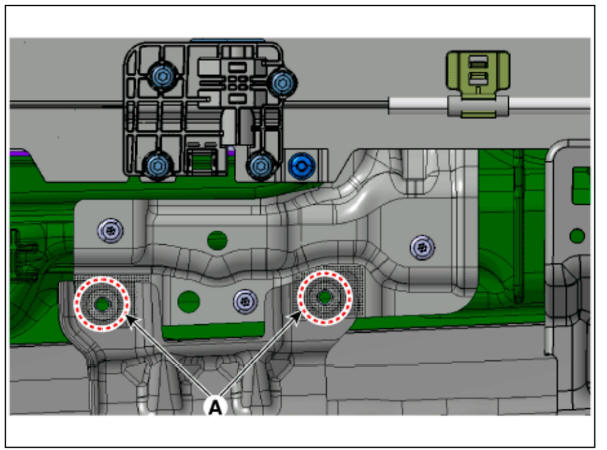
- Loosen the panorama sunroof mounting nuts (A). Front
Tightening torque : 7.8 - 11.8 N.m (0.8 - 1.2 kgf.m, 5.8 - 8.7 lb-ft)
 Rear
Rear
Tightening torque : 7.8 - 11.8 N.m (0.8 - 1.2 kgf.m, 5.8 - 8.7 lb-ft)
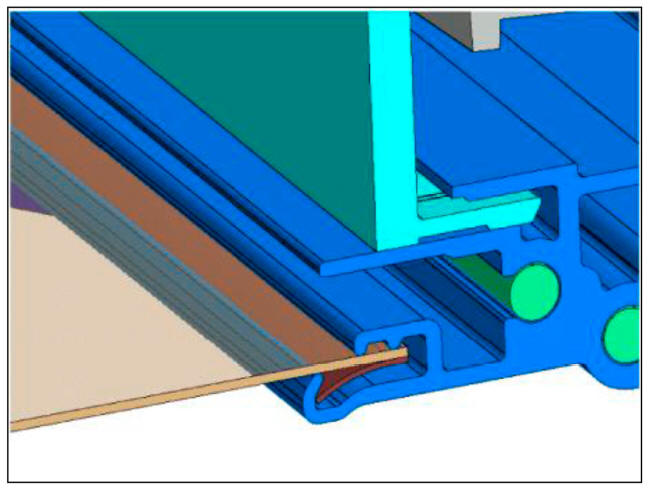
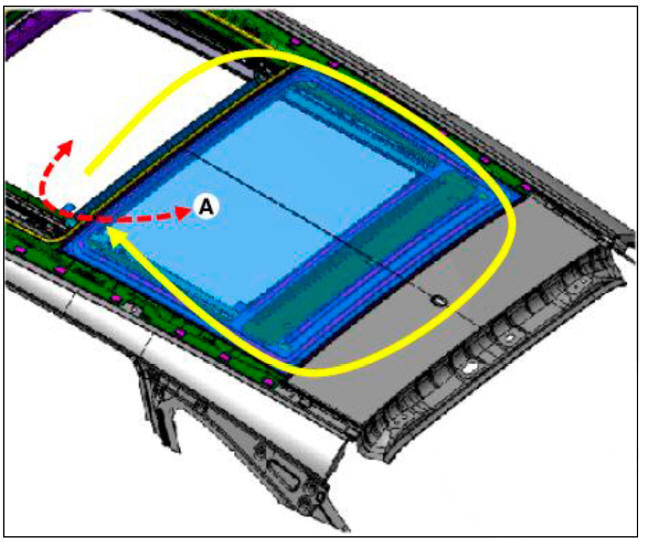
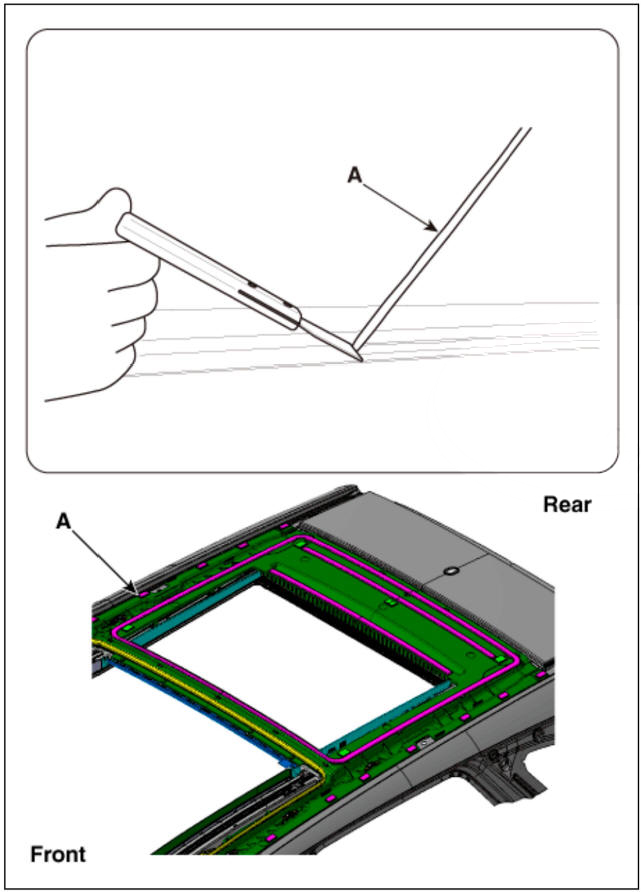
- Cut sealant in edge side front (A) pulling wire (B) from left to right.
WARNING
- Wear gloves not to get hurt in the hand.
- Be careful not to be burned in the hand by too much heat using wire.
- Work carefully because wire can be cut.
WARNING
- Use protective tape when removing parts with screw driver or remover not to damage the parts.
- Give attention not to damage body.
WARNING
More than two people should work together when using wire.

- Cut sealant between edge side front (A-A) pulling wire (B) from left to right.
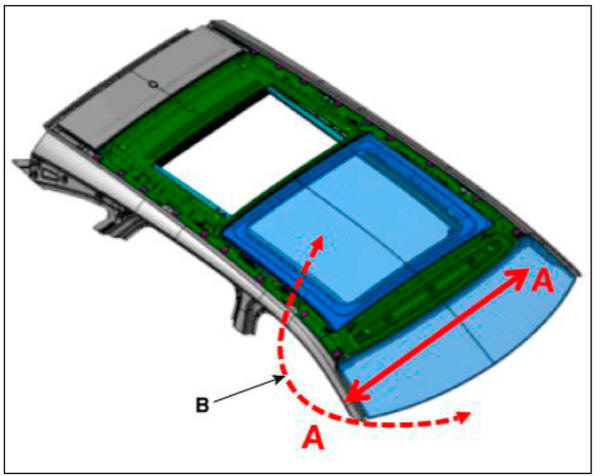
- Cut sealant between edge side (A-A) pulling wire (B) from left to right.
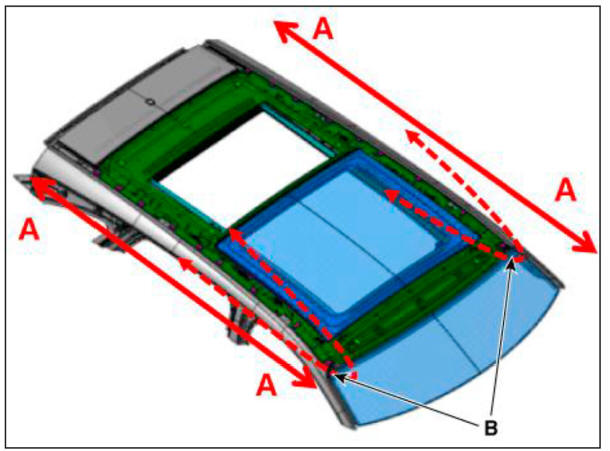
- After eveiy edge side sealant is cut, remove panorama sunroof assembly (A).
WARNING
When removal of the panorama sunroof assembly be careful not to damage.
- Use a blade to cut off residual sealant (A) around body panel.
WARNING
- Make sure that the body paint surface is not damaged at all.
- If it is damaged, apply paint or rust inhibitor for maintenance.
Installation
WARNING
In order to install panorama sunroof assembly use tools as follows.
Tooling Diagram
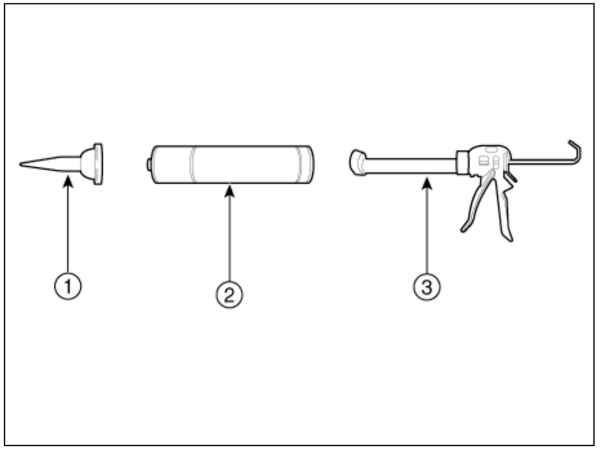

- Sealant nozzle
- Adhesive sealant only for glass
- Sealant gun
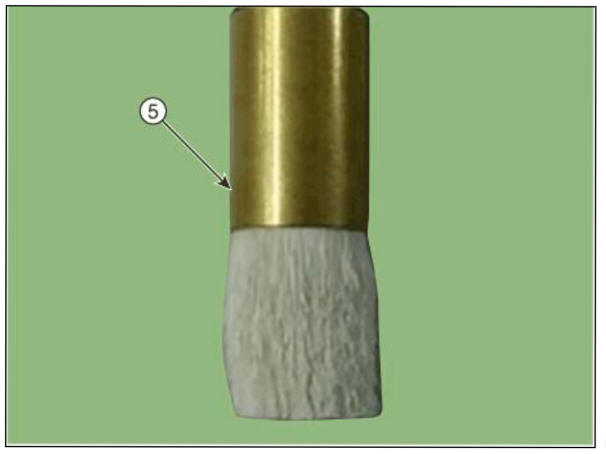
- Primer
- Primer application brush
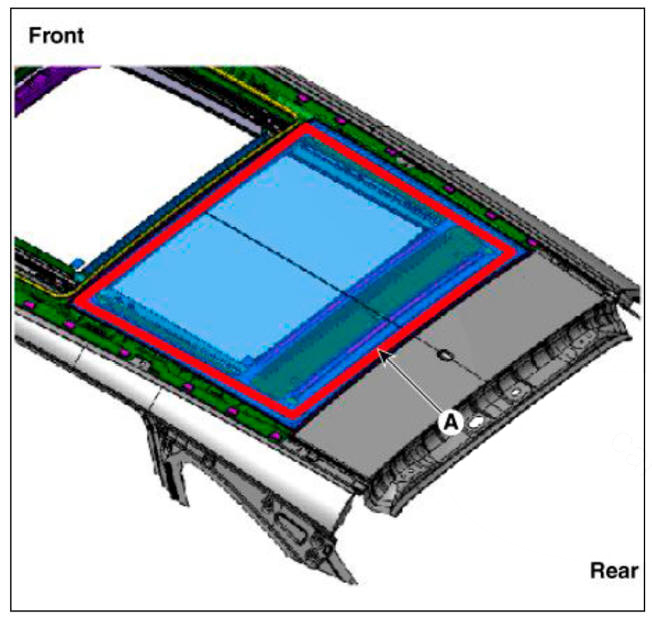
- Use alcohol or an air gun to clean up the edges of the body panel and panorama sunroof frame.
- Use a primer application brash to apply primer around the body panel and panorama sunroof frame.
- Use a sealant gun to apply sealant around the body panel (A) after applying the primer.
- Carefully install panorama sunroof on body flange set by centering device hole (A).
- Check steps and gaps for every side.

- Tighten the panorama sunroof fixing nuts.
- Perform water leak test.
WARNING
Avoid water flow to touch adhesive surface directly and let water flow to side of the glass.
- If water leak occurs, apply sealant on leakage spot.
WARNING
- After panorama sunroof is installed vehicle should be parked 011 flat place 4 hours at least.
- If vehicle should be run, drive slowly within 8 hours at least.
- Alert the driver to avoid driving the car aggressively for 2-3 days, or avoid driving in 011 irregular road surfaces.
- Install the roof trim.
(Refer to Roof Trim - "Roof Trim Assembly")
Removal
WARNING
In order to remove rear glass, use tools as follows shown in the picture.
Tooling Diagram
- Square wire
- Insert type wire grip
Tools Assembly Diagram
- Tighten square wire (1) inserting it
in the hole of Insert type wire grip (2)
- Remove the movable glass.
(Refer to Panorama Sunroof - "Movable Glass")
- Remove the roof side molding (A).
- Cut sealant from front pulling square wire (A) from left to right.
WARNING
- Wear gloves not to get hurt in the hand.
- Be careful not to be burned in the hand by too much heat using wire.
- Work carefully because wire can be cut.
WARNING
Give attention not to damage body.
- Carefully remove rear glass (A) not to be damaged.
Installation
- Install the roof side molding (A).

- Cut remaining sealant (A) around body panel using knife blade.
WARNING
When cutting sealant around body panel, leave 2 mm thick from adhesive spot.
WARNING
- Give attention not to damage painted area in the body.
- If found damaged area, apply protective paint or rust inhibitor.
- Clean edges of body panel and rear glass thoroughly with alcohol or air gun.
- Use a primer application brush to apply primer around the panorama sunroof frame (A) and front glass.
- Apply sealant (B) arround body panel (A) using sealant gun.
WARNING
When applying sealant using sealant gun avoid to cut off and water leak.
- Install the rear glass (A) on the body panel.
- Install the rear glass (A) completely after checking step and gap.
- Tape around rear glass not to make floating area.
WARNING
Clean thoroughly with alcohol or cleaner when sealant is over applied and seen from outside of the body.

WARNING
- After rear glass is installed vehicle should be parked on flat place 4 hours at least.
- If vehicle should be ran, drive slowly within 8 hours at least.
- Alert the driver to avoid driving the car aggressively for 2-3 days, or avoid driving in on irregular road surfaces.
- Install the movable glass.
(Refer to Panorama Sunroof - "Movable Glass")
READ NEXT:
 Outside rear view mirror
Component Location
Outside rear view mirror
Replacement
WARNING
When removing with a flat-tip screwdriver or remover, wrap
protective tape around the tools to prevent
damage to components.
Put on gloves to prevent hand injuries
Inside rear view mirror
Component Location
Inside rear view mirror
Replacement
WARNING
When removing with a flat-tip screwdriver or remover, wrap
protective tape around the tools to
prevent damage to components.
Put on gloves to prevent hand injuries.
SEE MORE:
Power Door Locks
Front Door Lock Module Inspection
Inspection
Remove the front door trim.
(Refer to Body - "Front Door Trim")
Disconnect the connectors from the actuator.
Check actuator operation by connecting power and ground according to the
Multifunction Switch Inspection
Check for continuity between the terminals in each switch position as
shown below.
Inspection (With Diagnostic Tool)
In the body electrical system, failure can be quickly diagnosed by using
the vehicle diagnostic system (d
Information
- Home
- Hyundai Tucson - Fourth generation (NX4) - (2020-2023) - Owner's Manual
- Hyundai Tucson - Fourth generation (NX4) - (2020-2023) - Workshop Manual
