Hyundai Tucson: Injector - Replacement
Hyundai Tucson - Fourth generation (NX4) - (2020-2023) - Workshop Manual / Engine Control - Fuel System / Injector / Injector - Replacement
The injector combustion seal should be replaced new one to prevent leakage after removing the injector.
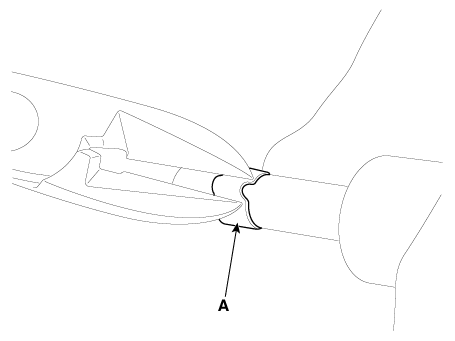
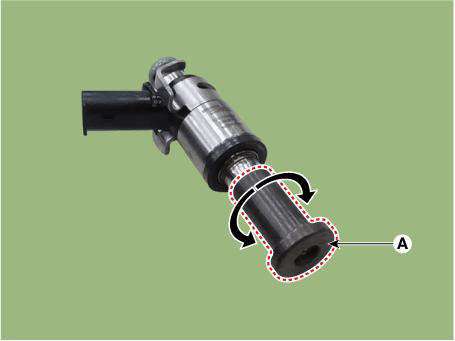
1. Remove the combustion seal (A) with a wire cutter.
WARNING
- Grip the sealing ring carefully, pull it to form a small loop and then cut it.
- Be careful not to damage the surface of the valve sleeve with the wire cutter.
- Before the assembly of the sealing ring the groove must be cleaned using
a clean cloth.
Any coking of the injector sealing surface must be carefully removed with a brass-wire brush.

WARNING
The surfaces of the new sealing ring must be clean and free of grease.
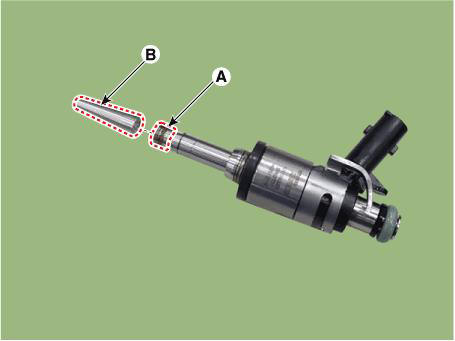
- Place the seal installing guide (B) (SST No. : 09353-2B000) on the tip
of the injector not to damage the
injector tip (A).
Push the sealing ring (C) with thumb and index finger over the conical assembly tool until it snaps into the groove.
The complete assembly must not take longer than 2 to 3 seconds.

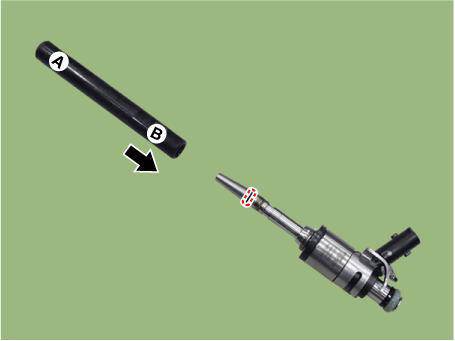
- To size the sealing ring the injector is first introduced into the sizing tool (A) (SST No. : 09353-2B000) and then pressed and at the same time rotated 180º into the sizing tool.
- Pull the injector out of the sizing tool by turning it in the reverse direction to that used for the press-in process.
WARNING
- Check that the seal ring has not been damaged during assembly to the injector and that no circumferential scratches are present.
- Do not reuse the combustion seal.
- The seal must be completely free of grease and oil.
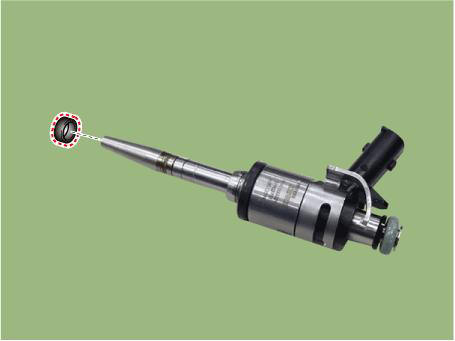
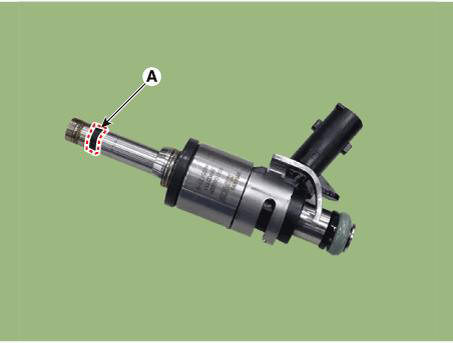
- Check the combustion seal (A) installation.
READ NEXT:
 DPF Differential Pressure Sensor (DPS)
Description
Differential Pressure Sensor (DPS) is measure the pressure difference of EGR
inlet and outlet.
Circuit Diagram
Harness Connector
Removal
Turn the ignition swtich OFF, and then disconnect the battery negative
(-) t
Ambient Temperature Sensor (ATS)
Description
Ambient Temperature Sensor (ATS) is installed on the front-end module and
senses the ambient
temperature.
This sensor is exposed to the ambient air temperature in front of the radiator.
The ATS is a Negative Temperature Coeffici
Purge Control Solenoid Valve (PCSV)
Description
Purge Control Solenoid Valve (PCSV) is a solenoid valve and is installed on
the surge tank and
controls the passage between the canister and the intake manifold.
The evaporative gases gathered in the canister are delivered to the i
SEE MORE:
Vehicle Information, Consumer Information and Reporting Safety Defects
Exterior overview (I)
Front view
The actual shape may differ from the illustration
Hood
Headlamp
Tires and wheels
Side view mirror
Panoramic sunroof
Front windshield wiper blades
Windows
Front radar
Ex
DCT (Dual Clutch Transmission) System (SBC) - Replacement
Replacement
WARNING
In principle, the Dual Clutch Transmission (DCT) oil is not changed
under normal driving conditions.
However, under harsh driving conditions, it must be changed every 80,000 miles.
Harsh driving conditions are as follows
Information
- Home
- Hyundai Tucson - Fourth generation (NX4) - (2020-2023) - Owner's Manual
- Hyundai Tucson - Fourth generation (NX4) - (2020-2023) - Workshop Manual
