Hyundai Tucson: Front seat assembly
Hyundai Tucson - Fourth generation (NX4) - (2020-2023) - Workshop Manual / Body (Interior and Exterior) / Front Seat / Front seat assembly
Component Location
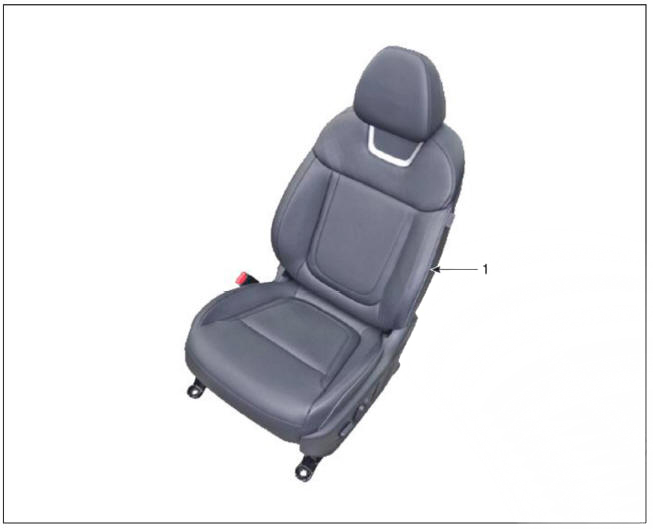
- Front seat assembly
Replacement
- Disconnect the negative (-) battery terminal.
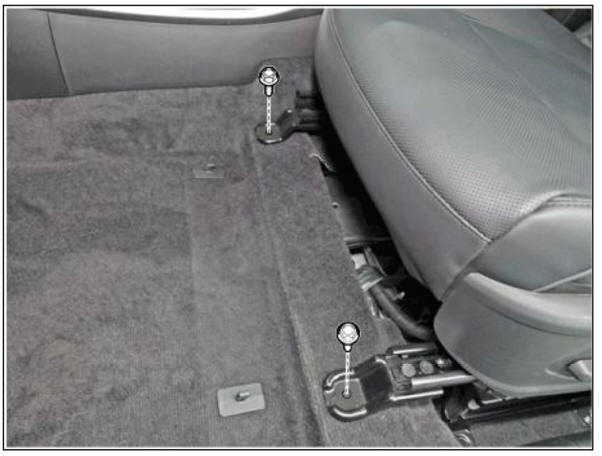
- Open the cover and loosen the front seat mounting bolts.
Front
Tightening torque : 49.0 - 63.7 N.m (5.0 - 6.5 kgf.m, 36.2 - 47.0 lb-ft)
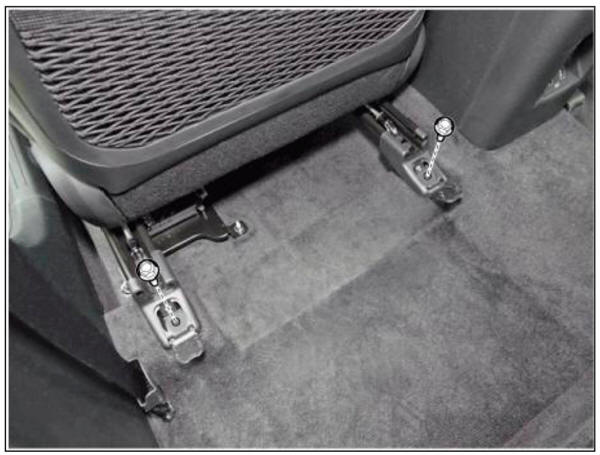
Rear
Tightening torque : 49.0 - 63.7 N.m (5.0 - 6.5 kgf.m, 36.2 - 47.0 lb-ft)
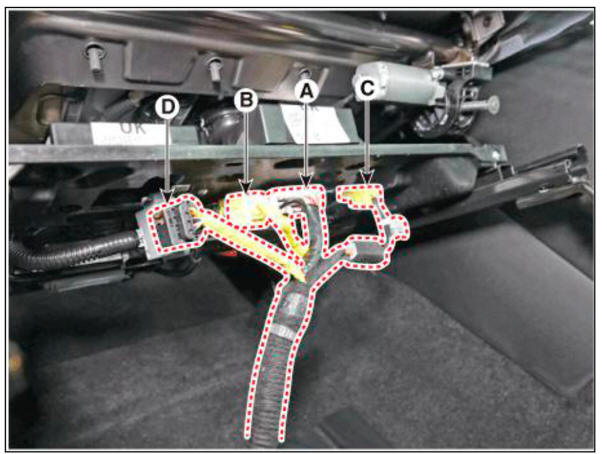
- Disconnect the main connector (A), side airbag connector (B), front seat belt buckle connector (C) and OCS connector (D).
LH
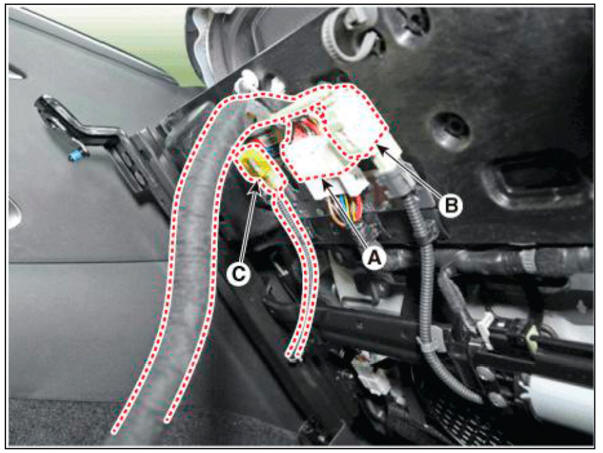
RH
- To install, reverse removal procedure
WARNING
The installation procedures of seat mounting bolts
- Push the seat to the rear end of slides and initially tighten the front mounting bolts.
- Push the seat to the front end of slides and completely tighten the rear mounting bolts.
- Send the seat to the rear end again to completely tighten the front mounting bolts.
- Check the seat for smooth movement.
- For the non-automatic slide seats, check the seats are fixed at each designated fixing position.
READ NEXT:
 Front seat shield outer cover
Component Location
Front seat shield outer cover
Replacement
WARNING
When removing with a flat-tip screwdriver or remover, wrap
protective tape around the tools to
prevent damage to components.
Put on gloves to prevent hand inj
Front seat shield inner cover/ Front seat back cover
Component Location
Front seat shield inner cover
Replacement
WARNING
When removing with a flat-tip screwdriver or remover, wrap
protective tape around the tools to
prevent damage to components.
Put on gloves to prevent hand inj
Front seat cushion cover
Component Location
Front seat cushion cover
Replacement
WARNING
When removing with a flat-tip screwdriver or remover, wrap
protective tape around the tools to
prevent damage to components.
Put on gloves to prevent hand injuries
SEE MORE:
Front door latch
Component Location
Front door latch
Replacement
WARNING
When removing with a flat-tip screwdriver or remover, wrap
protective tape around the tools to prevent
damage to components.
Put on gloves to prevent hand injuries.
Warning Lamp
Activation
Warning Lamp Behavior after Ignition On
As soon as the operating voltage is applied to the SRSCM ignition input, the
SRSCM activates the
warning lamp for a LED lamp check.
The lamp shall turn on for 6 seconds during the initialization phase an
Information
- Home
- Hyundai Tucson - Fourth generation (NX4) - (2020-2023) - Owner's Manual
- Hyundai Tucson - Fourth generation (NX4) - (2020-2023) - Workshop Manual
