Hyundai Tucson: Floor Console - SBW type
Hyundai Tucson - Fourth generation (NX4) - (2020-2023) - Workshop Manual / Body (Interior and Exterior) / Floor Console / Floor Console - SBW type
SBW type
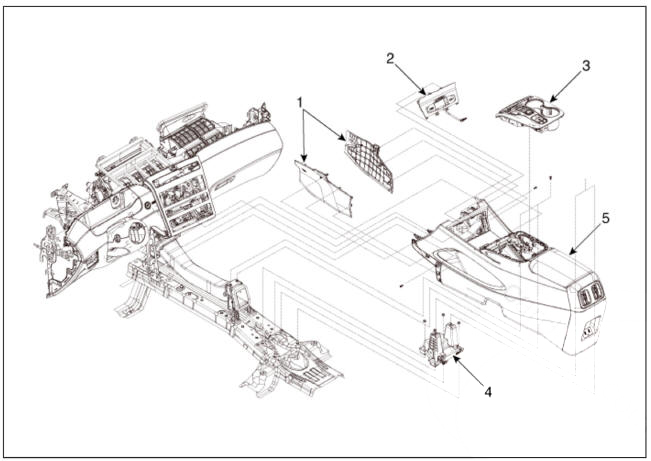
- Floor console side cover
- Floor console tray assembly
- Floor console upper cover assembly
- Floor console rear mounitng bracket
- Floor console assembly
Component Location
SBW type
- Floor console assembly
SBW type - Replacement
WARNING
- When removing with a flat-tip screwdriver or remover, wrap protective tape around the tools to prevent damage to components.
- Put on gloves to prevent hand injuries.
WARNING
Take care not to bend or scratch the trim and panels
- Disconnect the negative (-) battery terminal.
- Remove the console upper cover (A).
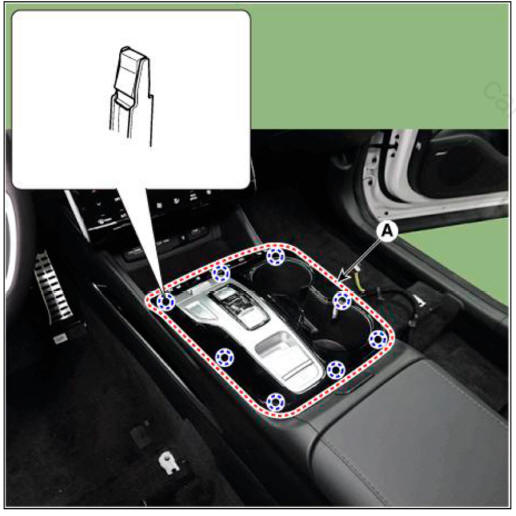
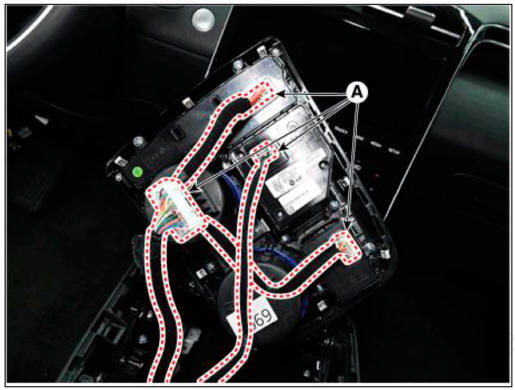
- Disconnect the console upper cover connectors (A).
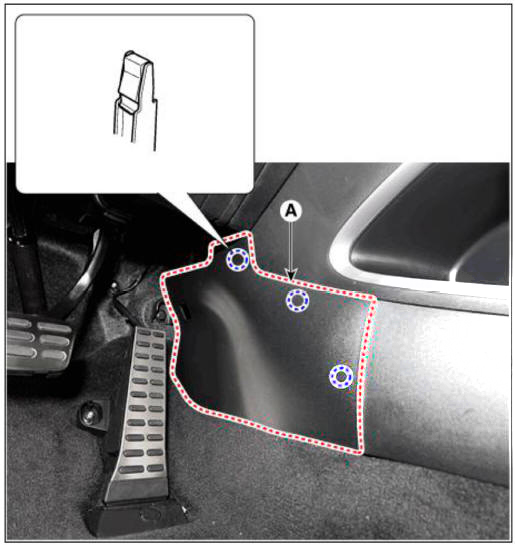
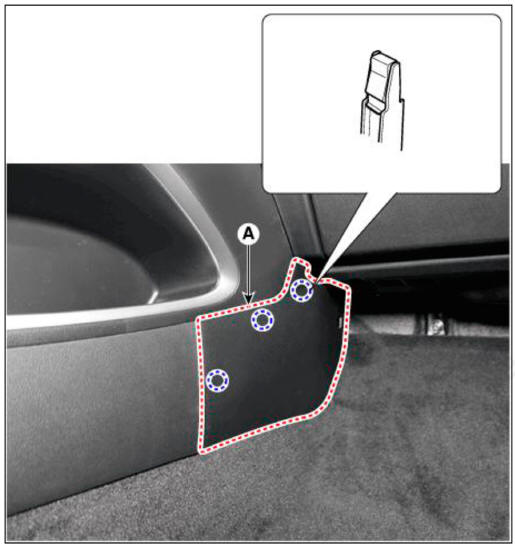
- Remove the console side cover (A).
LH
RH
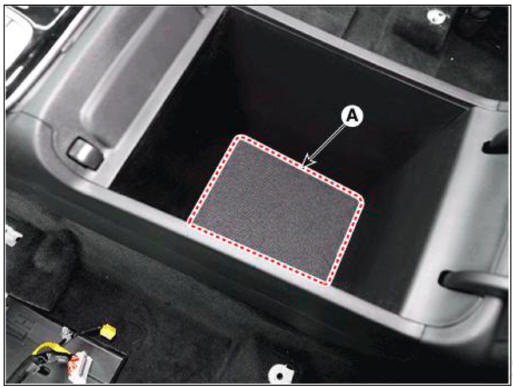
- Remove the storage box mat (A).
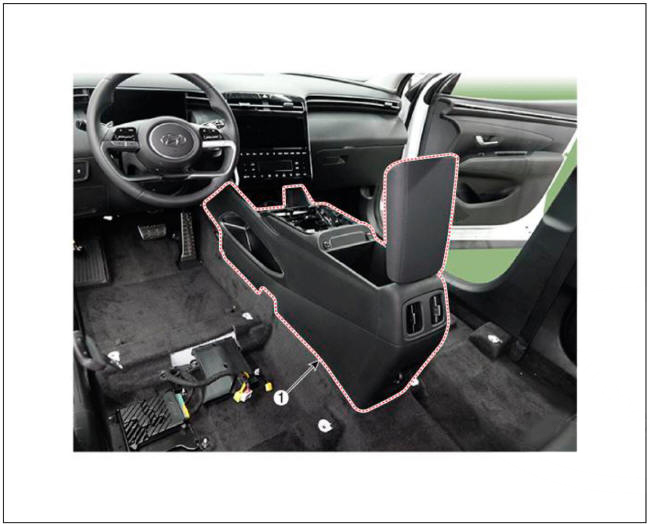
- Loosen the mounting bolts and screws, remove the floor console assembly (A).
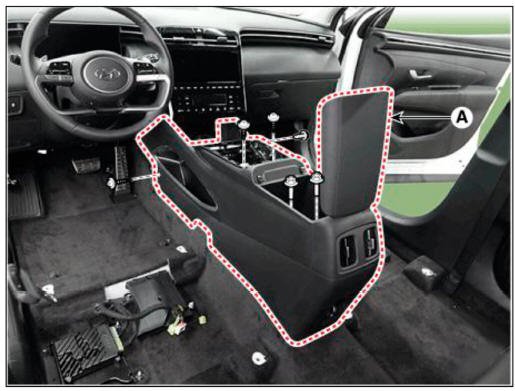
- Disconnect the floor console connector (A).

- To install, reverse removal procedure.
WARNING
- Make sure the connector is connected properly.
- Replace any damaged clips (or pin-type retainers).
READ NEXT:
 Floor Console - SBC type
SBC type
Floor console assembly
SBC type
WARNING
When removing with a flat-tip screwdriver or remover, wrap
protective tape around the tools to
prevent damage to components.
Put on gloves to prevent hand injuries.
WARNING
Tak
Rear console cover
Component Location
Rear console cover
Replacement
WARNING
When removing with a flat-tip screwdriver or remover, wrap
protective tape around the tools to
prevent damage to components.
Put on gloves to prevent hand injuries.
W
Console armrest
Component Location
Console armrest
Replacement
WARNING
When removing with a flat-tip screwdriver or remover, wrap
protective tape around the tools to
prevent damage to components.
Put on gloves to prevent hand injuries.
WARN
SEE MORE:
LCD display control
The LCD display modes can be changed by using the control buttons.
MODE button for changing modes
MOVE switch for changing items
SELECT/RESET button for setting
or resetting the selected item
Information
When the infotainment system
IBU Diagnosis With Diagnostic Tool
In the body electrical system, failure can be quickly diagnosed by using
the vehicle diagnostic system.
(1) Fault Code Searching : Checking failure and code number (DTC)
(2) Data Analysis : Checking the system input/output data state
(3) A
Information
- Home
- Hyundai Tucson - Fourth generation (NX4) - (2020-2023) - Owner's Manual
- Hyundai Tucson - Fourth generation (NX4) - (2020-2023) - Workshop Manual
