Hyundai Tucson: Brake Tube- Replacement
Hyundai Tucson - Fourth generation (NX4) - (2020-2023) - Workshop Manual / Brake System / Braking System - operation and description / Brake Tube- Replacement
Replacement
WARNING
Be careful not to damage the parts located under the vehicle (floor under cover, fuel filter, fuel tank and canister) when raising the vehicle using the lift.
(Refer to General Information - "Lift and Support Points")
- Turn ignition switch OFF and disconnect the negative (-) battery cable.
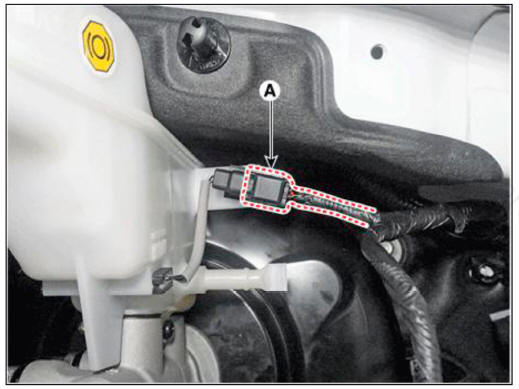
- Disconnect the brake fluid level sensor connector (A).
- Remove the brake fluid from the master cylinder reservoir with a syringe.
WARNING
- Do not spill brake fluid on the vehicle, it may damage the paint; if brake fluid does contact the paint, wash it off immediately with water.
- Make sure no dirt or other foreign matter is allowed to contaminate the brake fluid.
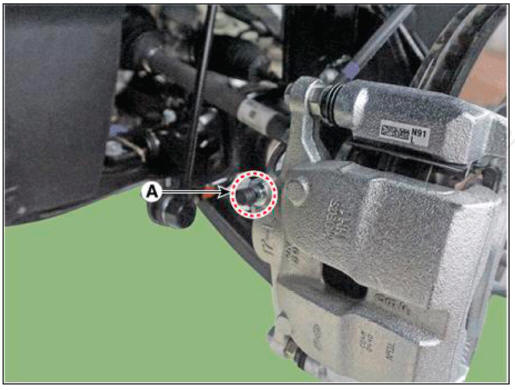
- Loosen the bleed screw (A) and depress the brake pedal repeatedly several times until the brake fluid reaches the caliper cylinder.
Front
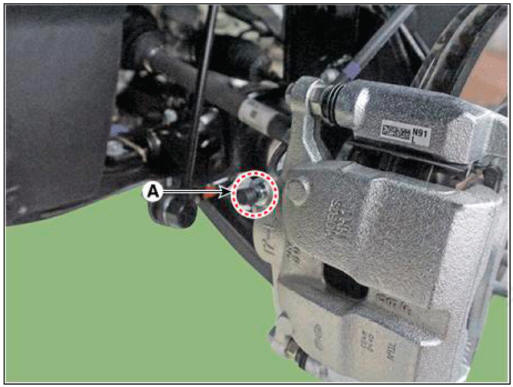
Rear
WARNING
- Work from rear right, front left, rear left to front right.
- Do not spill brake fluid on the vehicle, it may damage the paint; if brake fluid does contact the paint, wash it off immediately with water.
- Retighten the bleed screw and then make sure the brake fluid in the reservoir is at the MAX (upper) level line.
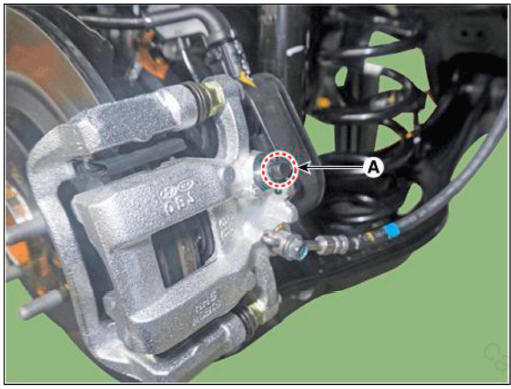
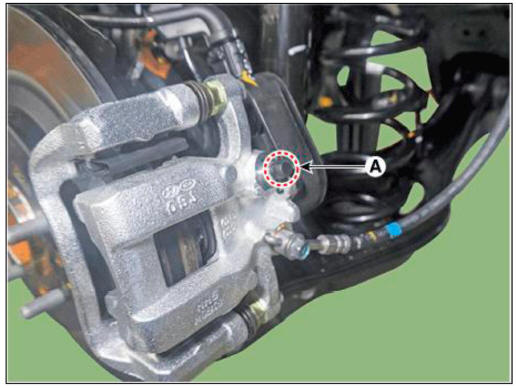
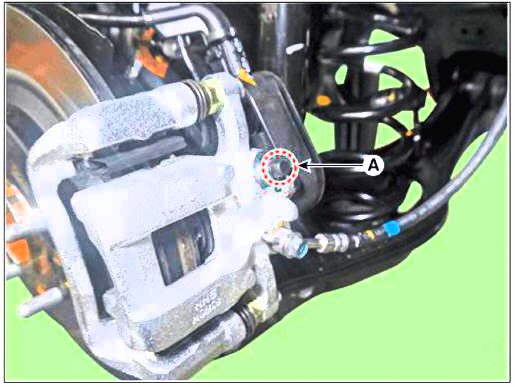
- Loosen the right-rear brake bleed screw (A) to allow air to escape from the system. Then tighten the bleed screw securely.
Front
Rear
WARNING
- Work from rear right, front left, rear left to front right.
- Do not spill brake fluid on the vehicle, it may damage the paint; if brake fluid does contact the paint, wash it off immediately with water.
- Make sure the brake fluid in the reservoir is at the MAX (upper) level line.
- Re-tighten the bleed screw.
- Have an assistant press the brake pedal several times to pressurize it and keep it pressed.
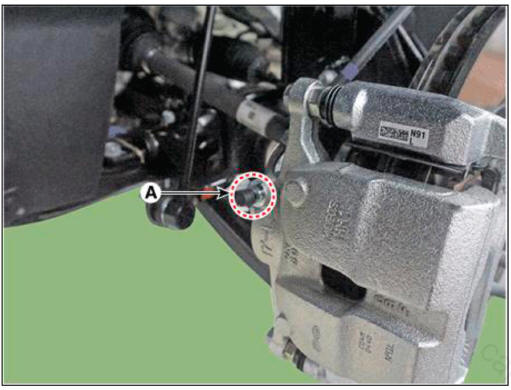
- Pump the brake pedal several times, and then loosen the bleeder screw until fluid starts to run out without bubbles. Then close the bleeder screw.
Front
Rear
WARNING
- Work from rear right, front left, rear left to front right.
- Do not spill brake fluid on the vehicle, it may damage the paint; if brake fluid does contact the paint, wash it off immediately with water.
- Make sure the brake fluid in the reservoir is at the MAX (upper) level line.
- Repeat the procedure for wheel in the sequence until air bubbles no longer appear in the fluid.
- Connect the negative (-) cable.
- Connect the brake fluid level sensor.
READ NEXT:
 Front Brake Caliper
Components
Caliper body
Caliper carrier
Pad inner shim
Pad retainer
Brake pad
Removal
Loosen the wheel nuts slightly.
Raise the vehicle, and make sure it is securely supported.
Remove the front wheel and tire (A) from the f
Front Brake Disc
Front Brake Disc Thickness Check
Inspection
Check the brake pads for wear and fade.
Check the brake disc for damage and cracks.
Remove all rust and contamination from the surface, and measure the disc
thickness at 24 points, at leas
Rear Brake Caliper
Components
EPB Actuator
Caliper body
Caliper carrier
Pad retainer
Brake pad
Removal
Before removing the rear caliper, perform "Brake Pad Replacement Mode"
using the self-diagnosis.
Raise the vehicle, and make sur
SEE MORE:
Engine compartment
„Smartstream G2.5 GDI
The actual engine compartment in the vehicle may differ from the
illustration
Engine coolant reservoir
Brake fluid reservoir
Air cleaner
Engine oil dipstick
Engine oil filler cap
Windshield washer fluid
Steering wheel - Reassembly
Reassembly
To reassembly, reverse the disassembly procedure.
Installation
To install, reverse the removal procedures.
Description
Heated pads to grip the steering grip makes the fever.
Heated pad
Specifications
System Circ
Information
- Home
- Hyundai Tucson - Fourth generation (NX4) - (2020-2023) - Owner's Manual
- Hyundai Tucson - Fourth generation (NX4) - (2020-2023) - Workshop Manual
