Hyundai Tucson: Troubleshooting
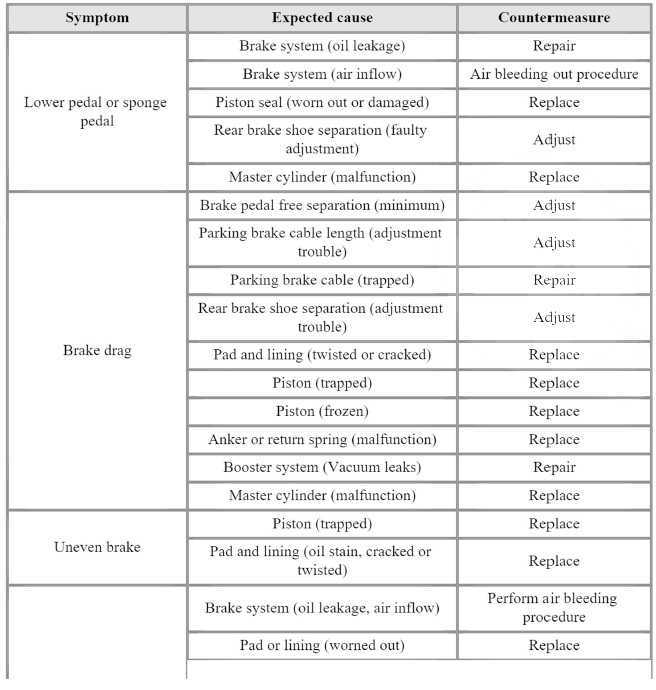
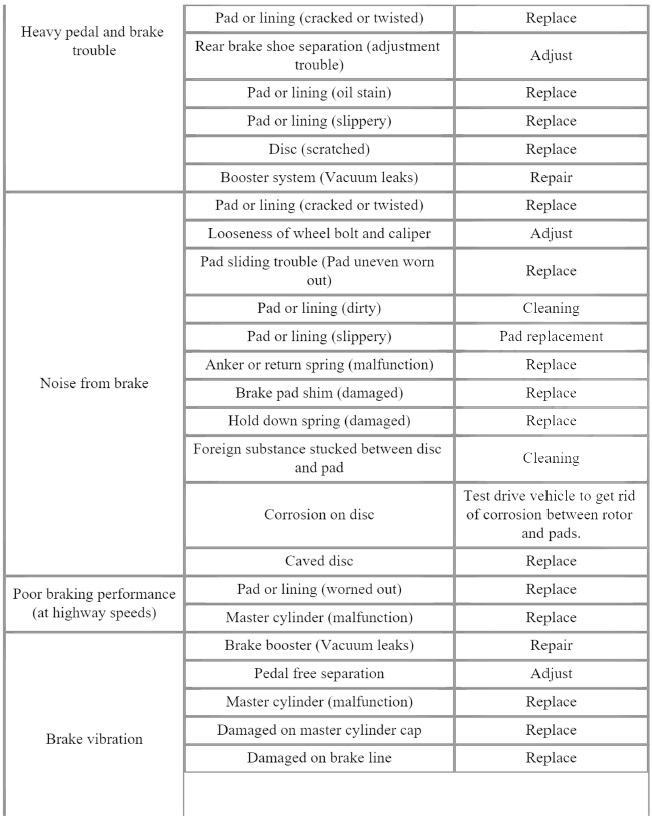
Problem Symptoms Table
Use the table below to help you find the cause of the problem. The numbers indicate the priority of the likely cause of the problem.
Check each part in order.
If necessary, replace these parts.

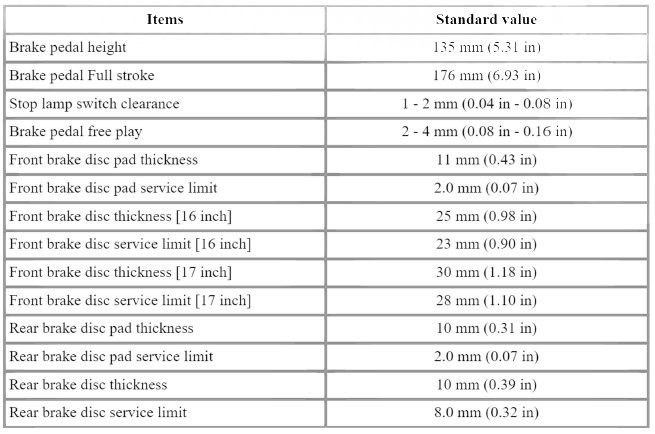
Specifications
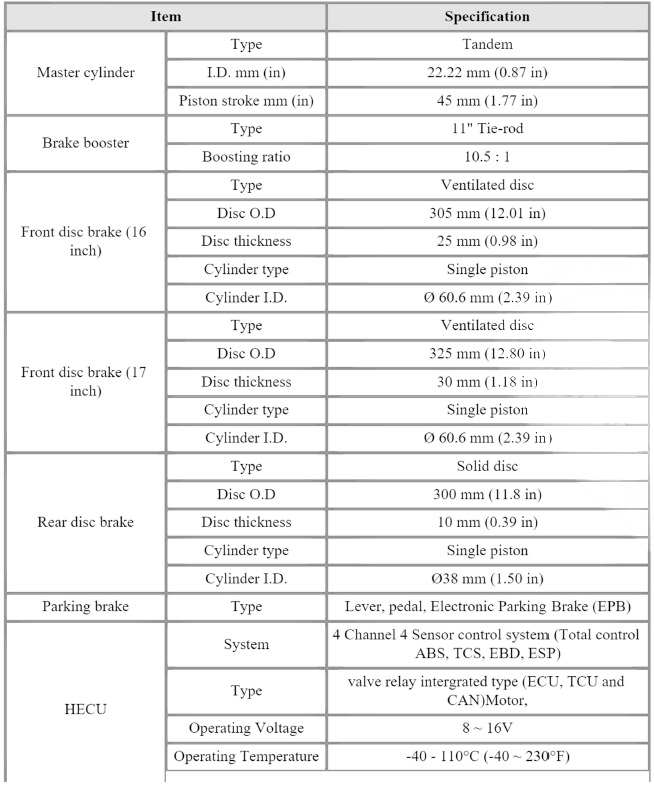
Service Standard
Tightening Torques
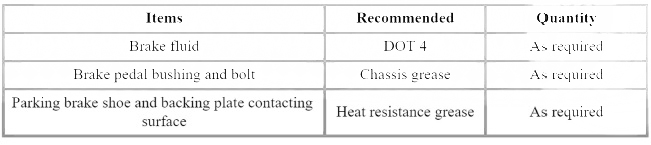
Lubricants
Special Service Tools
Tool (Number and Name)/ Illustration/ Use
09581-11000
Piston expander/  / Spreading the
front disc
brake piston
/ Spreading the
front disc
brake piston
09527 -2W110
Sensor cap installer/ 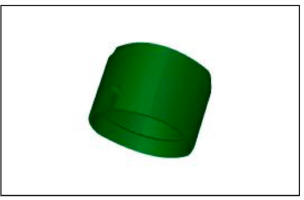 / Used for
installing wheel
speed sensor cap
(Use with 09231-HI 100)
/ Used for
installing wheel
speed sensor cap
(Use with 09231-HI 100)
09231 - HI 100
Handle/ 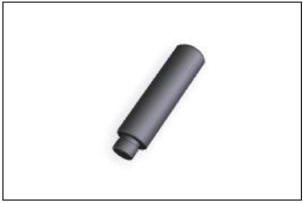 / (Use with 09527-2W110)
Brake System Bleeding
Nomal Brake System
WARNING
This work is to be performed by two people.
- Main worker : Bleeds the system by manually opening and closing the bleed screw and detecting air coming out of brake lines.
- Assistant: Brake pedal operation and scanner operation inside the vehicle.
- Connect the brake fluid filler to the reservoir tank.
WARNING
- Do not reuse the drained fluid.
- Always use genuine DOT4 brake Fluid.
Using a non-genuine DOT4 brake fluid can cause corrosion and decrease the life of the system.
- Make sure no dirt or other foreign matter is allowed to contaminate the brake fluid.
- Do not spill brake fluid on the vehicle, it may damage the paint; if brake fluid does contact the paint, wash it off immediately with water.
- The reservoir on the master cylinder must be at the MAX (upper) level mark at the start of bleeding procedure and checked after bleeding each brake caliper. Add fluid as required.
- Remove the wheel and tire.
(Refer to Suspension System - "Wheel")
- The main worker connects the clear hose to the wheel bleeder screw (A) and sends a signal to assistant to depress the brake pedal.
- The assistant ro pump the brake pedal 2 times with normal brake force and then keep the brake pedal depressed.
- While the assistant is depressing the brake pedal, remove the bleed screw (A) momentarily to remove the air. and then fasten it again.
WARNING
The bleed screw opens and closes only a quarter of a turn.
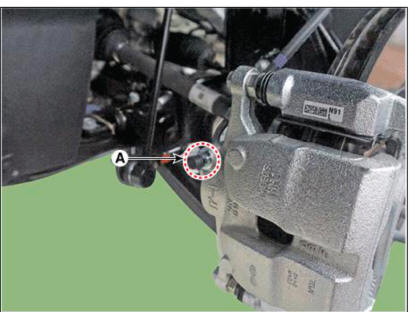
Front
Tightening torque : 6.8 - 12.7 N.m (0.7 - 1.3 kgf.m, 5.0 - 9.4 lb-ft)
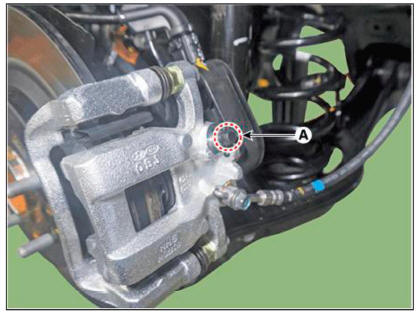
Rear
Tightening torque : 6.8 - 12.7 N.m (0.7 - 1.3 kgf.m, 5.0 - 9.4 lb-ft)
- Repeat the procedure for wheel in the sequence shown below until air bubbles no longer appear in the fluid.
READ NEXT:
 ESC Bleeding of Brake System
This procedure should be followed to ensure adequate bleeding of air and
filling of the ESC unit, brake lines and master cylinder
with brake fluid.
Connect the brake fluid filler to the reservoir tank.
WARNING
Do not reuse the drained f
Operation and Leakage Check
Inspection
Brake Booster (A)
(1) Check brake operation by applying the brakes during a test drive. If the
brakes do not work properly, check the brake
booster. Replace the brake booster as an assembly if it does not work properly
or i
SEE MORE:
Gear acmator assembly
Components
Gear acmator assembly
Specification
Connector and Terminal Function
Circuit Diagram
Inspection
The DCT system can be more quickly diagnosed for troubles by using the
vehicle diagnostic system (diagnosti
Seat belt restraint system
WARNING
Improperly positioned
seat belts may
increase the risk of serious injury
in an accident. Take the following
precautions when adjusting the seat
belt:
Position the lap portion of the seat
belt as low as possible across your
hi
Information
- Home
- Hyundai Tucson - Fourth generation (NX4) - (2020-2023) - Owner's Manual
- Hyundai Tucson - Fourth generation (NX4) - (2020-2023) - Workshop Manual
