Hyundai Tucson: Rear View Monitor (RVM)
Hyundai Tucson - Fourth generation (NX4) - (2020-2023) - Workshop Manual / Advanced Driver Assistance System (ADAS) / Rear View Monitor (RVM)
Description
Back view camera will activate when the backup light is ON with the ignition switch ON and the shift lever in the R position.
This system is a supplemental system that shows behind the vehicle through the H/UNIT or the ECM (Reverse Display Room Mirror) mirror while backing-up.
WARNING
This system is a supplementary function only. It is the responsibility of the driver or always check the inside/ outside rearview mirror and the area behind the vehicle before and while backing up because there is a dead zone that can't see through the camera.
Component Location
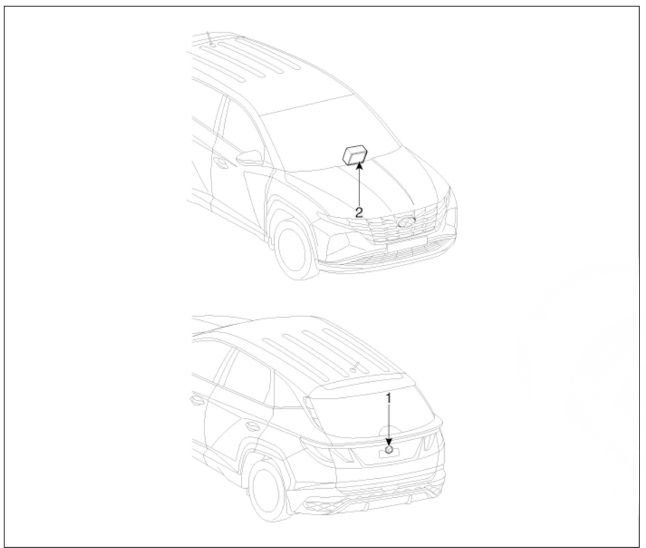
- Rear view camera
- H UNIT
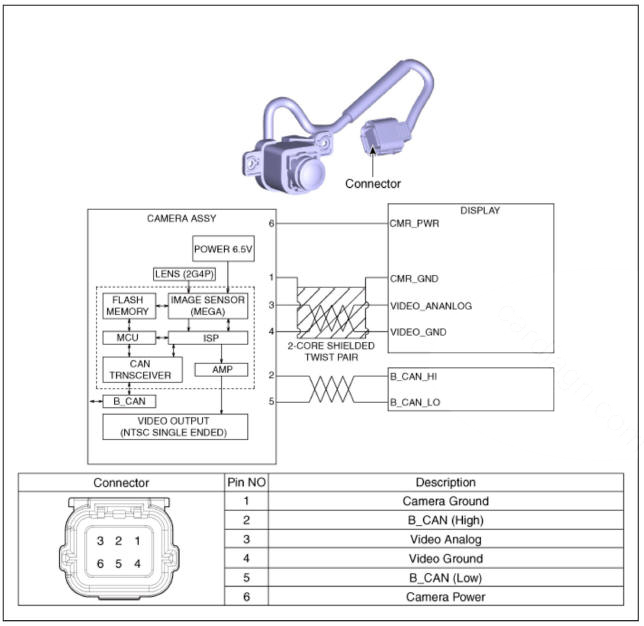
Circuit Diagram
Removal
- Disconnect the negative (-) battery terminal.
- Remove the tail gate back panel molding.
(Refer to Body - "Tail Gate Back Panel Molding")
- Disconnect the rear inside combination lamp connector (A).
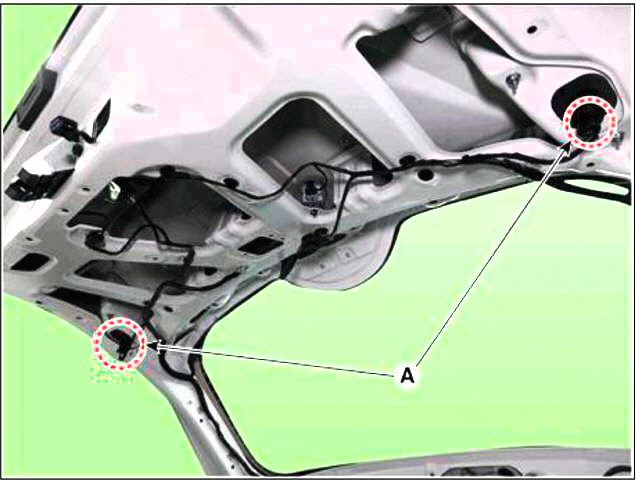
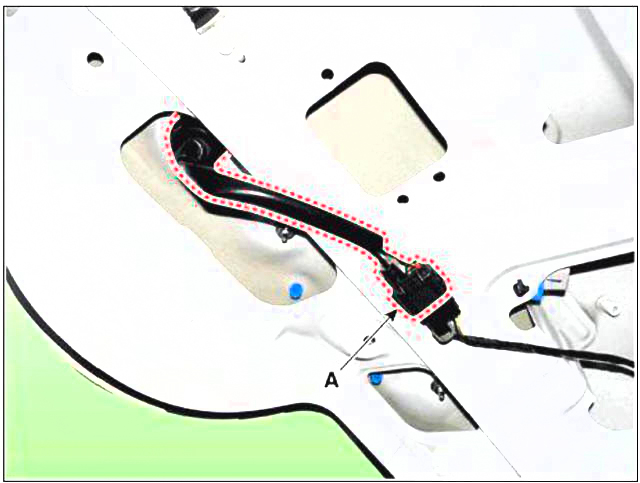
- Disconnect the rear view camera connector (A).
- Loosen the mounting nuts and remove the rear inside combination lamp (A).
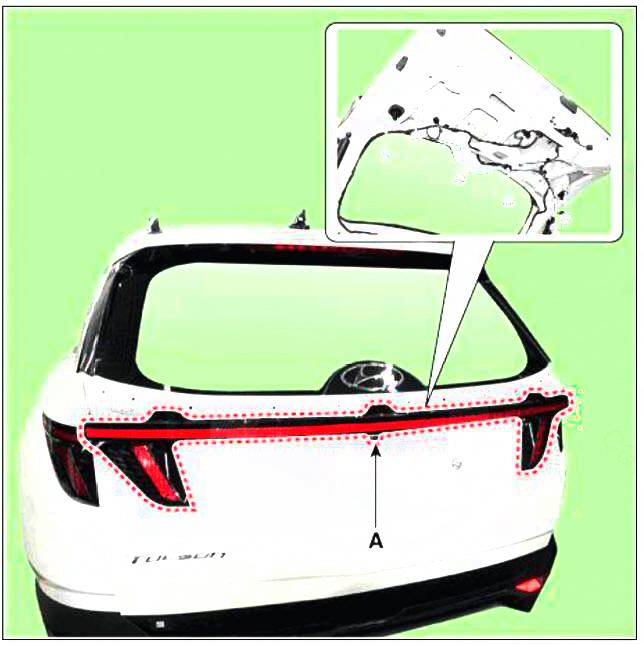
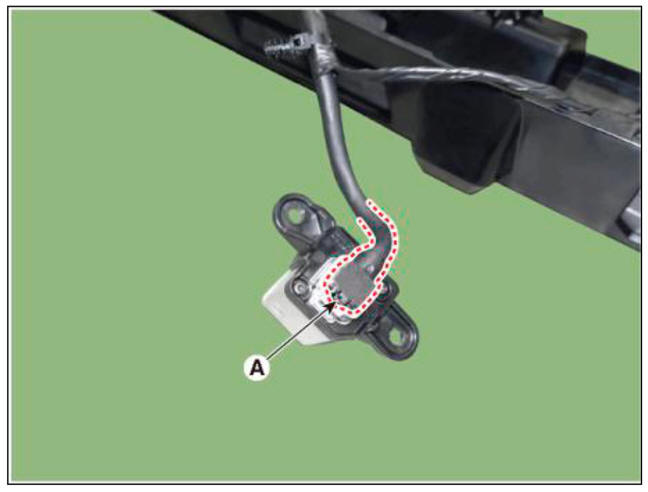
- Loosen the mounting screws and remove the rear view camera (A).
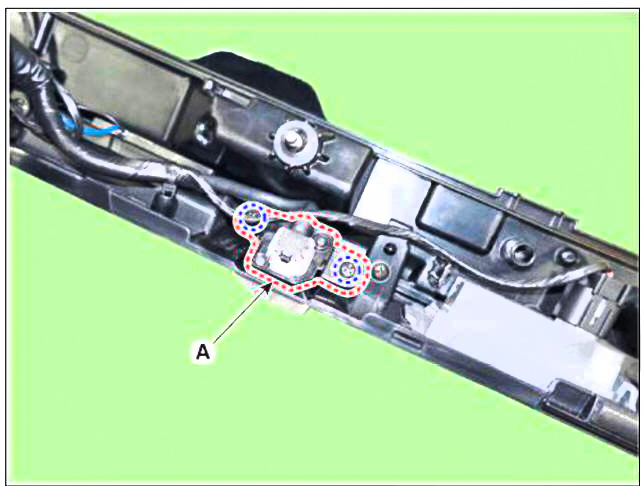
- Disconnect the rear view camera connector (A).
Installation
- Install the rear view camera.
- Install the tail gate back panel molding.
READ NEXT:
 General Troubleshooting
Information
Before Troubleshooting
Check applicable fuses in the appropriate fuse/relay box.
Using the battery checker (MCR-570 KIT), check the battery for damage,
state of charge, and clean
and tight connections.
(Refer to Engine Elect
SEE MORE:
Integrated Thermal Management Module (ITM)
Description
Integrated Thermal Management Module (ITM) is a device that controls the
coolant flow rate according to coolant
temperature. At initial startup, the ITM quickly warms up the engine by
controlling the flow of the coolant and this fas
Suction & Liquid Pipe Assembly
Components
Suction & Liquid Pipe Assembly
Replacement
If a compressor is available, the air conditioner is operated for a few
minutes in the engine idle state and then
the engine is stopped.
Disconnect the negative (-) batte
Information
- Home
- Hyundai Tucson - Fourth generation (NX4) - (2020-2023) - Owner's Manual
- Hyundai Tucson - Fourth generation (NX4) - (2020-2023) - Workshop Manual
