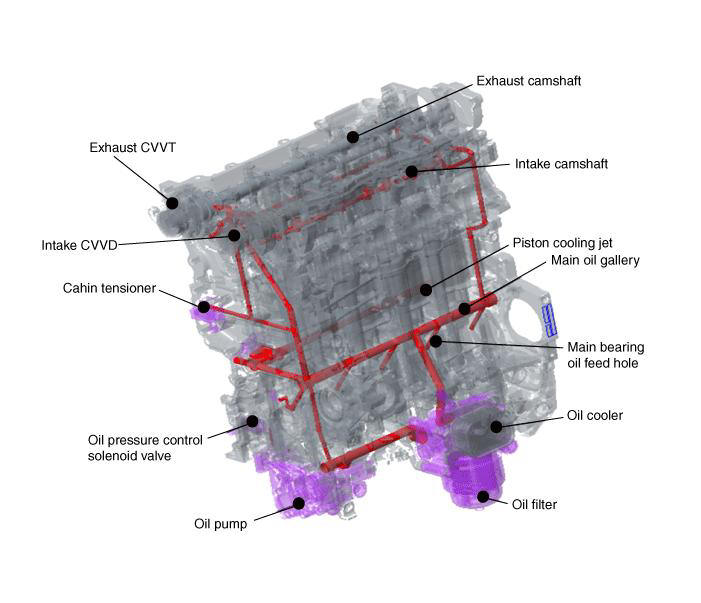
Hyundai Tucson: Engine oil flow diagram
Components
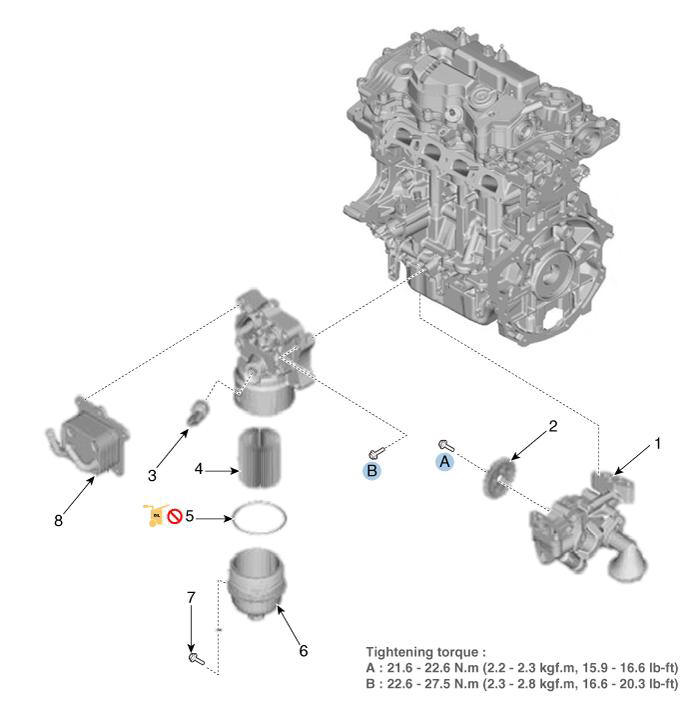
- Variable oil pump
- Variable oil pump sproket
- Oil Pressure & temperature sensor
- Oil filter
- Filter cap O-ring
- Filter cap
- Safety pin
- Oil cooler
Engine oil flow diagram
Replacement
WARNING
- Prolonged and repeated contact with mineral oil will result in the removal of natural fats from the skin, leading to dryness, irritation and dermatitis. In addition, used engine oil contains potentially harmful contaminants which may cause skin cancer.
- Exercise caution in order to minimize the length and frequency of contact of your skin to used oil. Wear protective clothing and gloves. Wash your skin thoroughly with soap and water, or use water-less hand cleaner, to remove any used engine oil. Do not use gasoline, thinners, or solvents.
- In order to preserve the environment, used oil and used oil filter must be disposed of only at designated disposal sites.
- Drain the engine oil.
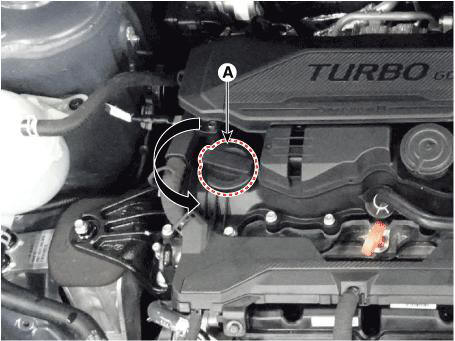
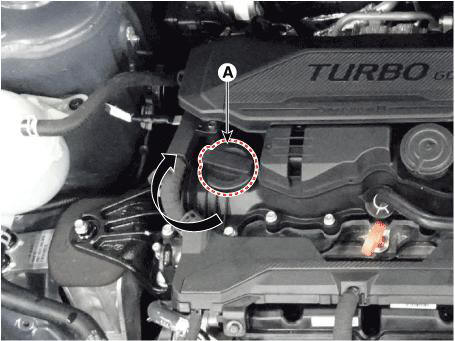
(1) Remove the oil filler cap (A).
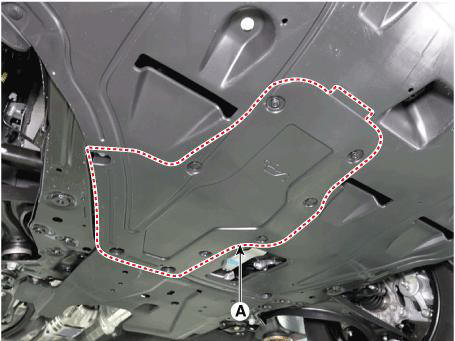
(2) Remove the service cover (A).
cardiagn.com
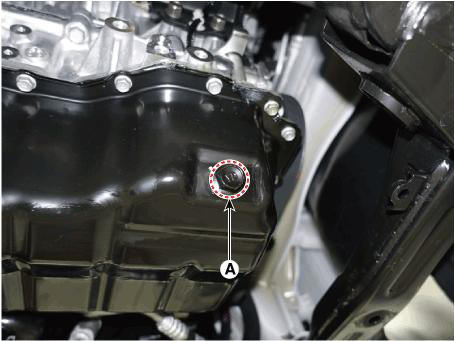
(3) Remove the oil drain plug (A), and drain the oil into a container.
- Replace the oil filter.
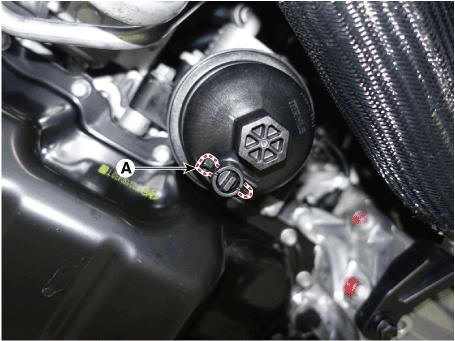
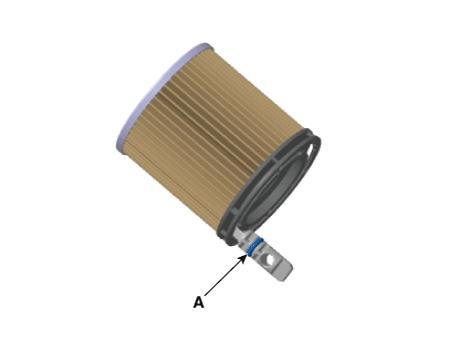
(1) Remove the safety pin (A).
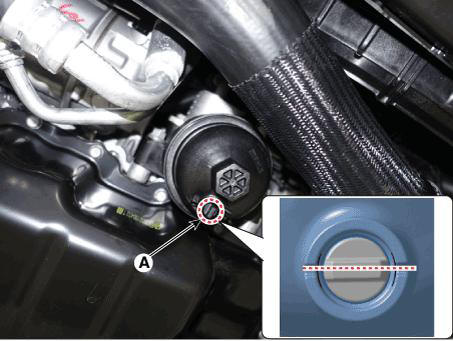
(2) Remove the pre-drain plug (A) by rotating it by 90º and then drain the engine oil in the oil filter.
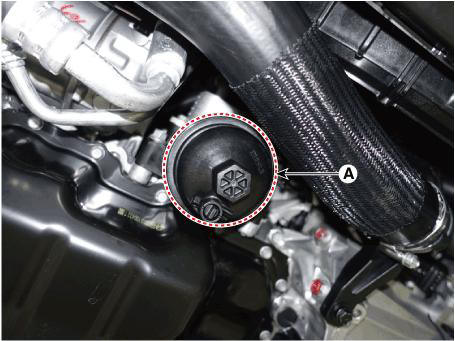
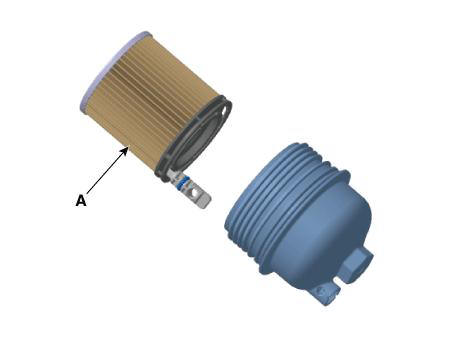
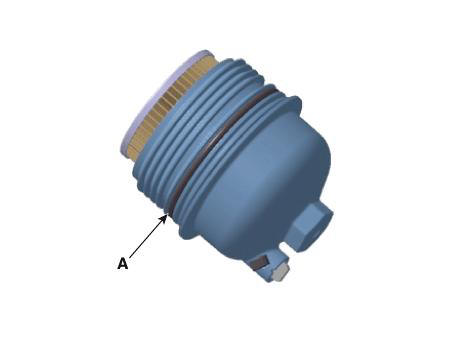
(3) Using the socket wrench, remove the oil filter cap (A).
(4) Replace the new o-ring (A) on the oil filter cap.

WARNING
- Always use a new O-ring.
- Wipe off the oil and foreign substances remaining inside the filter housing, threads and cover cap threads as much as possible.
*If the residual oil is not removed, it may leak between the cover cap and the housing mating surfaces, which can be mistaken for oil leakage. (The amount of leaking oil and the leaking period may differ depending on the amount of residual oil)
(5) Install the new oil filter (A).
WARNING
- When install the oil filter, apply engine oil to the drain plug
O-ring (A).
- Must use the drain plug (A) that is installed in a new oil
filter.
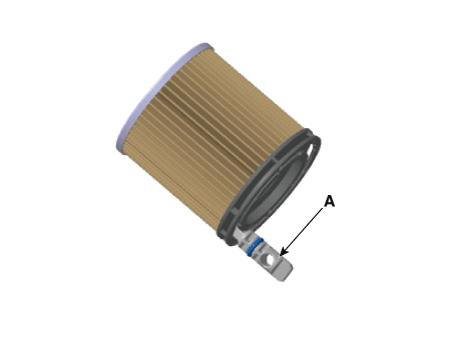
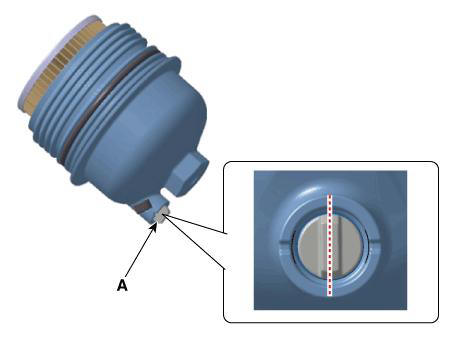
(6) Rotate the free drain plug (A) by 90º so that the drain pin is in the locked position.
(7) Install the new safety pin (A).

WARNING
Always use a new safety pin.
(8) Lightly tighten the O-ring of the oil filter cap until it contacts with the installed surface, then tighten the oil filter cap (A) to the specified torque using a socket wrench..
Tightening torque : 34.3 N.m (3.5 kgf.m, 25.3 lb-ft)

WARNING
- Always use a new O-ring.
- When install the oil filter cap, Check if the new o-ring (A) is installed correctly the cap.
-
When install the oil filter cap, apply engine oil to the new O-ring (A).
- Assemble the drain plug to the specified torque using a torque wrench.
* When manually assembling the drain plug using a hexagonal wrench, it may result in the damage to the drain plug or leakage due to the failure to comply with the specified torque.
- Refill with engine oil.
(1) Install the oil drain plug (A) with a new gasket.
Tightening torque : 34.3 - 44.1 N.m (3.5 - 4.5 kgf.m, 25.3 - 32.5 lb-ft)

(2) Install the service cover (A).

(3) Fill with fresh engine oil.
Capacity
Total : 5.0 L (1.32 U.S.gal., 5.28 U.S.qt., 4.4 lmp.qt.)
Oil pan : 4.4 L (1.16 U.S.gal., 4.65 U.S.qt., 3.87 lmp.qt.)
Drain and refill including oil filter :
4.8 L (1.27 U.S.gal., 5.07 U.S.qt., 4.22 lmp.qt.)
(4) Install the oil filler cap (A).
- Engine and check for oil leaks.
- Recheck the engine oil level.
READ NEXT:
 Engine Oil
Check the engine oil quality.
Check the oil deterioration, entry of water, discoloring of thinning.
If the quality is visibly poor, replace the oil.
Check the engine oil level.
After warning up the engine and then 10 minutes after the
Engine Oil - Removal and Installation
Disconnect the battery negative terminal.
Remove the engine room under cover.
(Refer to Engine and Transaxle Assembly - "Engine Room Under Cover")
Drain the coolant.
(Refer to Cooling System - "Coolant")
D
Oil Pump
Removal and
Installation
Remove the engine room under cover.
(Refer to Engine and Transaxle Assembly - "Engine Room Under Cover")
Drain the engine oil.
(Refer to Lubrication System - "Engine Oil")
Remove t
SEE MORE:
Electronic Parking Brake (EPB)
Components
ESC Control Module (HECU)
EPB Switch
Electronic Parking Brake (EPB) actuator
Circuit Diagram
Electronic Parking Brake (EPB)- Removal
WARNING
Be careful not to damage the parts located under the vehicle (floor
Cylinder Head - Installation
WARNING
Thoroughly clean all parts to be assembled.
Always use a new cylinder head gasket and manifold gasket.
Always use a new cylinder head bolt and cylinder head bolt
washer.
The cylinder head and exhaust manifold is a metal gasket. T
Information
- Home
- Hyundai Tucson - Fourth generation (NX4) - (2020-2023) - Owner's Manual
- Hyundai Tucson - Fourth generation (NX4) - (2020-2023) - Workshop Manual
