Hyundai Tucson: Cylinder head cover
Removal
- Disconnect the battery negative terminal.
- Remove the cylinder head cover.
(Refer to Cylinder Head Assembly - "Cylinder Head Cover")
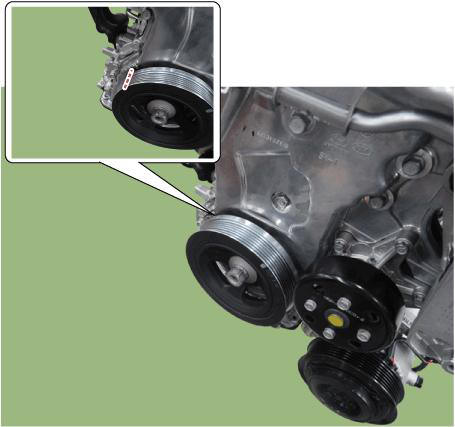
- Turn the crankshaft damper pulley so that No. 1 piston is at top dead center.
(1) Turn the crankshaft damper pulley and align its groove with the timing mark on the timing chain cover
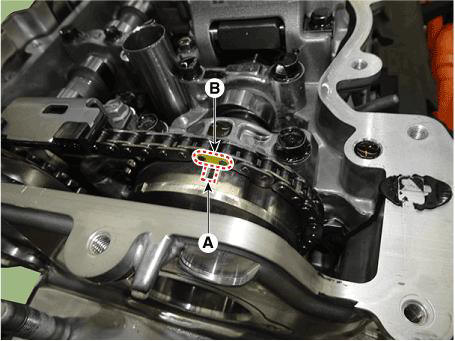
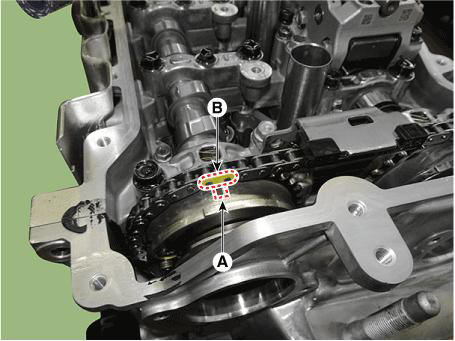
(2) Check the timing chain, be sure that the timing mark (A) of each sprocket is matched with the timing mark (B) (color link) of the timing chain.
If not, turn the crankshaft damper pulley by one revolution (360º).
Intake CVVT
Exhaust CVVT
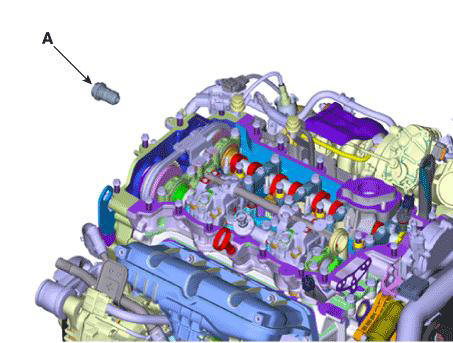
- Remove the intake and exhaust variable force solenoid (VFS) valves (A).
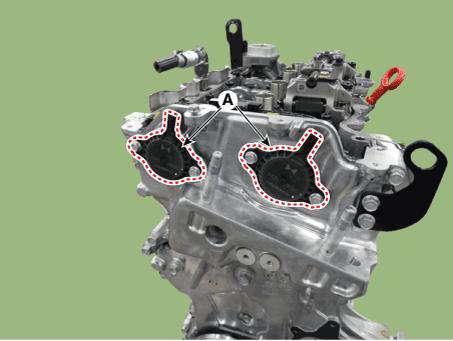
- Remove the cam to cam guide (A).

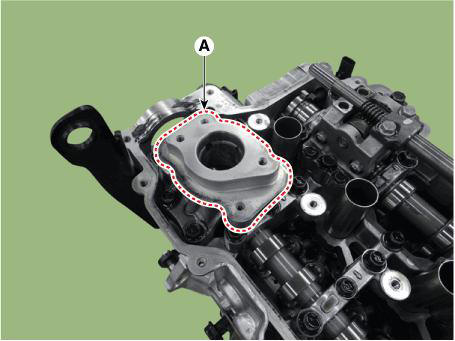
- Remove the fuel pump bracket (A).
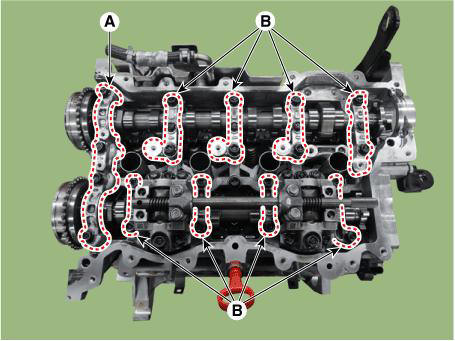
- Remove the camshaft front bearing cap (A) and camshaft bearing caps (B).
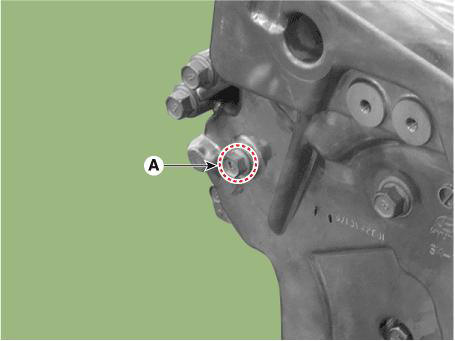
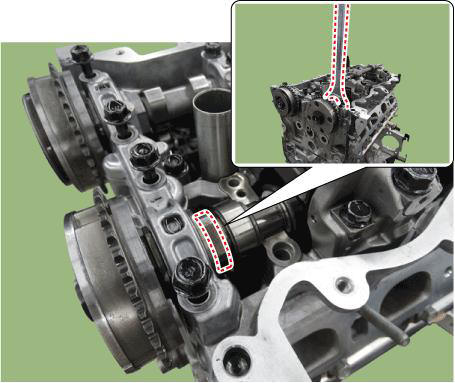
- Loosen the service hole bolt (A).
- Install the jack to the edge of oil pan
- Lift the engine using the jack to obtain space.
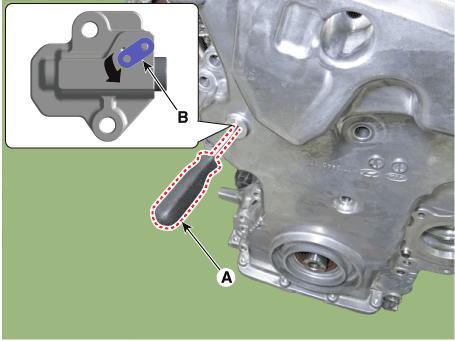
- Release the lock by putting down rachet plate (B) of timing chain tensioner with using back of tiny awl (A).
- Remove the intake oil control valve (OCV) & center bolt (A).

WARNING
- To prevent impurities from entering intake oil control valve (OCV) & center bolt, wear rubber gloves.
- Intake oil control valve (OCV) and center bolt, hold the
hexagonal portion on the camshaft with a wrench to
prevent the camshaft from rotating.
- Remove the exhaust oil control valve (OCV) and center bolt (A).
WARNING
To prevent impurities from entering exhaust oil control valve (OCV) & center bolt, wear rubber gloves.
When removing the exhaust oil control valve (OCV) and center bolt,
hold the hexagonal portion on the
camshaft with a wrench to prevent the camshaft from rotating.
- Remove the CVVD assembly
WARNING
- After removing the CVVD unit, make sure that the parts such as lifter, cam, etc are not separated.
- Ensure that the CVVD components are not damaged.
READ NEXT:
 When Using the CVVD fixture/ When not using the CVVD fixture
When Using the CVVD fixture
(1) Install the CVVD fixture (A) over the CVVD assembly.
(2) Remove the CVVD assembly.
When not using the CVVD fixture
(3) Remove the CVVD assembly.
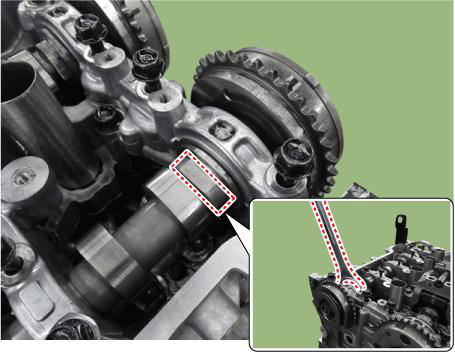
Remove the Intake CVVT (A).
Remove the
Camshaft - Inspection
Measure the height of the cam.
Check the surface of the cam lob for wear and tear. If necessary, replace the
camshaft.
Cam height
Intake : 37.33 mm (1.4697 in.)
Exhaust : 37.44 mm (1.474 in.)
Inspect the camshaft journal clearance.
Camshaft - Installation
Install the intake CVVT (A).
Install the CVVD assembly (A).
WARNING
After installing the CVVD, check whether the swing arm is
separated or is installed correctly.
When installing the intake camshaft, spray the engine oil
SEE MORE:
Exterior Bumper Antenna
Disconnect the negative (-) battery terminal.
Lift the vehicle.
Disconnect the antenna connector (A) from the rear bumper.
Remove the antenna (B) after loosening mounting nuts.
Buzzer
Disconnect the negative (-) battery terminal.
Even After The Engine Is Started, The ABS Warning Lamp Remains ON
Detecting condition
If the HECU detects trouble, it lights the ABS warning lamp while at the
same time prohibiting ABS control. At this time, the HECU records a
DTC in memory. Even though the normal code is output, the ABS
warning lamp remains ON
Information
- Home
- Hyundai Tucson - Fourth generation (NX4) - (2020-2023) - Owner's Manual
- Hyundai Tucson - Fourth generation (NX4) - (2020-2023) - Workshop Manual
