Hyundai Tucson: Audio - Removal
- Disconnect the negative (-) battery terminal.
- Remove the front monitor lower cover (A).
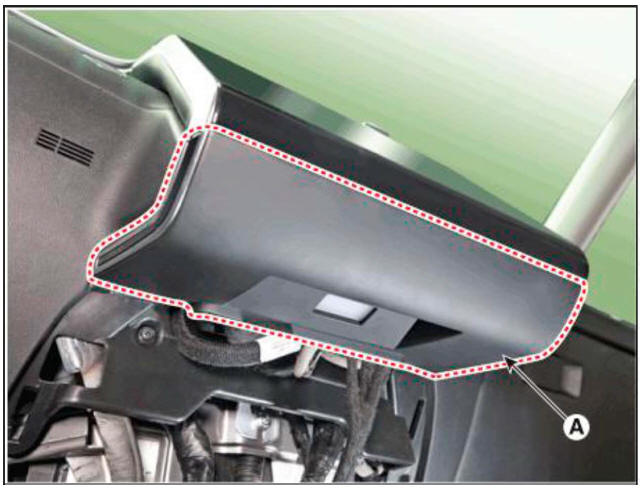
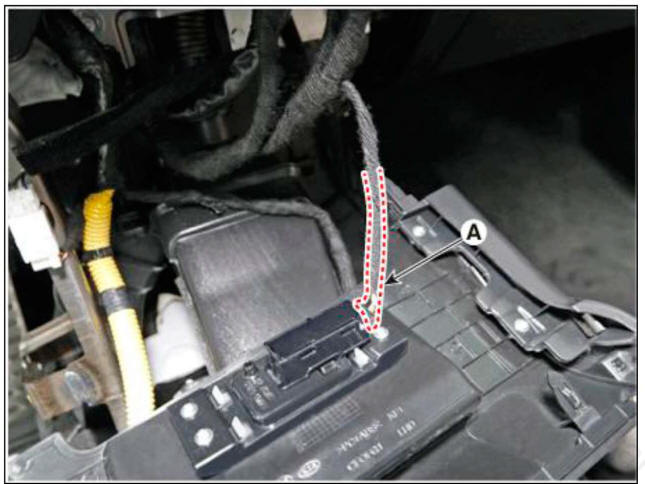
- Remove the front monitor lower cover (A) after disconnecting the mood lamp connector (A).
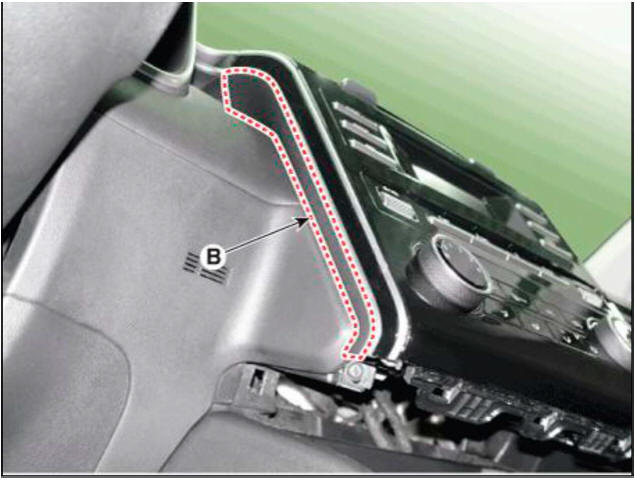
- Remove front monitor side cover (A) and (B).

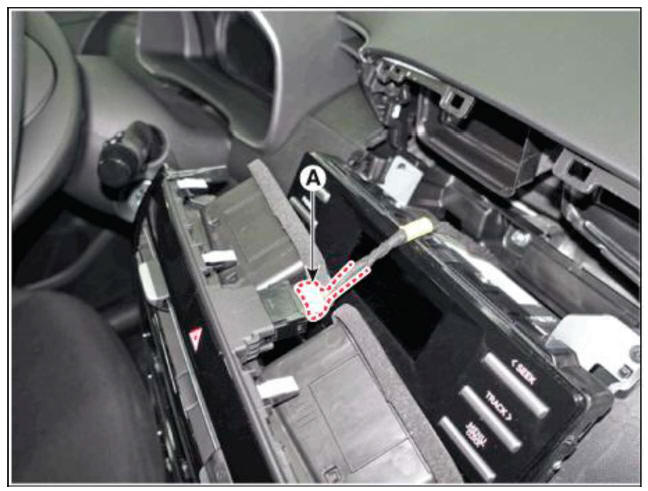
- Remove the front monitor cover (A) after loosening mounting screws.
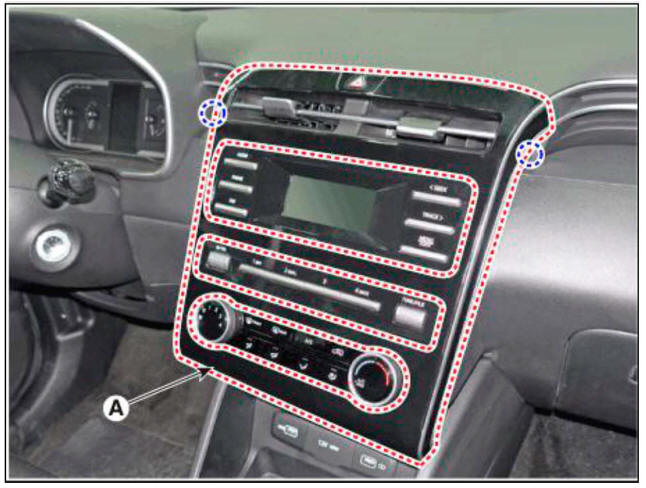
- Remove the Front monitor cover after disconnect the hazard switch connector (A).
- Remove the heater control unit (A) after loosening mounting screws.
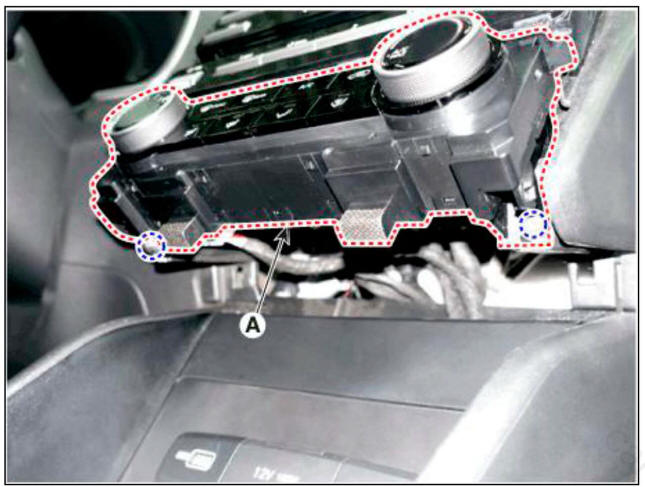
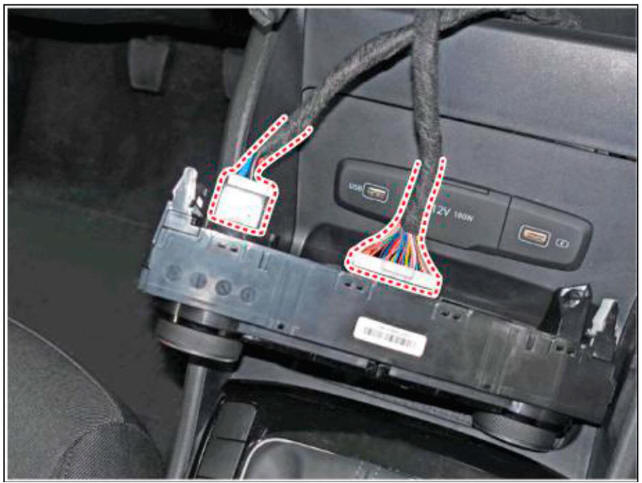
- Remove the heater control unit after disconnecting connectors.
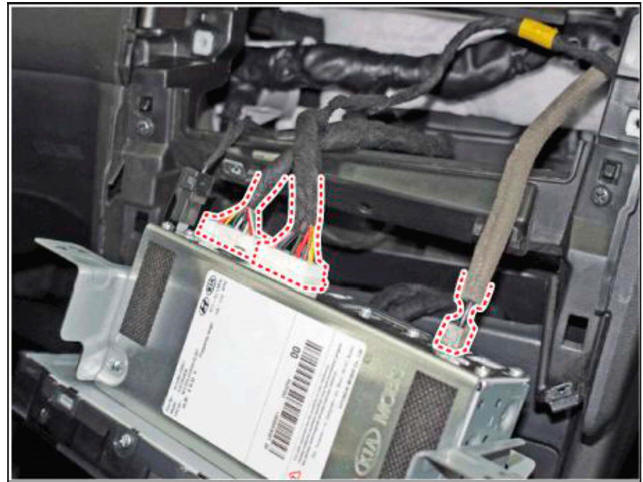
- Remove the audio unit (A) after loosening mounting screws.
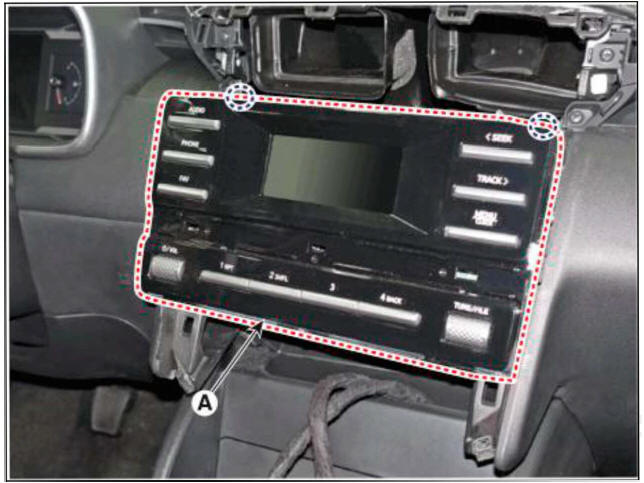
- Remove the audio unit after disconnecting connectors.
Installation
Display audio
- Install audio connectors and antenna connectors.
- Install the audio unit.
- Install the front monitor assembly.
- Install the front monitor side cover.
- Install the front monitor lower cover.
- Connect the negative (-) battery terminal.
- Make sure the connector are connected in properly.
- Check the audio system for normal operation.
Audio
- Install audio connectors and antenna connectors.
- Install the audio unit.
- Install the front monitor assembly.
- Install the front monitor cover.
- Install the front monitor side cover.
- Install the front monitor lower cover.
- Connect the negative (-) battery terminal.
Inspection
- Check the plus (+) and negative (-) speaker terminals using an ohmmeter.
- Check the supply power to the speaker and the resistance, then inspect the sound quality.
Removal
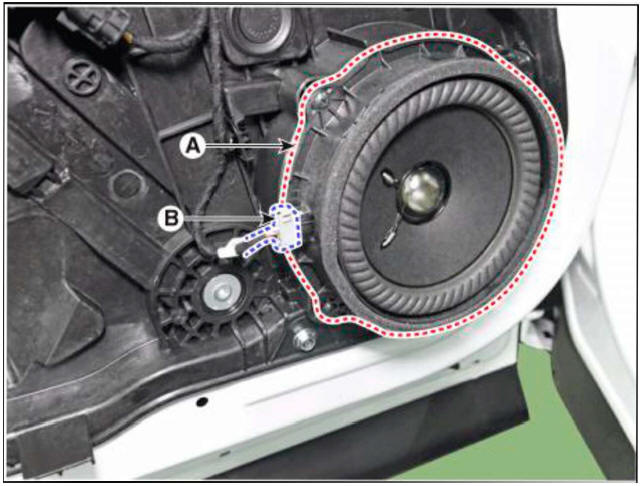
Front Door Speaker
- Remove the front door trim.
(Refer to Body - "Front Door Trim")
- Disconnecting the connector (B) and then remove the front speaker (A) after loosening screws.
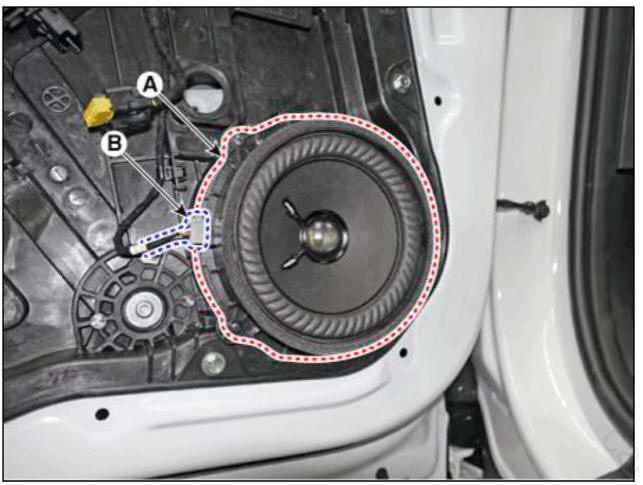
Rear Door Speaker
- Remove the rear door trim.
(Refer to Body - "Rear Door Trim")
- Remove the raer speaker (A) after loosening the screws before disconnecting connector (B).
Tweeter Speaker
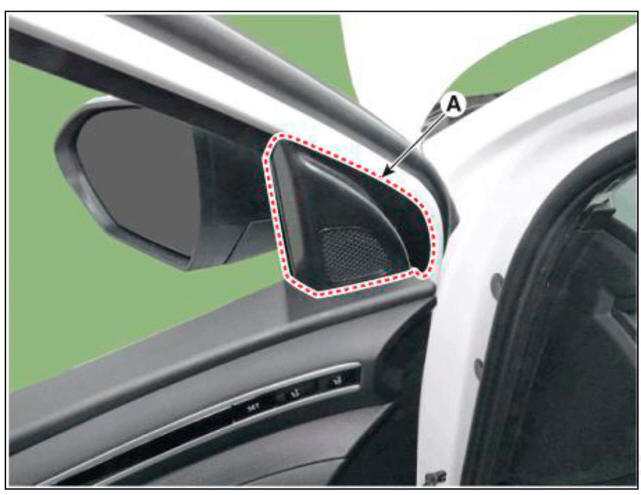
- Using a screwdriver or remover, remove the front door quadrant inner cover (A).
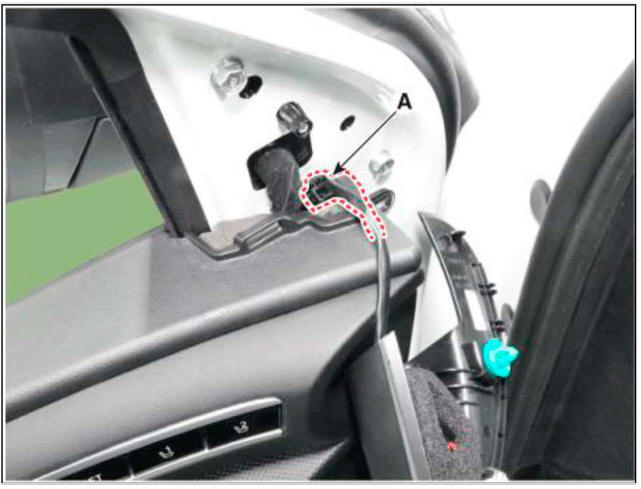
- Remove the tweeter speaker connector (A).
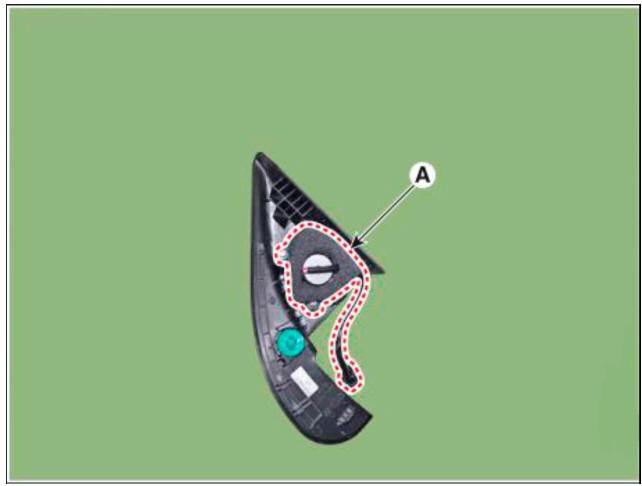
- Remove the tweeter speaker (A) after loosening mounting screws.
Installation
Front Door Speaker
- Install the front speaker.
- Install the front door trim.
Rear Door Speaker
- Install the rear speaker.
- Install the rear door trim.
Tweeter Speaker
- Install the tweeter speaker.
- Install the front door quadrant inner cover.
- Make sure the connector are connected in properly.
- Check the audio system for normal operation
Removal
- Disconnect the negative (-) battery terminal.
- Remove the rear roof trim.
(Refer to Body - "Roof Trim Assembly")
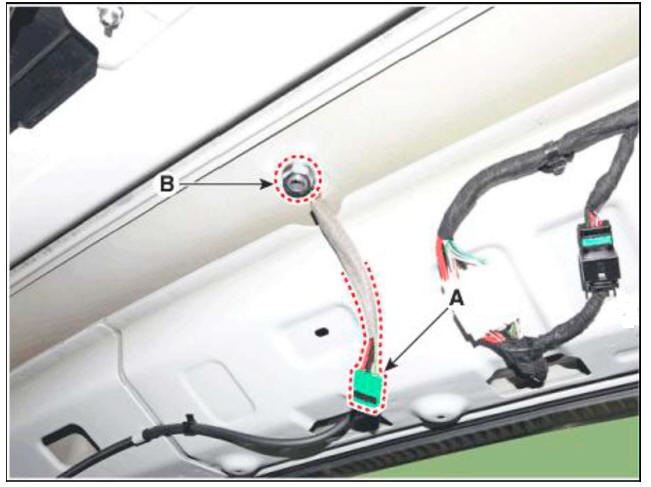
- Disconnect the roof antenna connectors (A) and then remove the mounting nut (B).
Removal
- Disconnect the negative (-) battery terminal.
- Remove the rear roof trim.
(Refer to Body - "Roof Trim Assembly")
- Disconnect the roof antenna connectors (A) and then remove the mounting nut (B).
Installation
- Install the roof antenna.
- Connect the antenna connector and then install the mounting nut.
- Install the roof trim.
- Connect the negative (-) battery terminal.
- Make sure that the cables and connectors are plugged in properly.
- Check the audio system for normal operation.
READ NEXT:
 Remote Control Switch
Components
Left Remote Control Switch (Audio)
Right Remote Control Switch (Cruise)
Schematic
Diagrams
Audio + B/Tooth+Voice+TRIP+SCC+MSLA+LFA
Audio + B/Tooth+Voice+TRIP+SCC+MSLA+LFA+Paddle Shift
Inspection
Check for resis
Monitor cover
Remove the front monitor lower cover after disconnecting the mood lamp
connector
Remove front monitor side cover (A) and (B).
Remove the front monitor assembly (A).
Remove the front monitor assembly (A) aft
SEE MORE:
Inspection (With diagnostic tool)
In the body electrical system, failure can be quickly diagnosed by using
the vehicle diagnostic system (diagnostic tool).
The diagnostic system (diagnostic tool) provides the following information.
(1) Fault Code Searching : Checking failu
Crankshaft Position Sensor (CKPS)
Description
Crankshaft Position Sensor (CKPS) detects the crankshaft position and is one
of the most important
sensors of the engine control system. If there is no CKPS signal input, fuel is
not supplied.That is,
vehicle can't run without
Information
- Home
- Hyundai Tucson - Fourth generation (NX4) - (2020-2023) - Owner's Manual
- Hyundai Tucson - Fourth generation (NX4) - (2020-2023) - Workshop Manual
