Hyundai Tucson: Windshield Wiper Washer - Removal
- Disconnect the negative (-) battery terminal.
- If necessary, release the wiper blade fixing clip(A) by pulling up and remove the wiper blade(B) from the inside radius of wiper arm.

- Remove the cowl top cover.
(Refer to Body - "Cowl Top Cover")
- Disconnect the wiper motor connector (A).
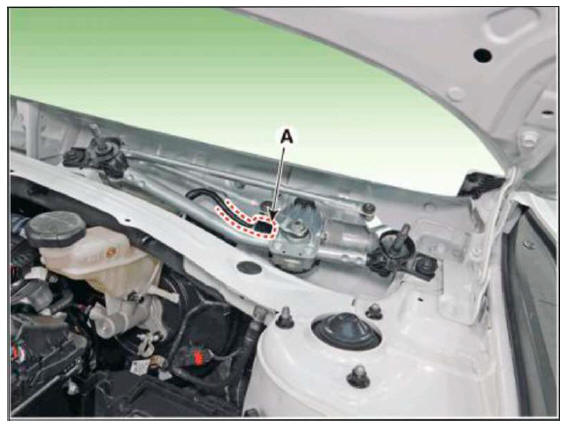
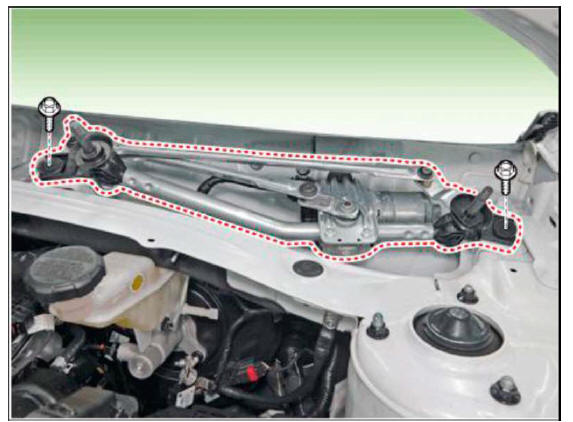
- Remove the windshield wiper motor and linkage assembly (A) after removing mounting bolts.
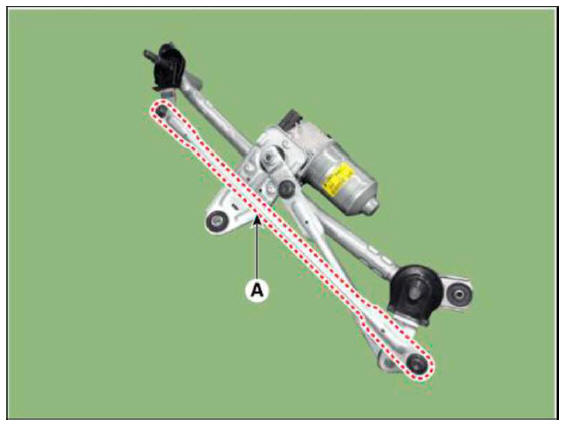
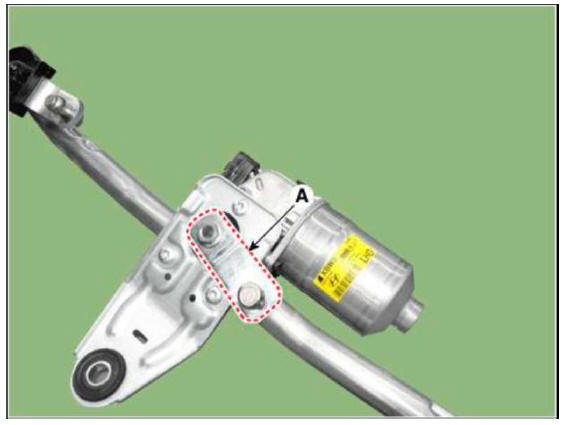
- Hold the wiper motor crank arm and remove the upper linkage (A) from the wiper motor crank arm.
Before removing the wiper motor and linkage assembly, make sure that the linkage is stoped at auto stop position.
To install the wiper motor crank arm exactly, check that the linkage is aligned with the crank arm in straight line and the angle of each linkages.
Be careful not to bend the linkage.
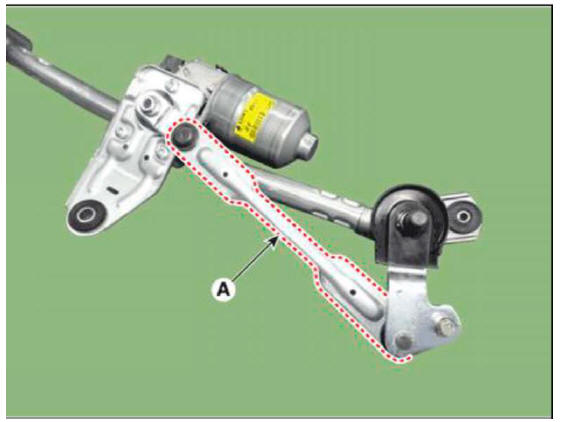
- Remove the lower linkage (A) from the wiper motor crank arm.
To install the wiper motor crank arm exactly, check that the linkage is aligned with the crank arm in straight line and the angle of each linkages.
Be careful not to bend the linkage.
- Remove the crank arm (A) after loosening a nut.
- Remove the bracket (A) after loosening mounting screws.
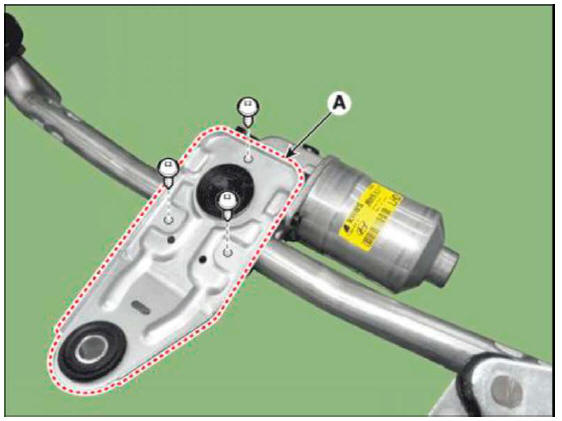
- Remove the wiper motor.
Installation
- Install the wiper motor and linkage assembly and then connect the wiper motor connector.
6T.i9g h- t1e0n.i8n gN mto r(0q.u7e - 1: . 1 kgf.m, 5.0 - 7.9 lbf.ft)
- Install the cowl top cover.
- Install the windshield wiper arm and blade.
Tightening torque : 22.5 - 26.5 Nm (2.3 - 2.7 kgf.m, 16.6 - 19.5 lbf.ft)
- Install the wiper arm and blade to the specified position.
Check if the wiper stops at the specified position by operating it 2-3 times.
Inspection
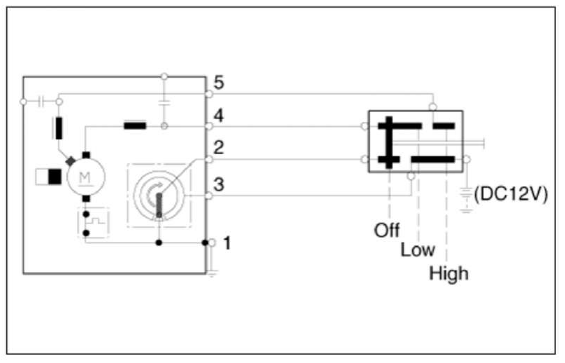
- Remove the connector (A) from the wiper motor.
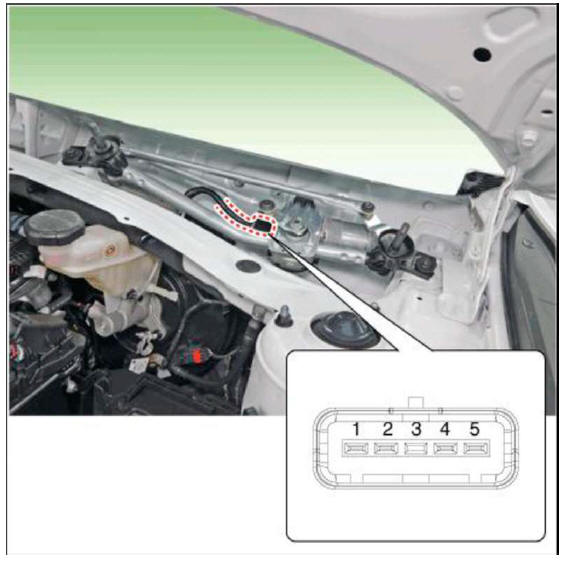
- Attach the positive (+) lead from the battery to terminal 3 and the negative (-) lead to terminal 1.
Check that the motor operates at low or high speed as below table.
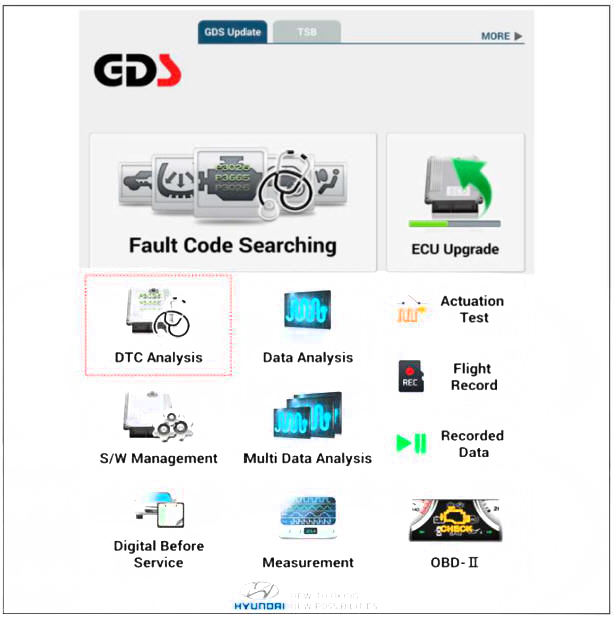
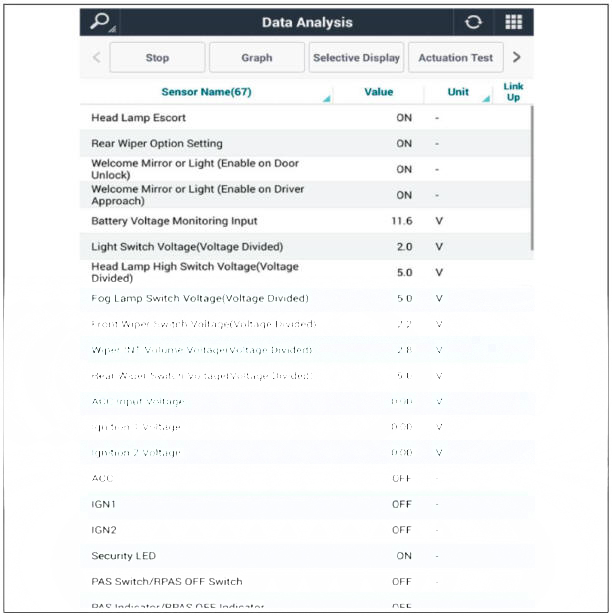
Diagnosis with diagnostic tool
- In the body electrical system, failure can be quickly diagnosed by using the vehicle diagnostic system (diagnostic tool).
The diagnostic system (diagnostic tool) provides the following information.
(1) Fault Code Searching : Checking failure and code number (DTC)
(2) Data Analysis : Checking the system input/output data state
(3) Actuation test: Checking the system operation condition
(4) S/W Management: Controlling other feamres including system option setting and zero point adjustment
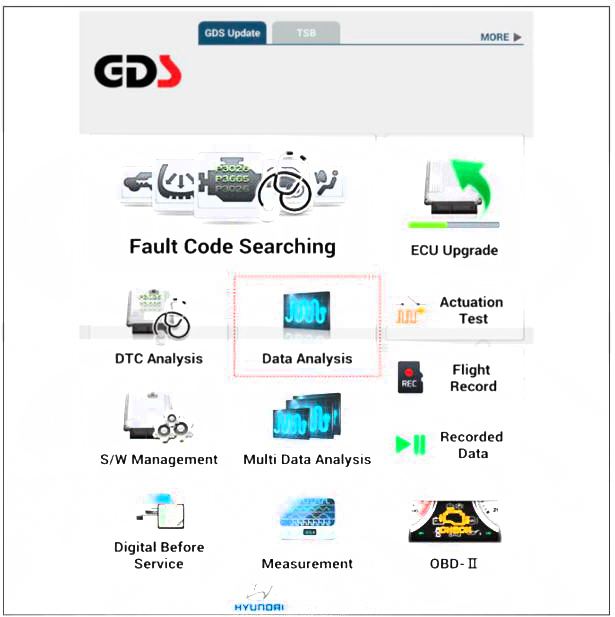
- If diagnose the vehicle by diagnostic tool, select "DTC Analysis" and "Vehicle".
- Select the 'Data Analysis'.
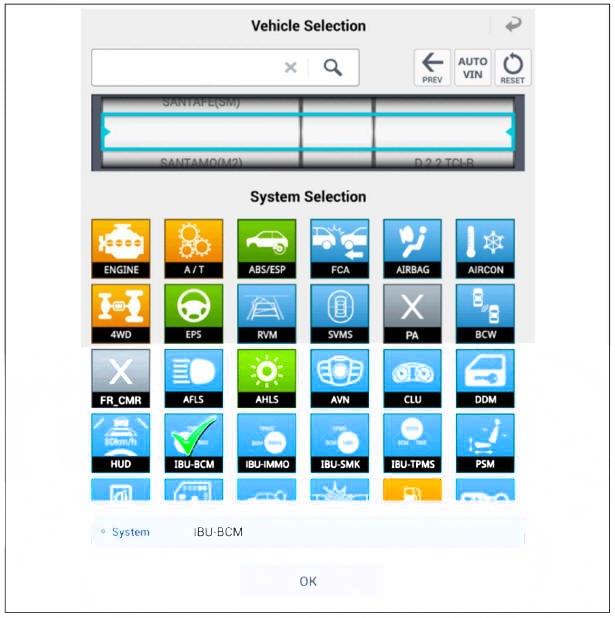
- Select the 'IBU_BCM' to search the current state of the input/output data.
READ NEXT:
 Front and Rear Washer Motor
Inspection
With the washer motor connected to the reservoir tank, fill the
reservoir tank with water.
Before filling the reservoir tank with water, check the filter for
foreign material or
contamination, if necessary, clean the filt
Windshield Wiper Washer - Installation
Check the operation of the rain sensor and the light sensor before
mounting.
Check the sensor for silicon damage.
Check w7hether the rain sensor connector is tightened.
Check w7hether the rain sensor and bracket are properly tightened.
SEE MORE:
Intelligent Manual Transaxle (IMT) Oil
General
Information
Check & Change intervals
WARNING
Severe usage is defined as
Driving in dusty, rough roads
Driving in areas using salt or other corrosive materials or in
very cold weather
Driving in sandy areas
Drivin
Engine Cover
Removal
Turn the ignition switch OFF and disconnect the battery (-) terminal.
Remove the engine cover.
(Refer to Engine Mechanical System - "Engine Cover")
Disconnect the ignition coil connectors (A).
WARNING
When remov
Information
- Home
- Hyundai Tucson - Fourth generation (NX4) - (2020-2023) - Owner's Manual
- Hyundai Tucson - Fourth generation (NX4) - (2020-2023) - Workshop Manual
