Hyundai Tucson: Shift Lever
Removal
- Turn ignition switch OFF and then disconnect the battery (-) cable.
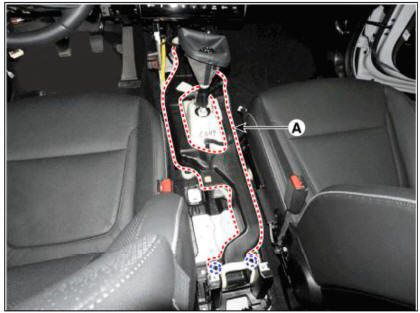
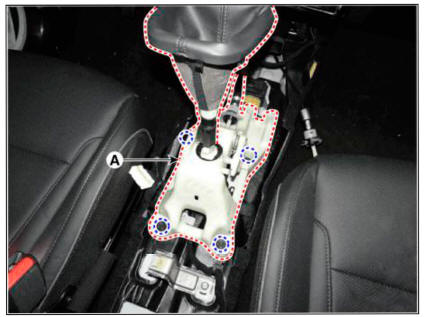
- Remove the floor console assembly.
(Re fer to Body (Interior and Exterior) - " Floor Console")
- Remove the floor air duct (A).
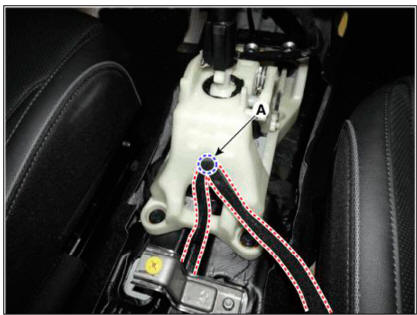
- Separate the wiring clips (A. B).

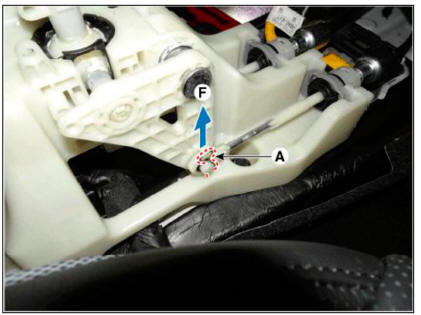
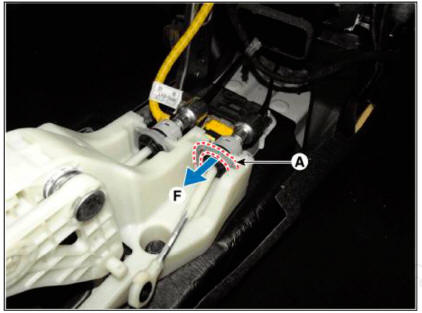
- Remove the snap pin (A) in the arrow "F" direction.
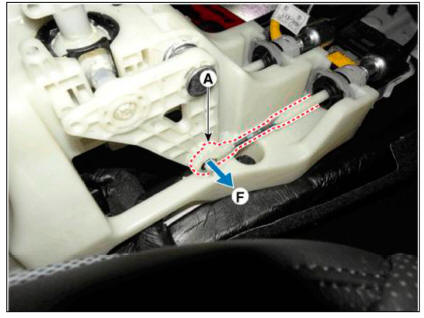
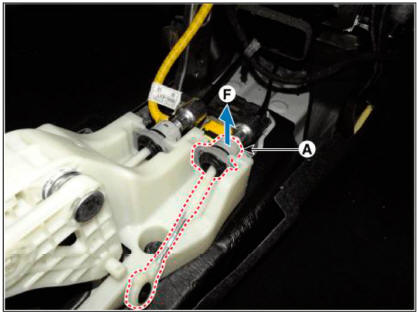
- Separate the select cable end (A) in the arrow "F" direction.
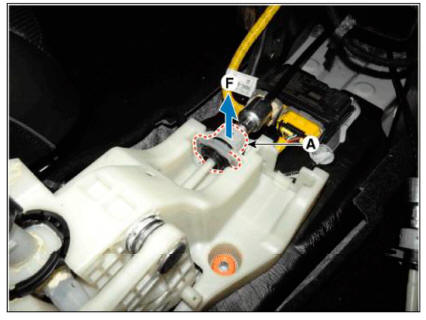
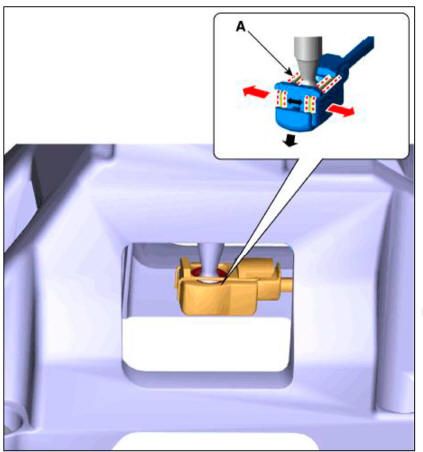
- Separate the select cable socket.
(1) Pull the select cable socket clip (A) in the arrow "F" direction.
(2) Pull the select cable socket (A) in the arrow "F" direction.
- Separate the shift cable socket.
(1) Pull the shiftt cable socket clip (A) in the arrow "F" direction.

(2) Pull the shiftt cable socket (A) in the arrow "F" direction.
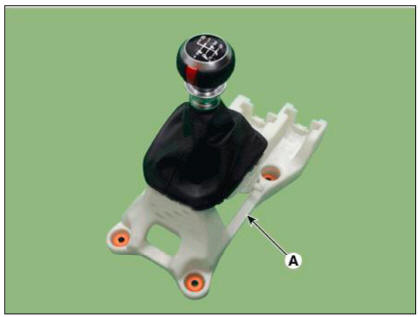
- Loosen the bolts and then separate the shift lever (A).
Tightening torque : 8.8 - 13.7 N.m (0.9 - 1.4 kgf.m, 6.5 - 10.1 lb-ft)
- Remove the clip, in the shape of a "U"(A), from the shift cable end by spreading it towards both sides
- Remove the shift lever (A) from shift cable end.
Installation
- To install, reverse the removal procedures.
WARNING
- New shift lever assembly is mounted in the 4th fixing pin.
- After installation, remove the 4th fixed pin.
- Check operating of lever of transaxle side when operating shift lever after assembly. (1~6,R)
READ NEXT:
 Control Cable - Removal
Turn OFF ignition switch and disconnect the negative (-) batteiy cable.
Remove the air duct and air cleaner assembly.
(Refer to Engine Mechanical System - "Air Cleaner")
Remove the batteiy and batteiy tray.
(Refer to Engine E
Control Cable- Installation
Installation
WARNING
Check if the 4th fixing pin (A) is installed.
Install the control cable retainer (B) and then tightening the nuts (A).
Tightening torque:
11.8 - 14.7 N.m (1.2 - 1.5 kgf.m, 8.7 - 10.8 lb-ft)
Install the clip, i
SEE MORE:
Curtain Air Bag (CAB)
Components Location
Curtain Air Bag (CAB)
Removal
Disconnect the batteiy negative terminal.
WARNING
After disconnecting the cables, wait at least 3 minutes.
Remove the roof trim.
(Refer to Body - "Roof Trim Assembly"
Piston
Clean the piston.
(1) Using a gasket scraper, remove the carbon from the piston top.
(2) Using a groove cleaning tool or broken ring, clean the piston ring grooves.
(3) Using solvent and a brush, thoroughly clean the piston.
WARNING
Do
Information
- Home
- Hyundai Tucson - Fourth generation (NX4) - (2020-2023) - Owner's Manual
- Hyundai Tucson - Fourth generation (NX4) - (2020-2023) - Workshop Manual
