Hyundai Tucson: Seat Belt Pretensioner
Description
The Seat Belt Pretensioners (BPT) are installed inside Center Pillar (LH & RH). When a vehicle crashes with a certain degree of frontal impact, the pretensioner seat belt helps to reduce the severity of injury to the front seat occupants by retracting the seat belt webbing. (Seat belt pretensioner may be activated in side impact collisions if the vehicle has side airbag or curtuain airbag.) This prevents the front occupants from thrusting forward and hitting the steering wheel or the instrument panel when the vehicle crashes.
WARNING
Never attempt to measure the circuit resistance of the Seat Belt Pretensioner (BPT) even if you are using the specified tester. If the circuit resistance is measured with a tester, the pretensioner will be ignited accidentally. This will result in serious personal injury.
Components Location
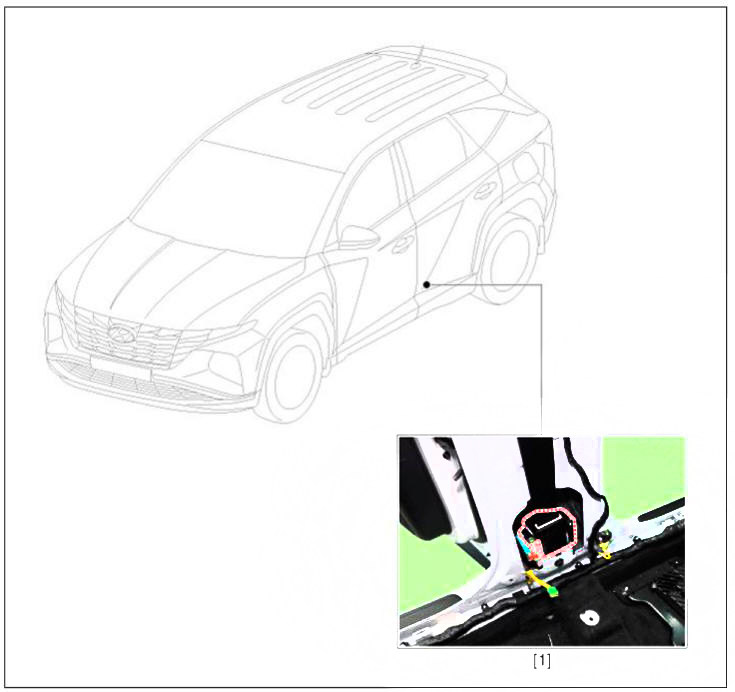
- Front Seat Belt Pretensioner (BPT)
Removal
- Disconnect the battery negative terminal.
WARNING
After disconnecting the cables, wait at least 3 minutes
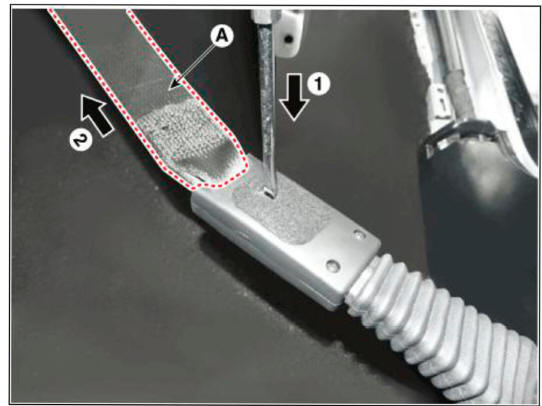
- Remove the front anchor seat belt (A).
- Remove the center pillar upper trim.
(Refer to Body - "Center Pillar Trim")
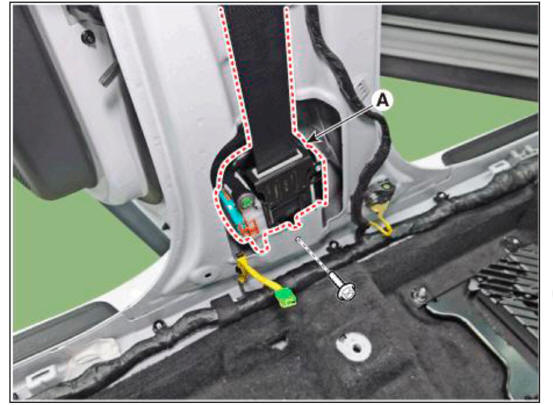
- Disconnect the seat belt pretensioner connector (A) and then remove the seat belt pretensioner.

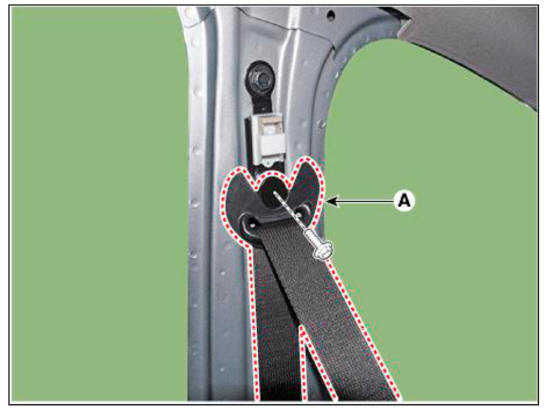
- After loosening the mounting bolt, then remove the front seat belt lower anchor (A).
Tightening torque : 39.2 - 53.9 N.m (4.0 - 5.5 kgf.m, 28.9 - 39.8 lb-ft)
- Remove the seat belt pretensioner (A) after loosening the mouning bolts.
Tightening torque : 39.2 - 53.9 N.m (4.0 - 5.5 kgf.m, 28.9 - 39.8 lb-ft)
Installation
- Install in the reverse order of removal.
- After installing the airbag module, confirm proper system operation.
WARNING
Switch ON the ignition. The SRS indicator light should turn on for about three-six seconds and then off.
READ NEXT:
 Troubleshooting
Problem Symptoms Table
Use the table below to help you find the cause of the problem. The numbers
indicate the priority of the
likely cause of the problem.
Check each part in order.
If necessary, replace these parts.
Specificat
SEE MORE:
Airbag Module - Removal
Removal
Set the front tires straight-ahead.
Disconnect the batteiy negative terminal.
WARNING
After disconnecting the cables, wait at least 3 minutes.
Put a flat tool (05mm) into a guide hole located in the left/right of
steering whe
Inhibitor switch/ Manual control lever
Components
Inhibitor switch
Manual control lever
Fault Diagnosis
Fault Diagnosis for Symptom
Specifications
Signal Code Table
Inspection
WARNING
Thoroughly check connectors for looseness, poor connection, bending,
cor
Information
- Home
- Hyundai Tucson - Fourth generation (NX4) - (2020-2023) - Owner's Manual
- Hyundai Tucson - Fourth generation (NX4) - (2020-2023) - Workshop Manual
