Hyundai Tucson: Mode control actuator
Components Location

- Mode control actuator
Inspection
- Turn the ignition switch OFF.
- Disconnect the mode control actuator connector.
- Verify that the mode control actuator operates to the defrost mode when
connecting 12V to terminal
3 and grounding terminal 4.
Verify that the mode control actuator operates to the vent mode when connected in reverse.
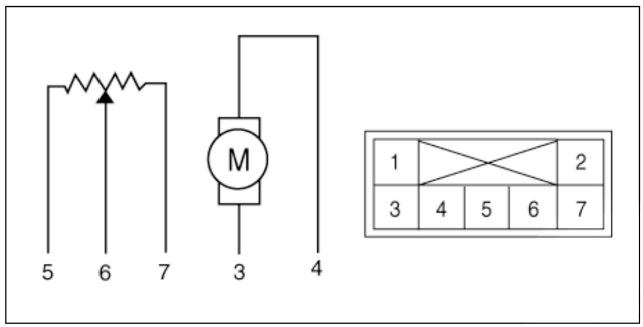
- -
- -
- Defrost mode
- Vent mode
- Sensor ground
- Feedback signal
- Sensor (+ 5V)
- Connect the mode control actuator connector.
- Turn the ignition switch ON.
- Check the voltage between terminal 5 and 4.

* It will feedback the current position of the actuator to controls.
- If the measured voltage is not within specification, substitute with a known-good mode control actuator and check for proper operation.
- Replace the mode control actuator if it is proved that there is a problem with it.
Replacement
- Disconnect the negative (-) battery terminal.
- Remove the main crash pad assembly.
(Refer to Body (Interior and Exterior) - "Main Crash Pad Assembly")
- Remove the DC DC converter.
(Refer to Engine Electrical System - "DC DC converter")
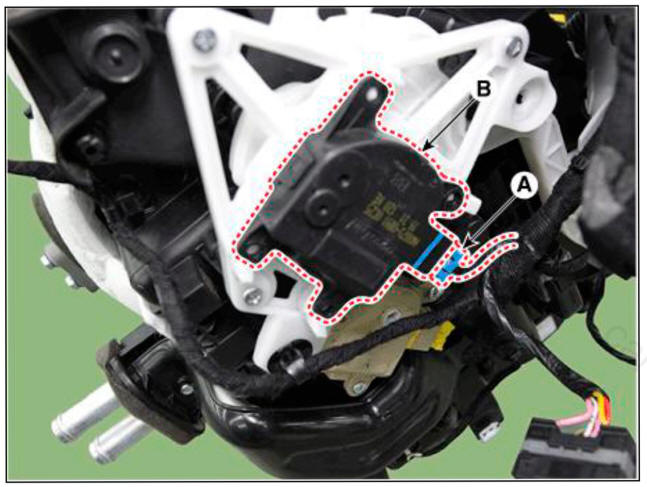
- Disconnect the mode control actuator connector (A) and loosen the mounting screw and remove the mode control actuator (B).
- Install in the reverse order of removal.
Description
The auto defogging sensor is installed on the front window glass. The sensor judges and sends signal if moisture occurs to blow out wind for defogging. The air conditioner control module receives a signal from the sensor and restrains moisture and eliminates defog by the intake actuator, A/C, auto defogging actuator, blower motor rpm and mode actuator.
READ NEXT:
 Auto defogging actuator
Components Location
Auto defogging actuator
Inspection
Turn the ignition switch OFF.
Disconnect the auto defogging connector.
Verify that the auto defogging actuator operates to the open position
when connecting 12V to
termina
Blower unit assembly
Components Location
Blower unit assembly
Components
Blower unit assembly
Intake actuator
Intake duct case LH
Intake seal
Intake door(l)
Intake door(2)
Intake duct case RH
Climate control actuator
PWM blower module
B
SEE MORE:
Vehicle load limit
Two labels on your driver's door sill show
how much weight your vehicle was
designed to carry: the Tire and Loading
Information Label and the Certification
Label.
Before loading your vehicle, familiarize
yourself with the following terms for
Power Relay (Type A)
Component Location
Engine room junction block
ICU Junction block
Inspection
Power Relay (Type A)
There should be continuity between the No.30 and No.87 terminals when
power and ground are
connected to the No.85 and No.86
Information
- Home
- Hyundai Tucson - Fourth generation (NX4) - (2020-2023) - Owner's Manual
- Hyundai Tucson - Fourth generation (NX4) - (2020-2023) - Workshop Manual
