Hyundai Tucson: Indicators And Gauges
Troubleshooting
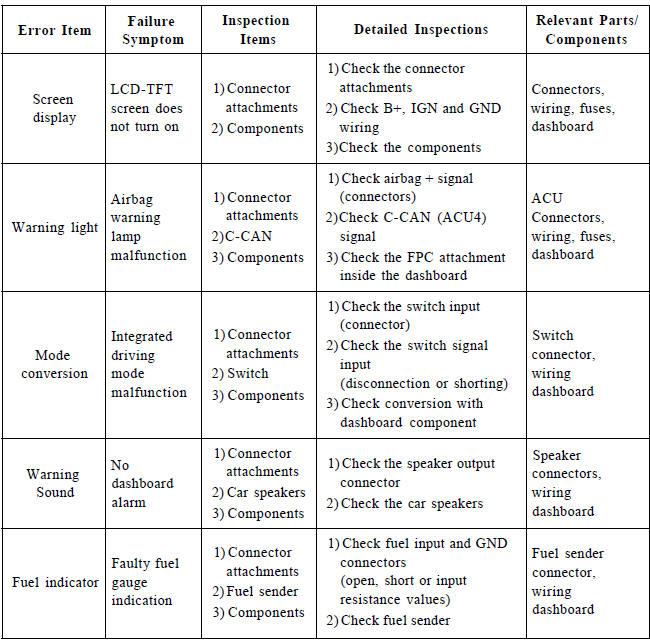
Description
Cluster Variant Coding
As we have more options (SCC, VDC, EPB, Cubis, MDPS, TPMS. LDWS, ECS -) in the car, the dashboard now has more information to display depending on the chosen options.
For this reason, we need to learn which options the vehicle has when replacing the dashboard.
To address this issue, a course of learning based on the option required for the vehicle when replacing the dashboard should be carried out.
This is called Variant Coding.
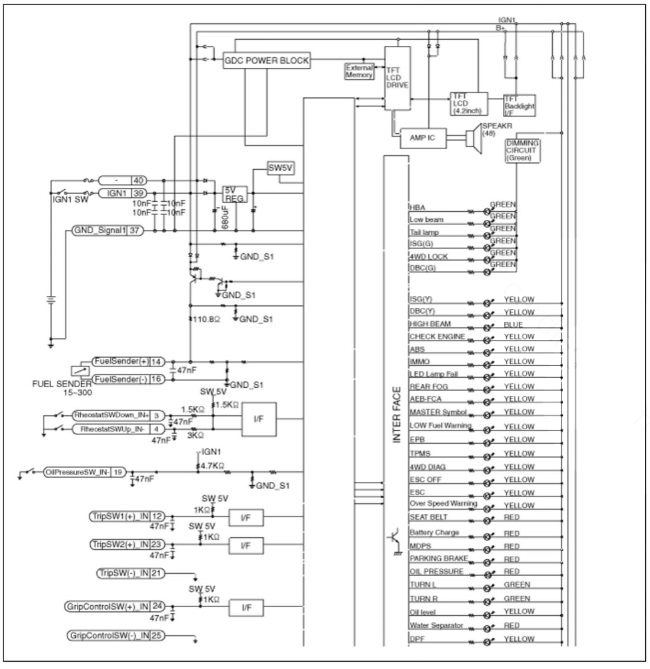
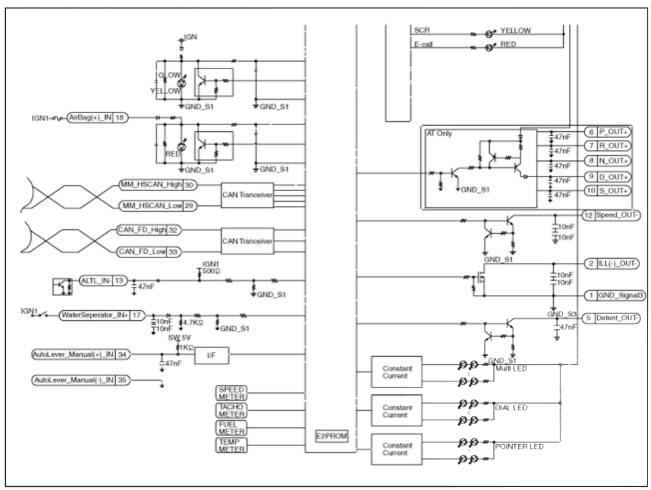
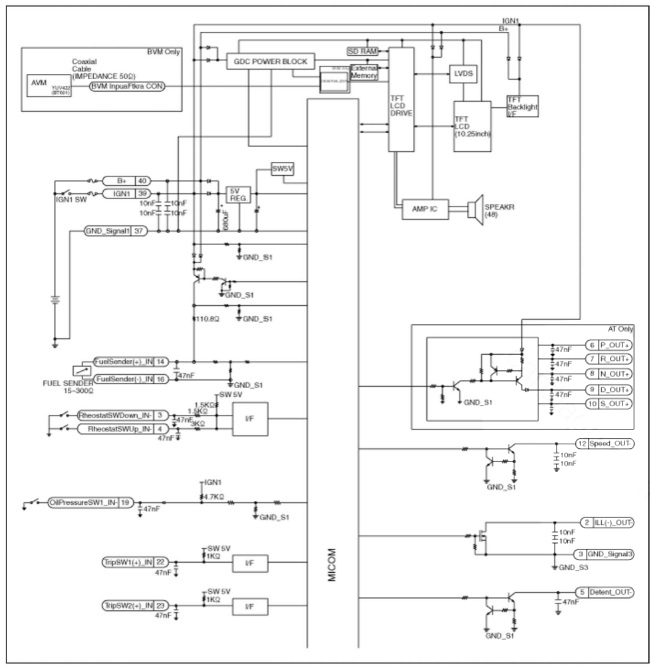
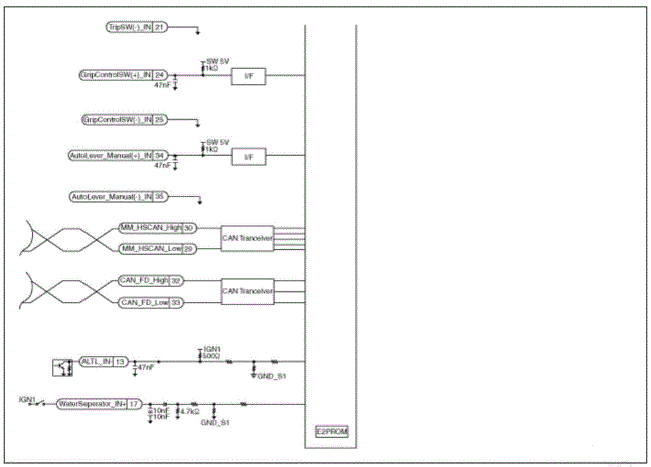
Circuit Diagram
General
Super Vision
Removal
- Disconnect the negative (-) battery terminal.
- Remove the cluster fascia panel.
(Refer to Body - "Cluster Fascia Panel")
- Remove the cluster (A) after loosening mounting screws.
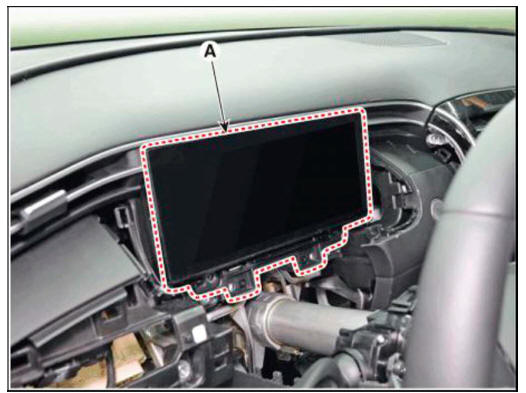
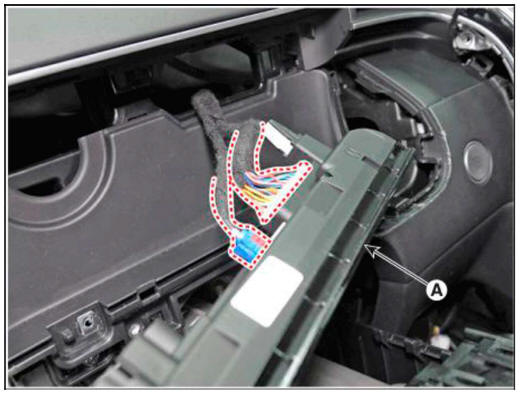
- Disconnect cluster connecters and then remove the cluster (A).
Installation
- Install the cluster assembly.
- Install the cluster facia panel.
- Connect the negative (-) battery terminal.
- Perform variant coding after exchanging the instrument cluster.
Inspection
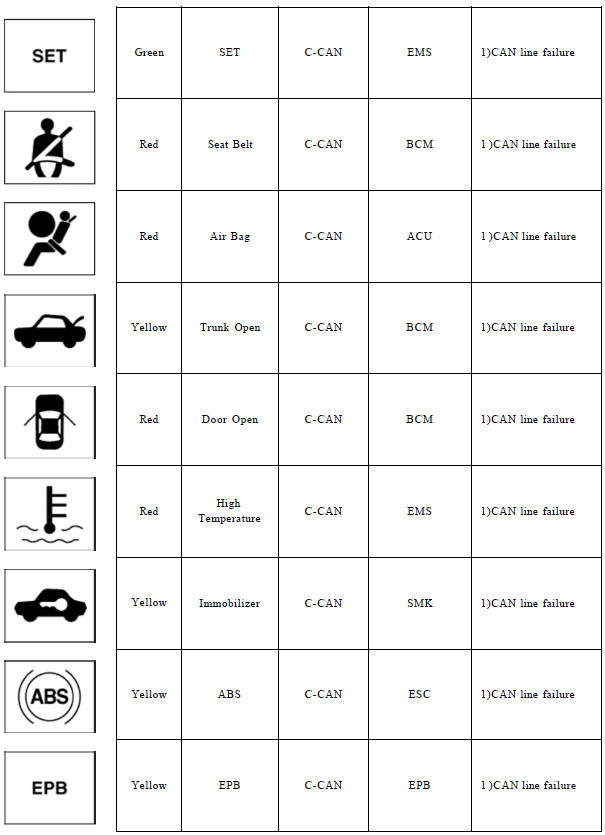
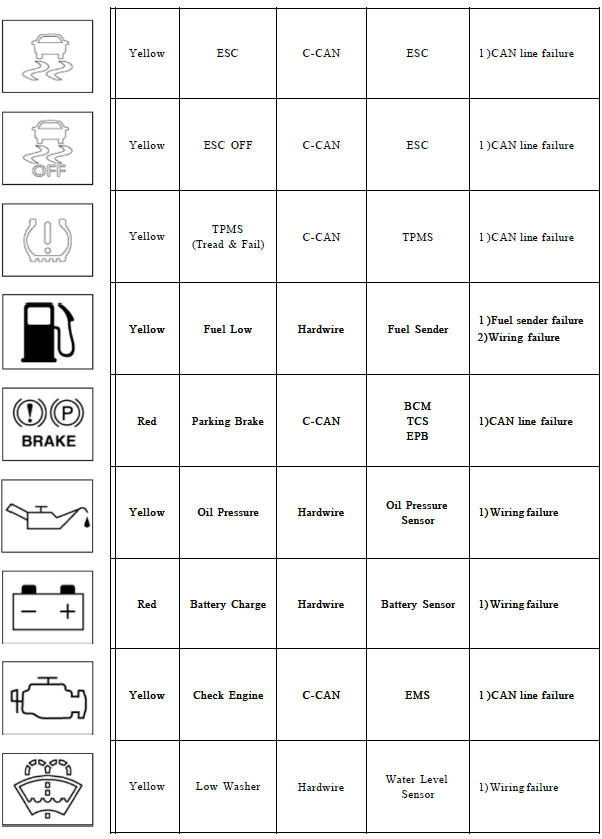
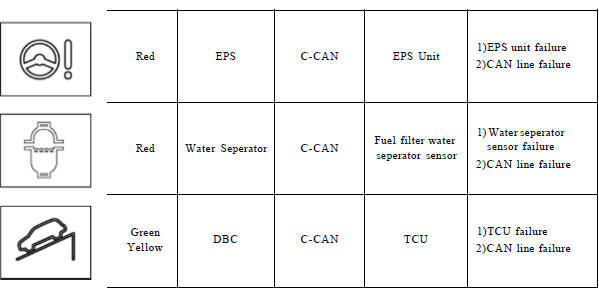
- Check point (Warning indicator)
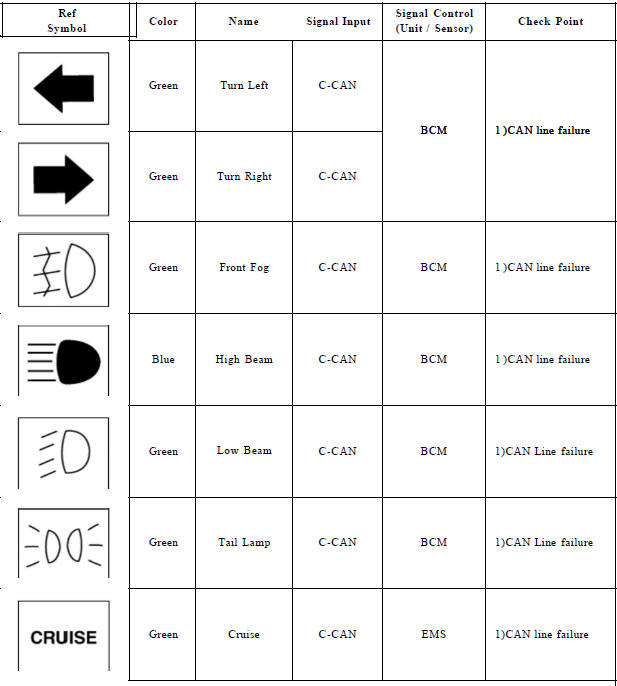

2. Check point (Gauge) 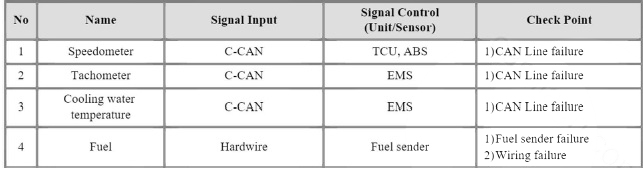
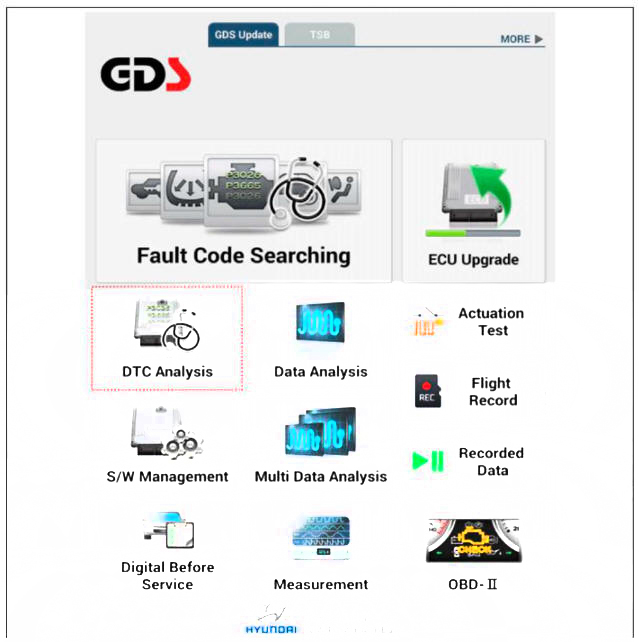
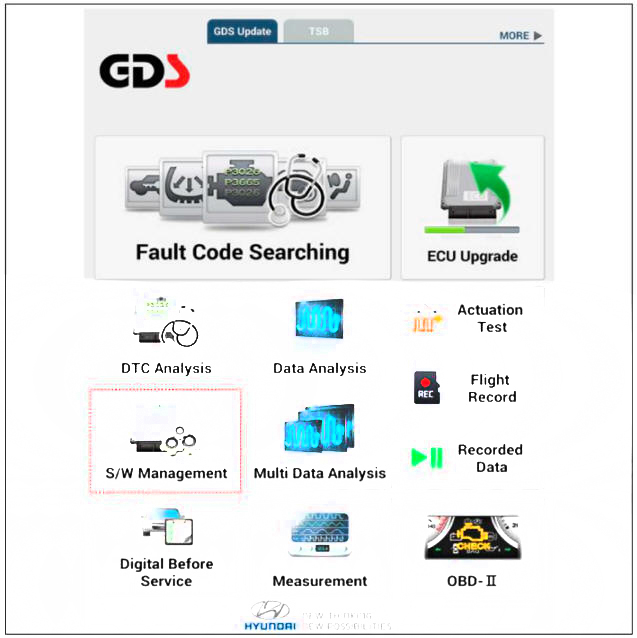
Diagnosis with Diagnostic Tool
- In the body electrical system, failure can be quickly diagnosed by using
the vehicle diagnostic system.
The diagnostic system provides the following information.
(1) Fault Code Searching : Checking failure and code number (DTC)
(2) Data Analysis : Checking the system input/output data state
(3) Actuation test: Checking the system operation condition
(4) S/W Management: Controlling other features including system option setting and zero point adjustment
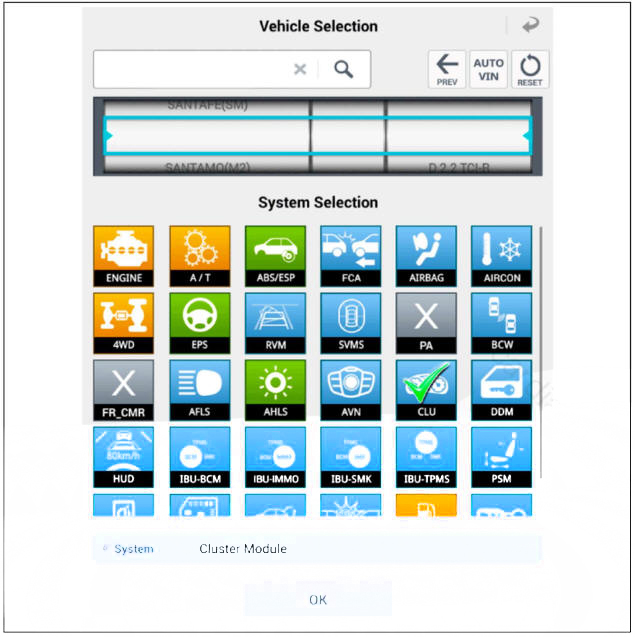
- If diagnose the vehicle by diagnostic tool, select "DTC Analysis" and "Vehicle".
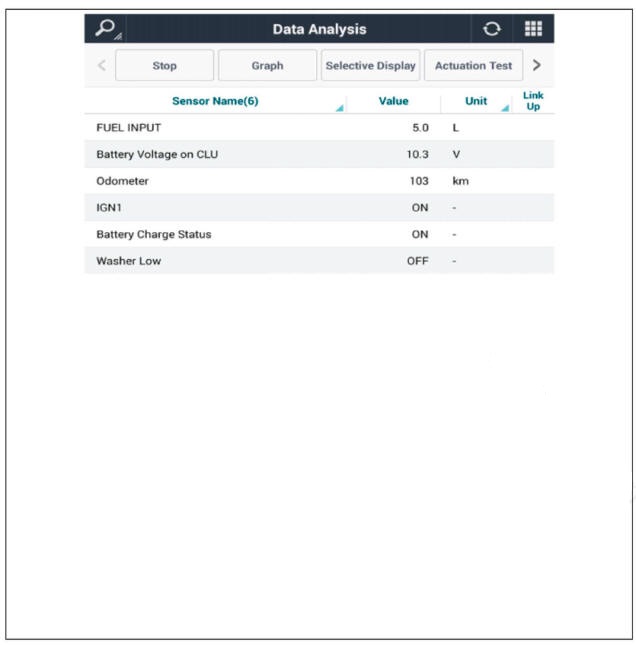
- If check current status, select the "Data Analysis" and "Car model".
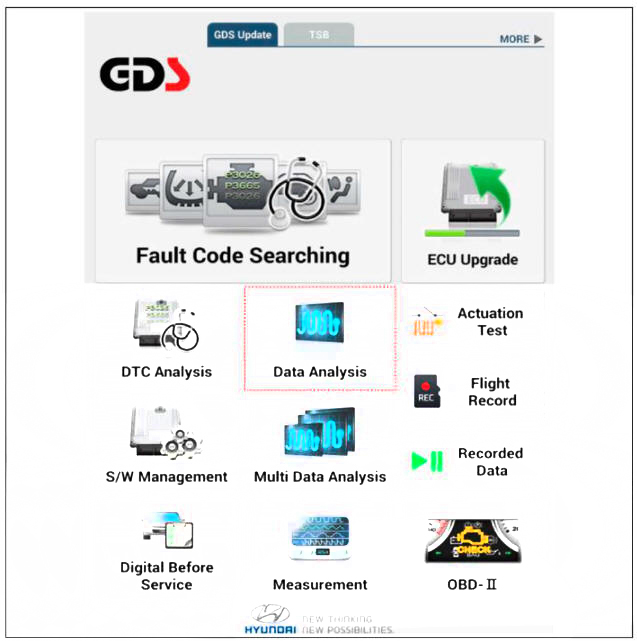
- Select the 'CLU' to search the current state of the input/output data.
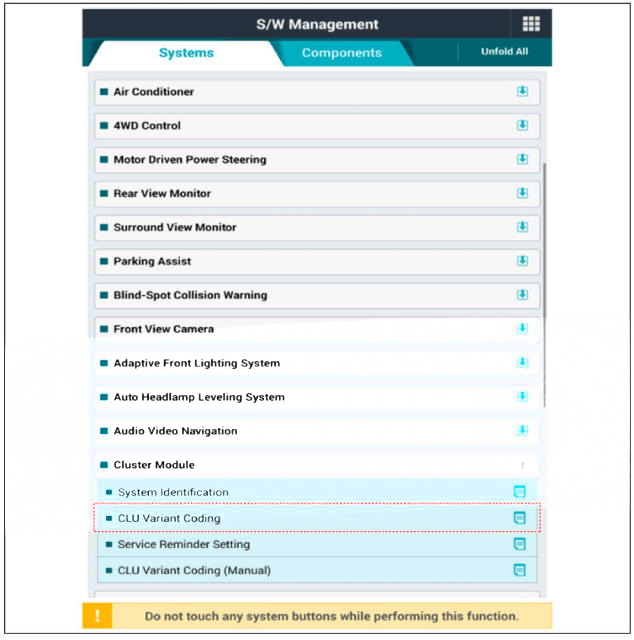
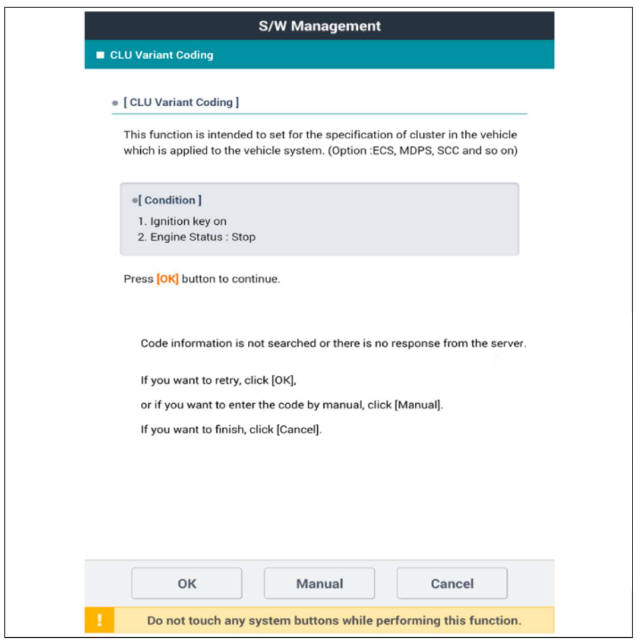
CLU Variant Coding
As we have more options (ESC, TPMS. SCC, etc.) in the car, the dashboard now have more information to display depending on the chosen options.
For this reason, we need to learn which options the current vehicle when we replace the dashboard.
To address this issue, a course of learning based on the option required for the vehicle when replacing the dashboard should be carried out.
This is called Variant Coding.
- Connect the cable of diagnostic tool to the data link connector in driver side crash pad lower panel.
- Select the 'S/W Management' and 'Car model'.
- Select the 'Cluster Module' and 'CLU Variant Coding'.
READ NEXT:
 Power Door Locks
Front Door Lock Module Inspection
Inspection
Remove the front door trim.
(Refer to Body - "Front Door Trim")
Disconnect the connectors from the actuator.
Check actuator operation by connecting power and ground according to the
Function Of Safety Power Window
Operation
When driver door power window auto-up switch is operated, safety function is
activated.
Safety function condition
When detect the force of 100N (using the lON/mm spring) during the window
rising, window is
reversed.
Length
SEE MORE:
Air ventilation seat
The air ventilation seats are provided
to cool the front seats by blowing air
through small vent holes on the surface
of the seat cushions and seatbacks.
When the operation of the air ventilation
seat is not needed, keep the switches in
t
Run out inspection
Jack up the vehicle.
Measure the wheel Run-out by using a dial indicator as illustration
below.
If measured value exceeds the standard value, replace the wheel.
Adjustment
When using a commercially available computerizedwhee
Information
- Home
- Hyundai Tucson - Fourth generation (NX4) - (2020-2023) - Owner's Manual
- Hyundai Tucson - Fourth generation (NX4) - (2020-2023) - Workshop Manual
